All Recipes
 Beverages
 Breakfast
 Appetizers
 Dinner
 Sides
Sides
 Dessert
 Videos
Learn the art of crafting a flawlessly flaky Pie Crust from scratch, using shortening. This extensive guide offers expert tips, step-by-step visuals, and a detailed recipe to ensure your baking success.
Whether you’re crafting a Graham Cracker Crust for a sweet pie or a Buttermilk Pie Crust for a savory delight, the quality of your pie crust can frequently determine the success or failure of your pie.
What I Love About This Recipe
- Very Forgiving: An all-butter pie crust boasts a delectably rich flavor, but butter’s quick softening can pose challenges when working with it as a fat. On the other hand, shortening’s consistency makes it more manageable, although it lacks the depth of flavor. This is why I opt for a blend of both butter and shortening.
- Results in a Flaky Pie Crust: Shortening contributes to a pie crust’s exceptionally flaky texture, making each bite a delightful experience.
- Makes Two Deep Dish Pie Crust: This recipe results in two deep-dish pie crusts, offering ample space for generous fillings and versatility in your pie creations.
How to Make Pie Crust with Shortening and Butter
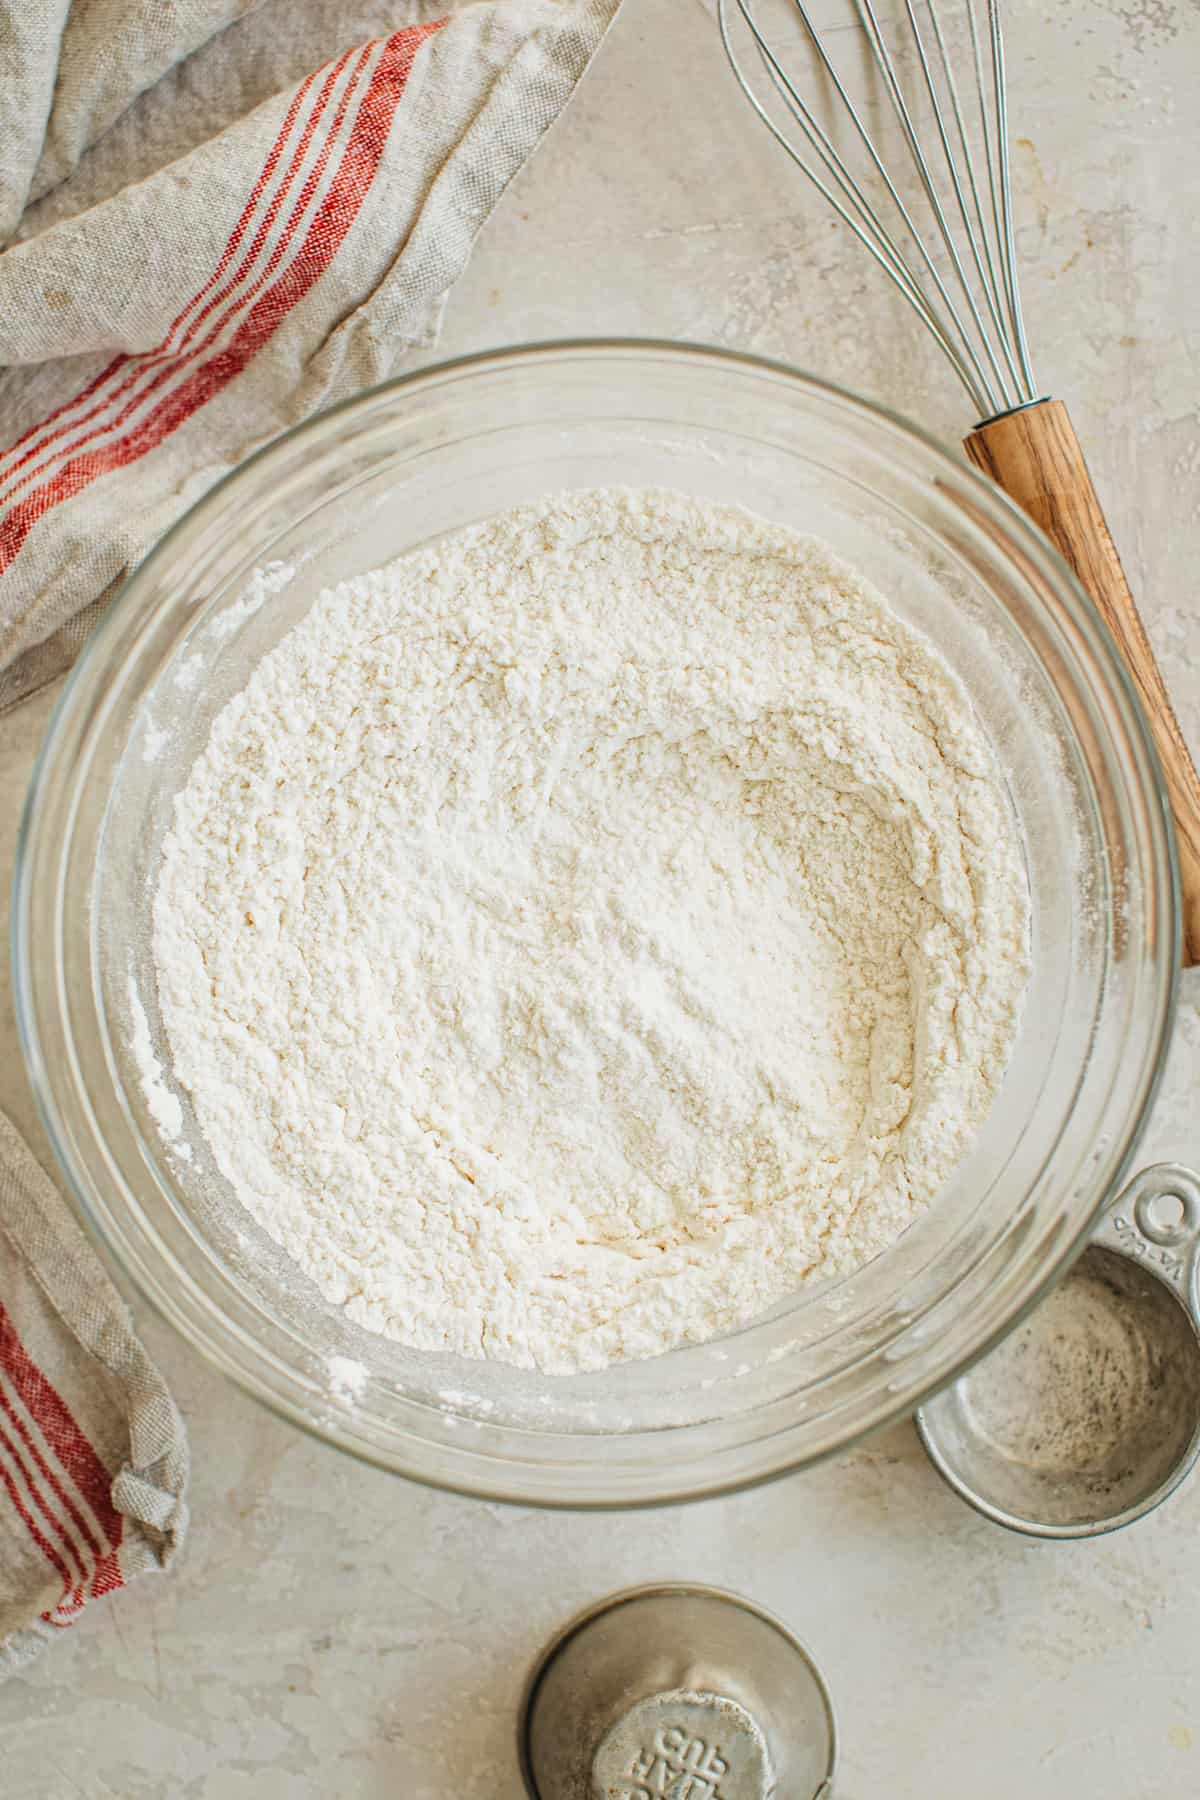
- Mix the flour and salt. In a large bowl, whisk the flour and salt together.
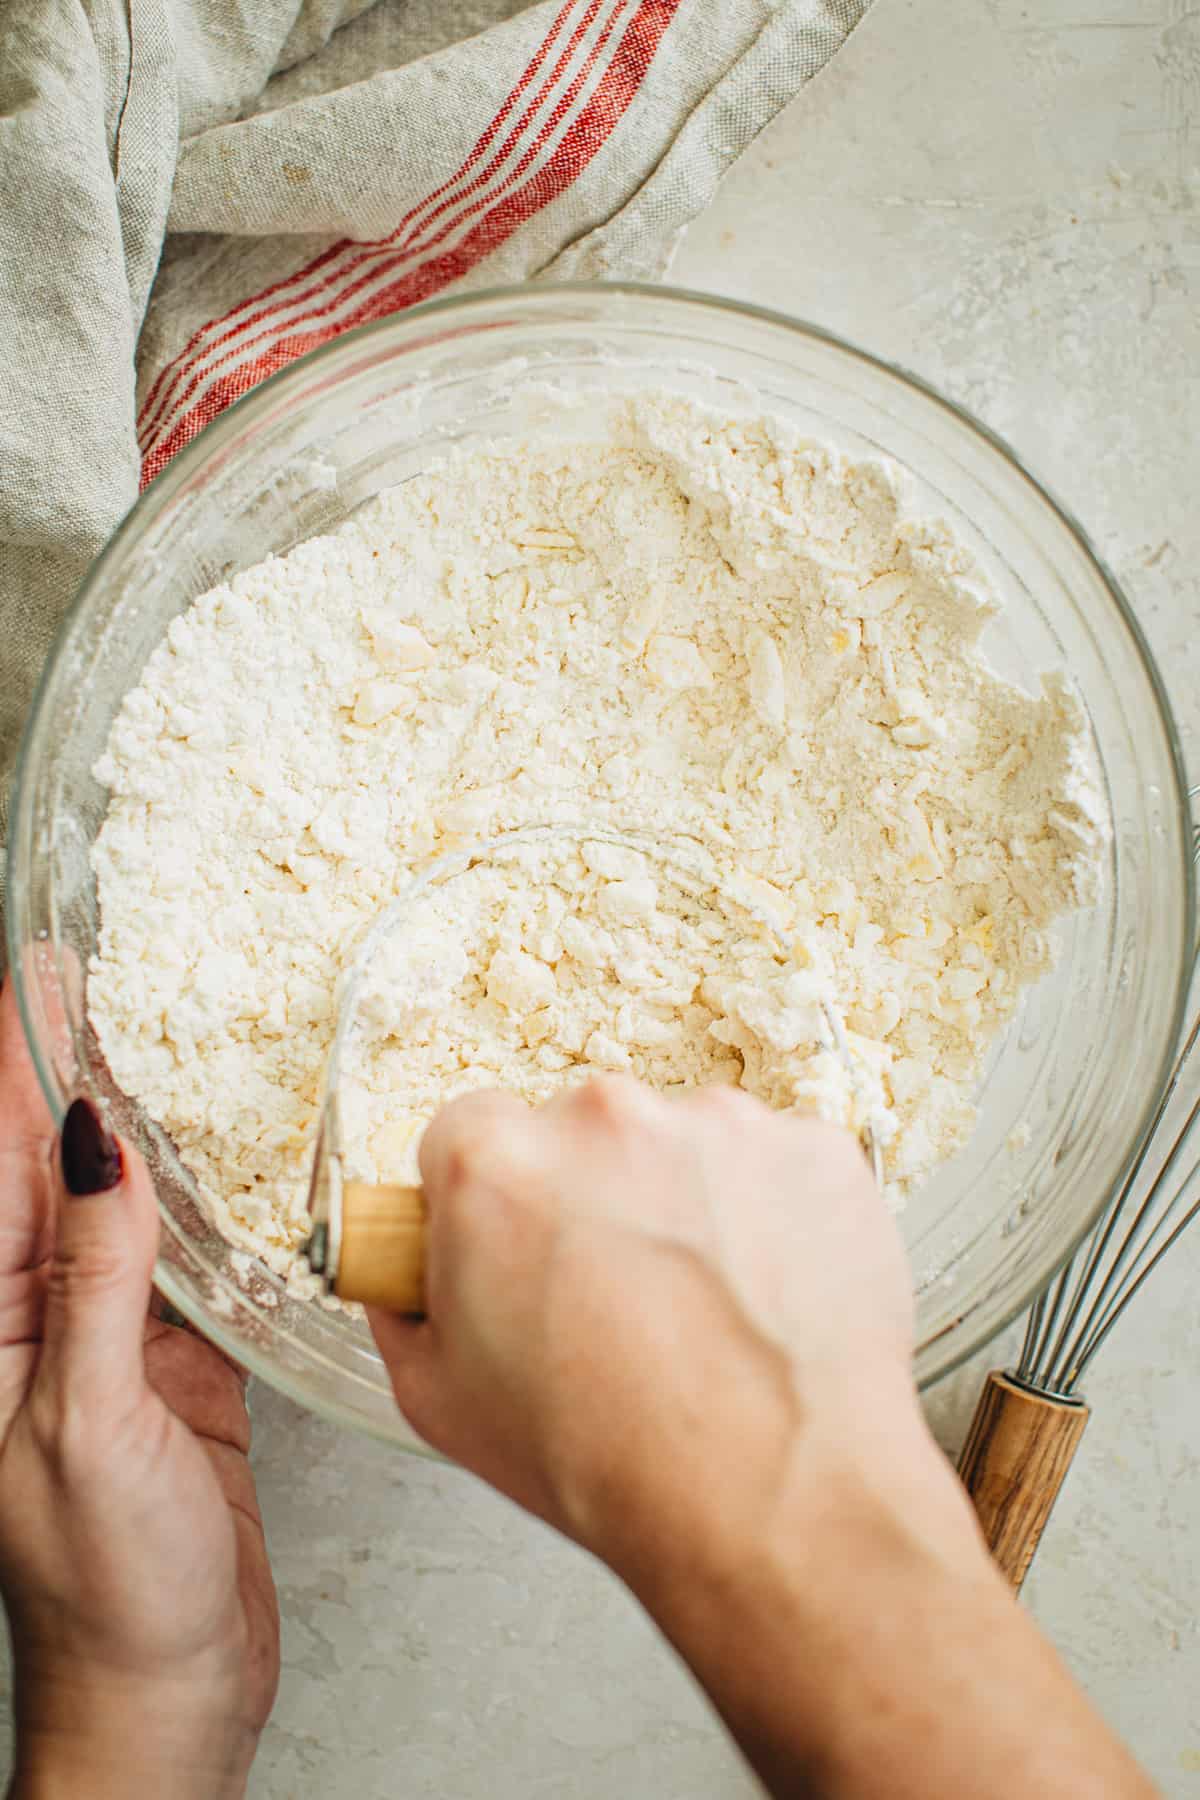
- Cut the fat into the flour. Using a pastry cutter cut the butter and shortening into the flour mixture.
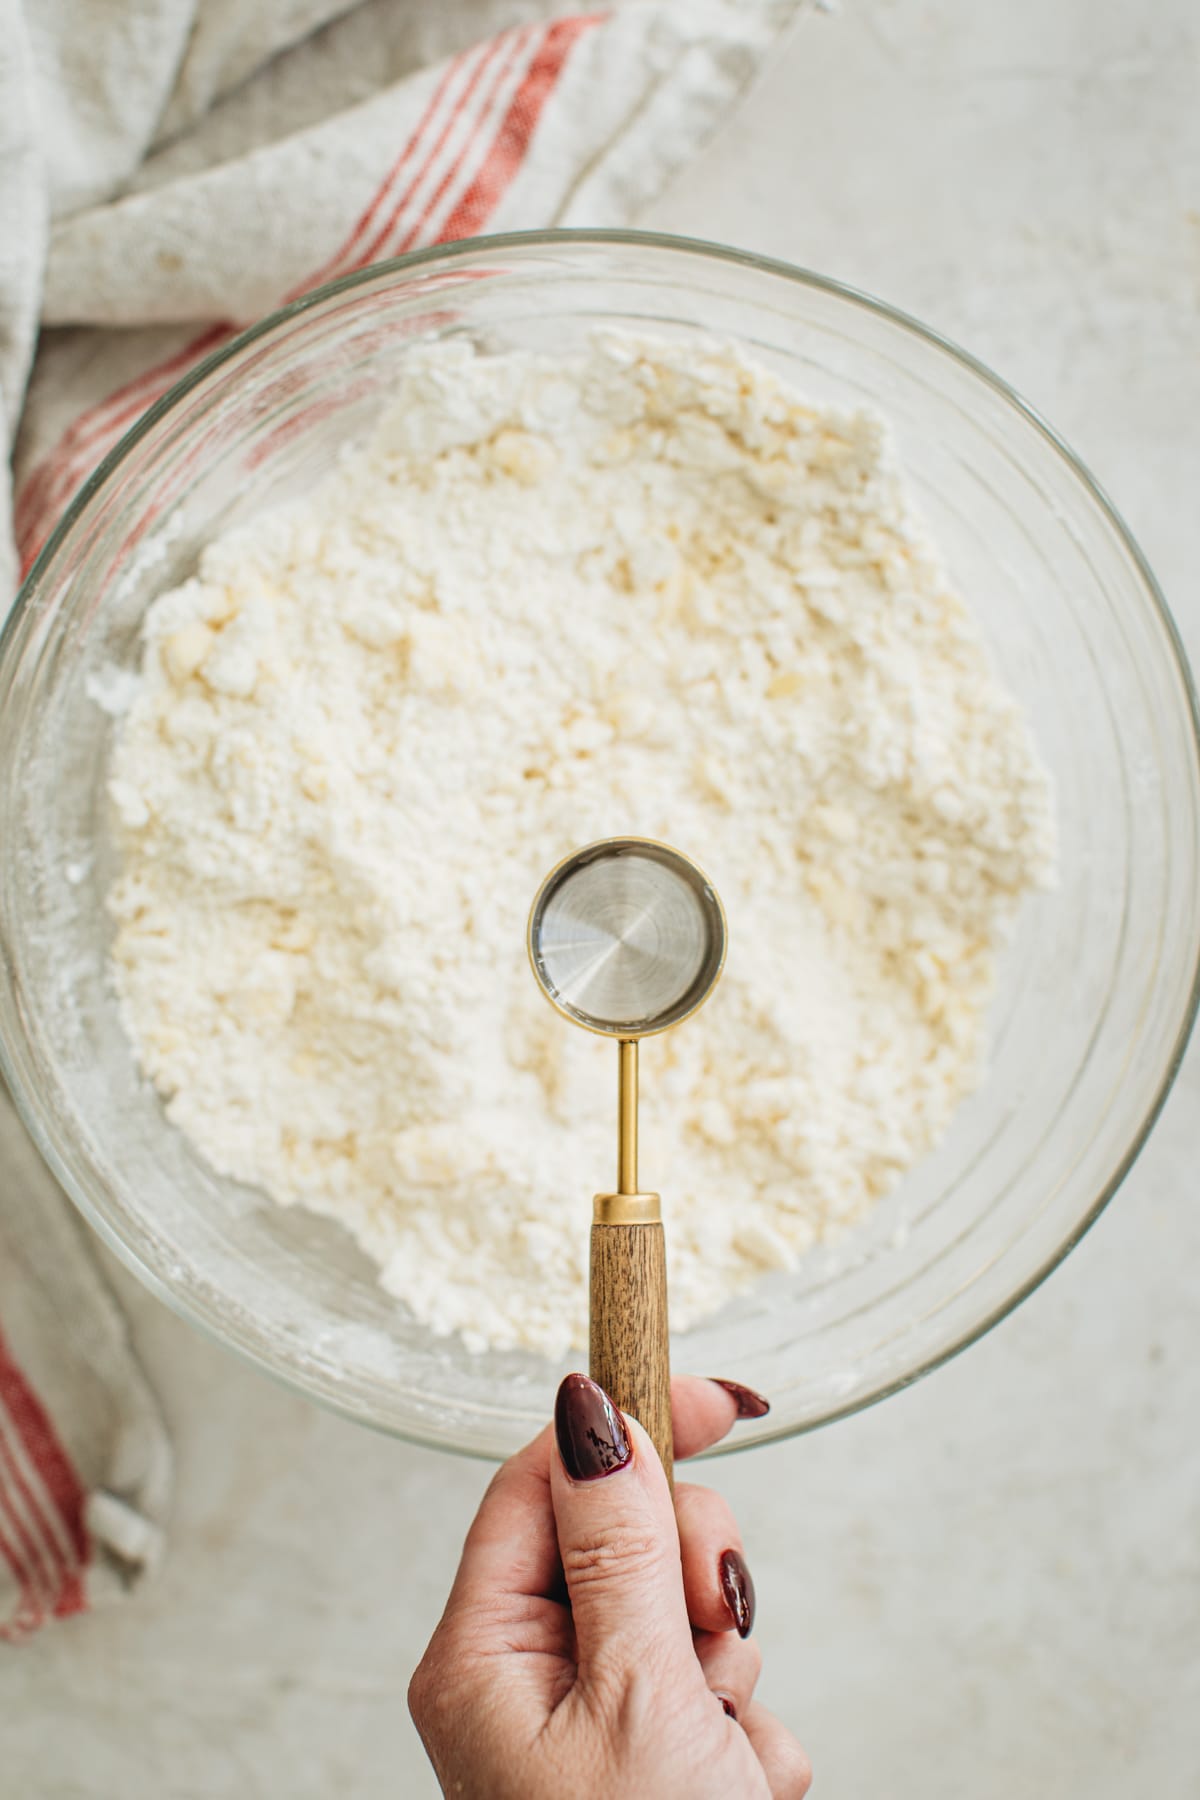
- Add the water. Measure out a 1/2 cup of water and add some ice. Stir the water briefly to melt some of the ice. Using a tablespoon measure out 1 tablespoon of water and add it to the pie dough 1 Tablespoon at a time. Stir with a rubber spatula or wooden spoon after every Tablespoon has been added.
- Stop when the dough starts forming large clumps. I typically use around 1/2 cup of water, so be mindful not to add more than necessary. You don’t want the dough to be sticky.

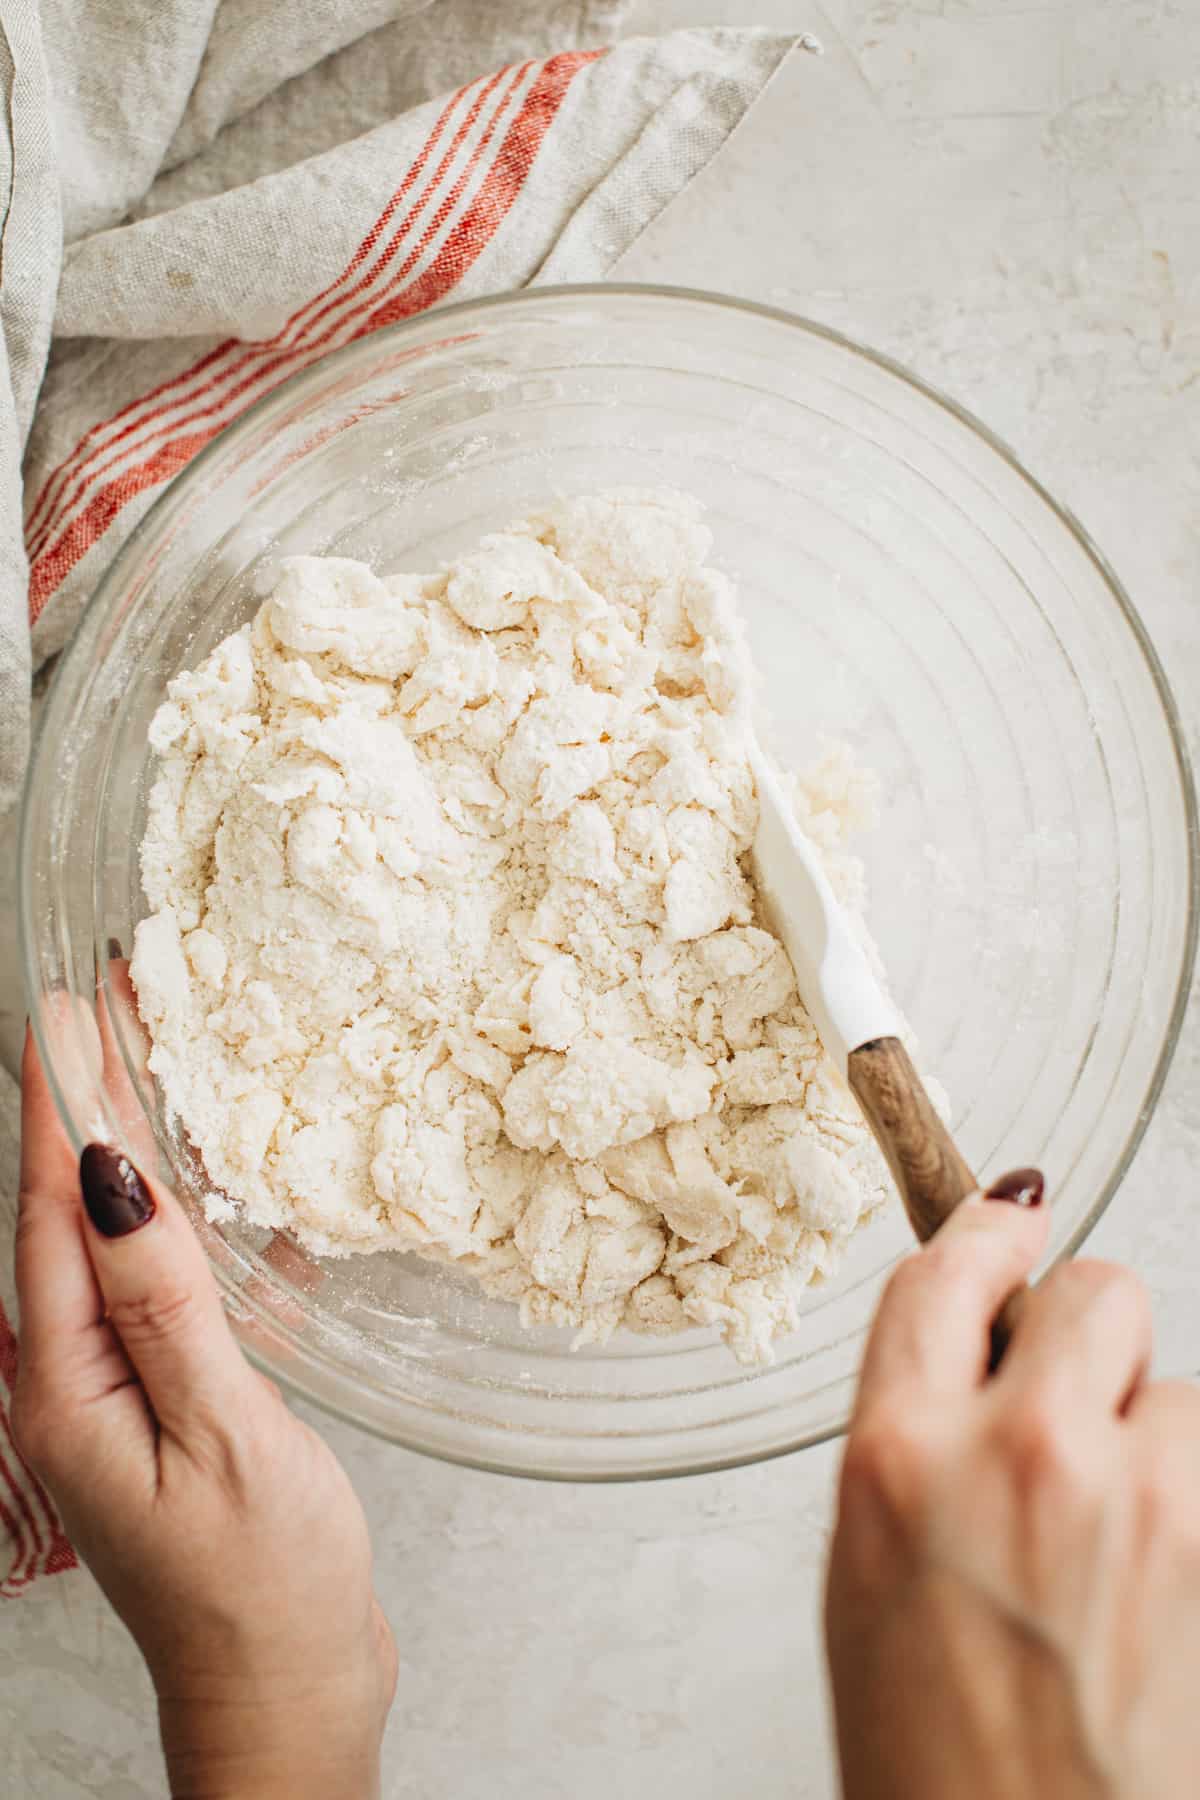
- Form the dough. Place the pie dough onto a floured surface. With floured hands, gently fold the dough into itself until the flour blends thoroughly with the fats. The dough should come together without being too sticky. Be careful not to overwork it. If the dough seems slightly dry or crumbly, dampen your fingers with ice water and continue to combine it. If it feels too sticky, sprinkle on more flour and proceed to shape it into a ball.
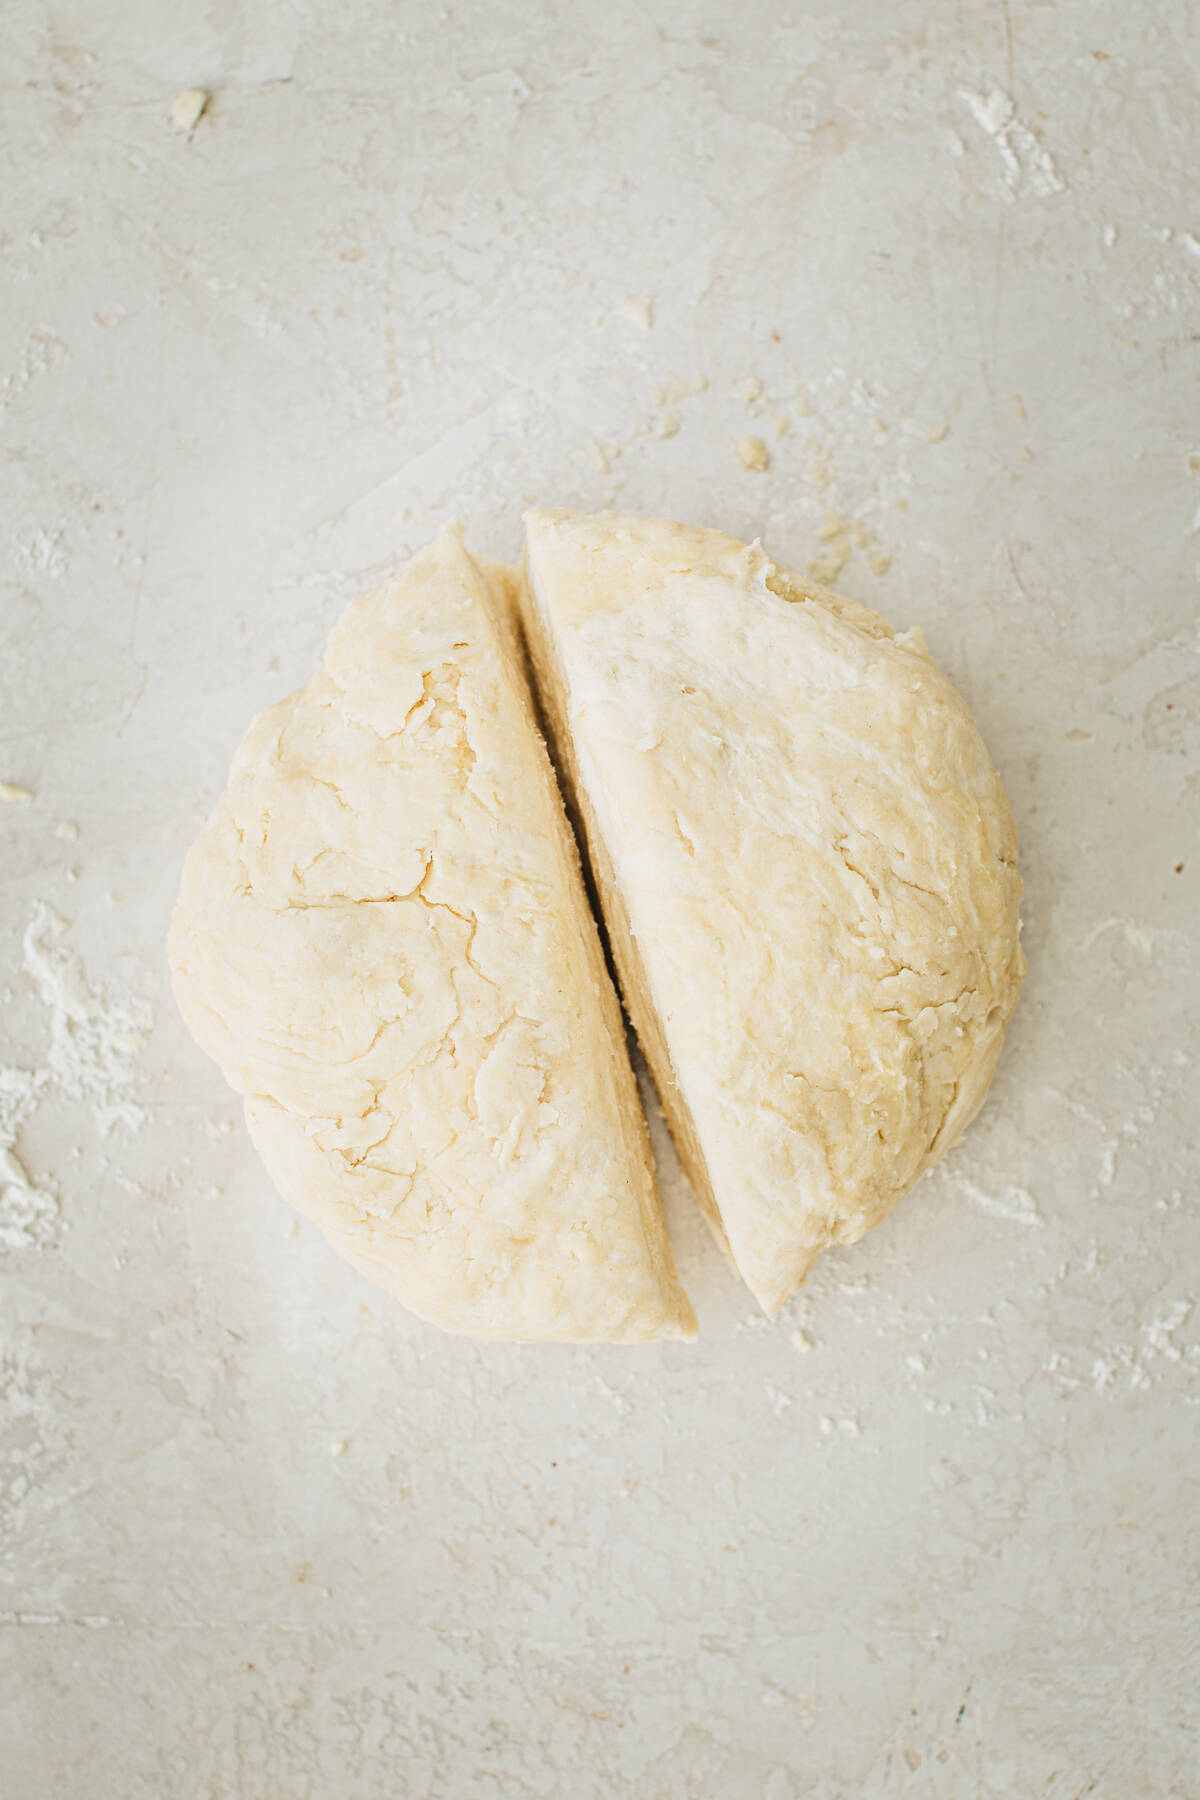
- Split the dough. Cut it in half with a sharp knife, and using your hands, gently flatten each half into 1-inch-thick discs.
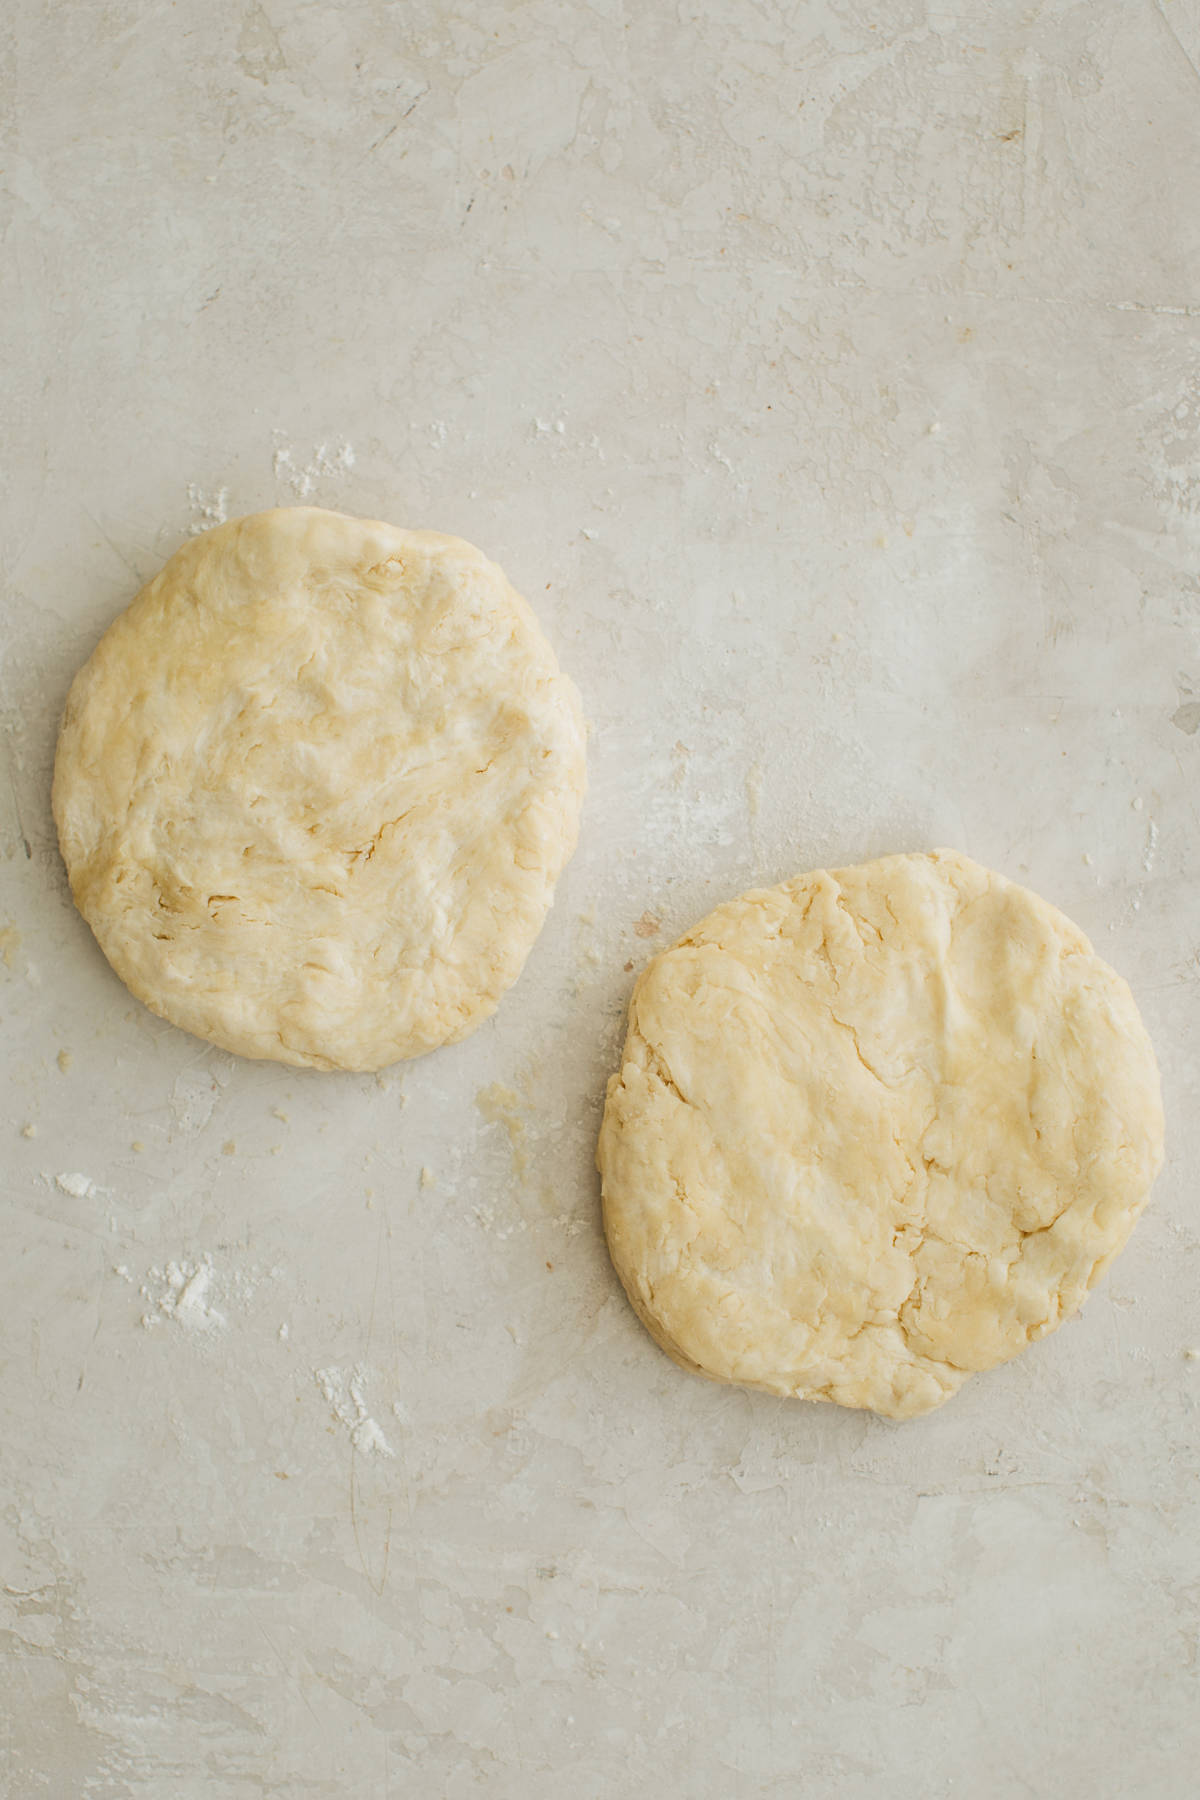
- Wrap the dough and chill. Individually wrap each one tightly with plastic wrap, then refrigerate for a minimum of 2 hours, and you can keep them in the fridge for up to 5 days.
Troubleshooting Pie Crust
- Dough is crumbly: Lightly sprinkle no more than a tablespoon of cold water over the dough, then carefully incorporate it into the dough using your fingertips. If the dough starts to warm up excessively, set it in the fridge to chill.
- Pie dough is dry and cracking at the edges: If you encounter cracking along the edges of your pie crust while rolling it out, lightly wet your fingertips with ice-cold water to fuse the edges together. Let the dough to rest for a minute, then continue with your rolling.
- The dough is falling apart while rolling it: This is due to too much fat and not enough water. Fix the dough with extra water and flour. Sprinkle a small amount of ice-cold water and flour onto the cracked and crumbled sections, gently blending them in using your fingers. After a minute of rest, try rolling it out again.
How to Roll Out Pie Crust
Once the dough has been chilled for a minimum of 2 hours, you can begin to roll it out.
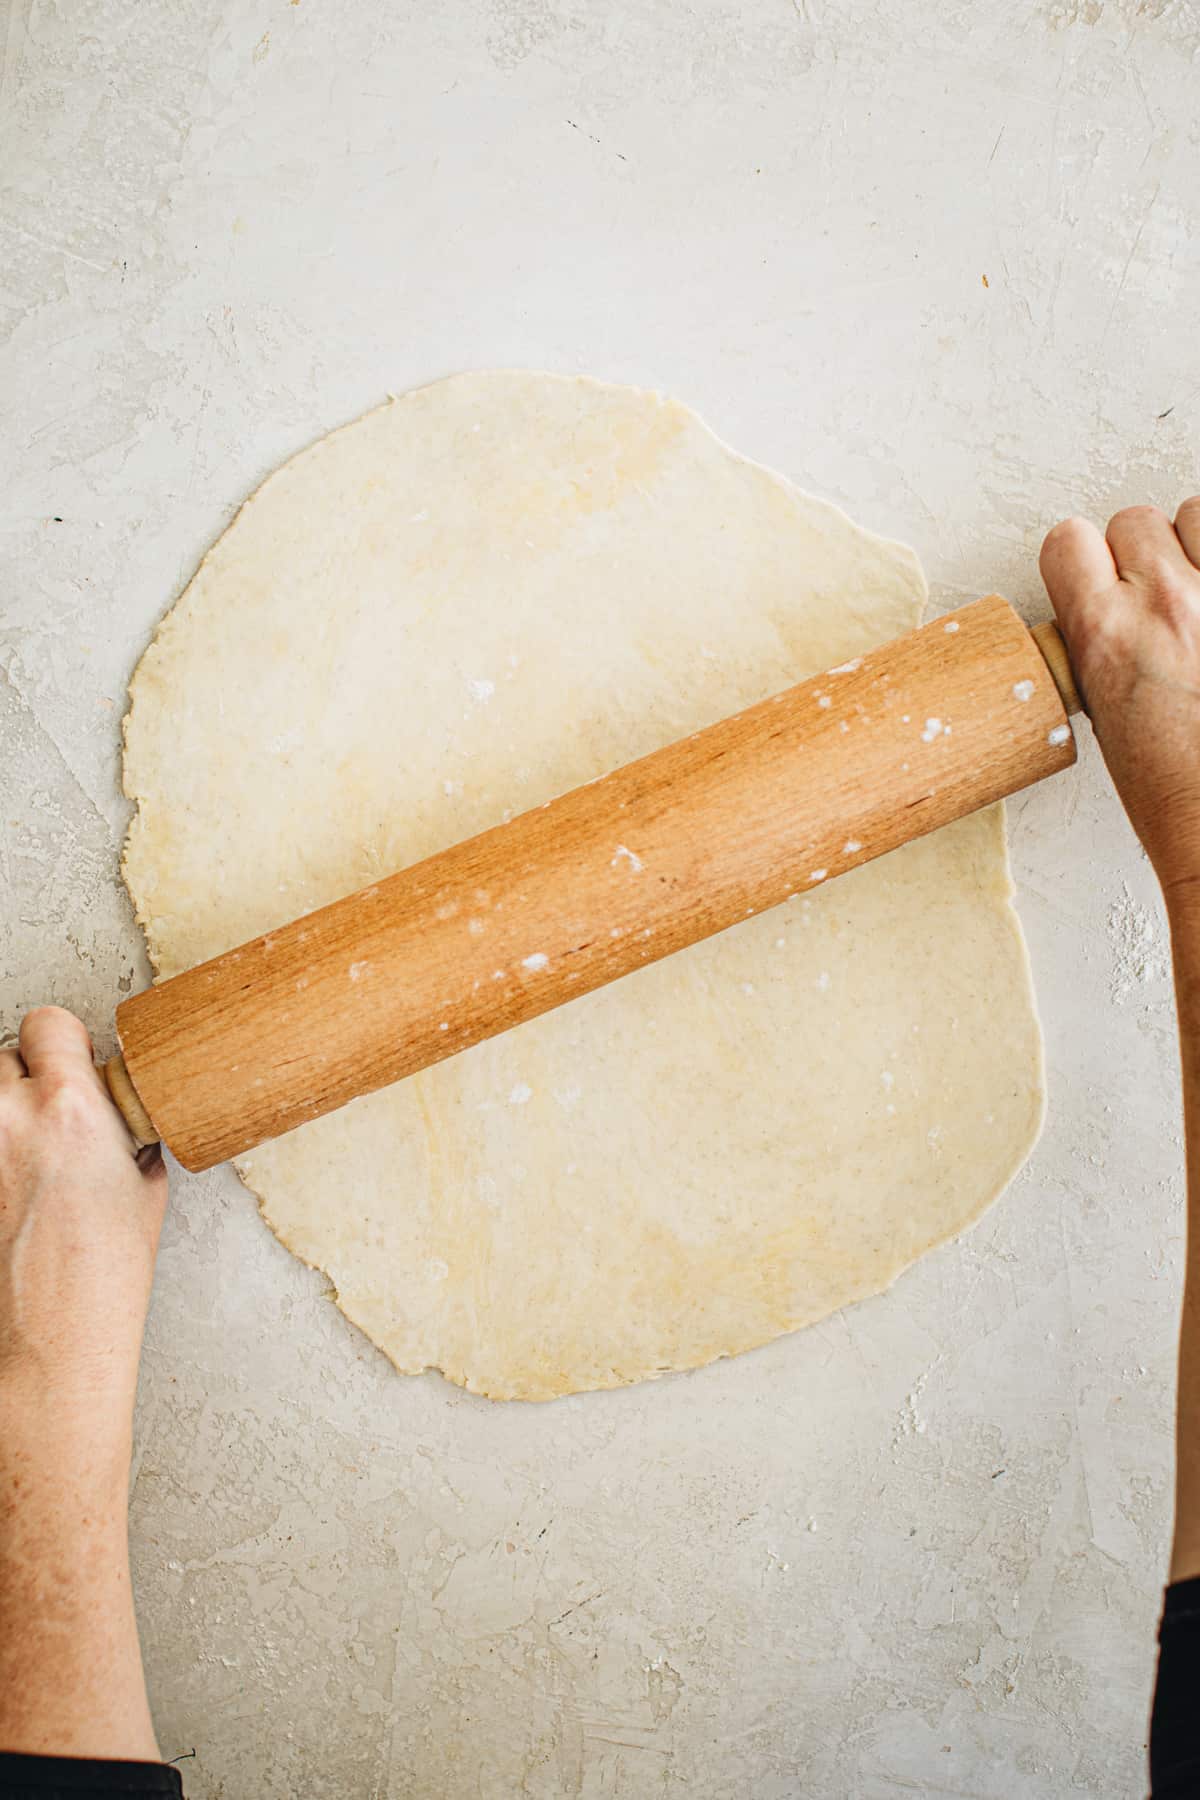

- Roll the dough using a rolling pin. Dust the work surface, rolling pin, and your hands with a light coating of flour, and add a small amount of flour atop the dough. Apply moderate but gentle pressure when using the rolling pin on the dough. When rolling dough, start from the center, working outward and turning as you go. Rotate and flip the crust between rolling to avoid sticking.
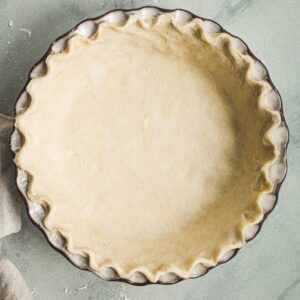
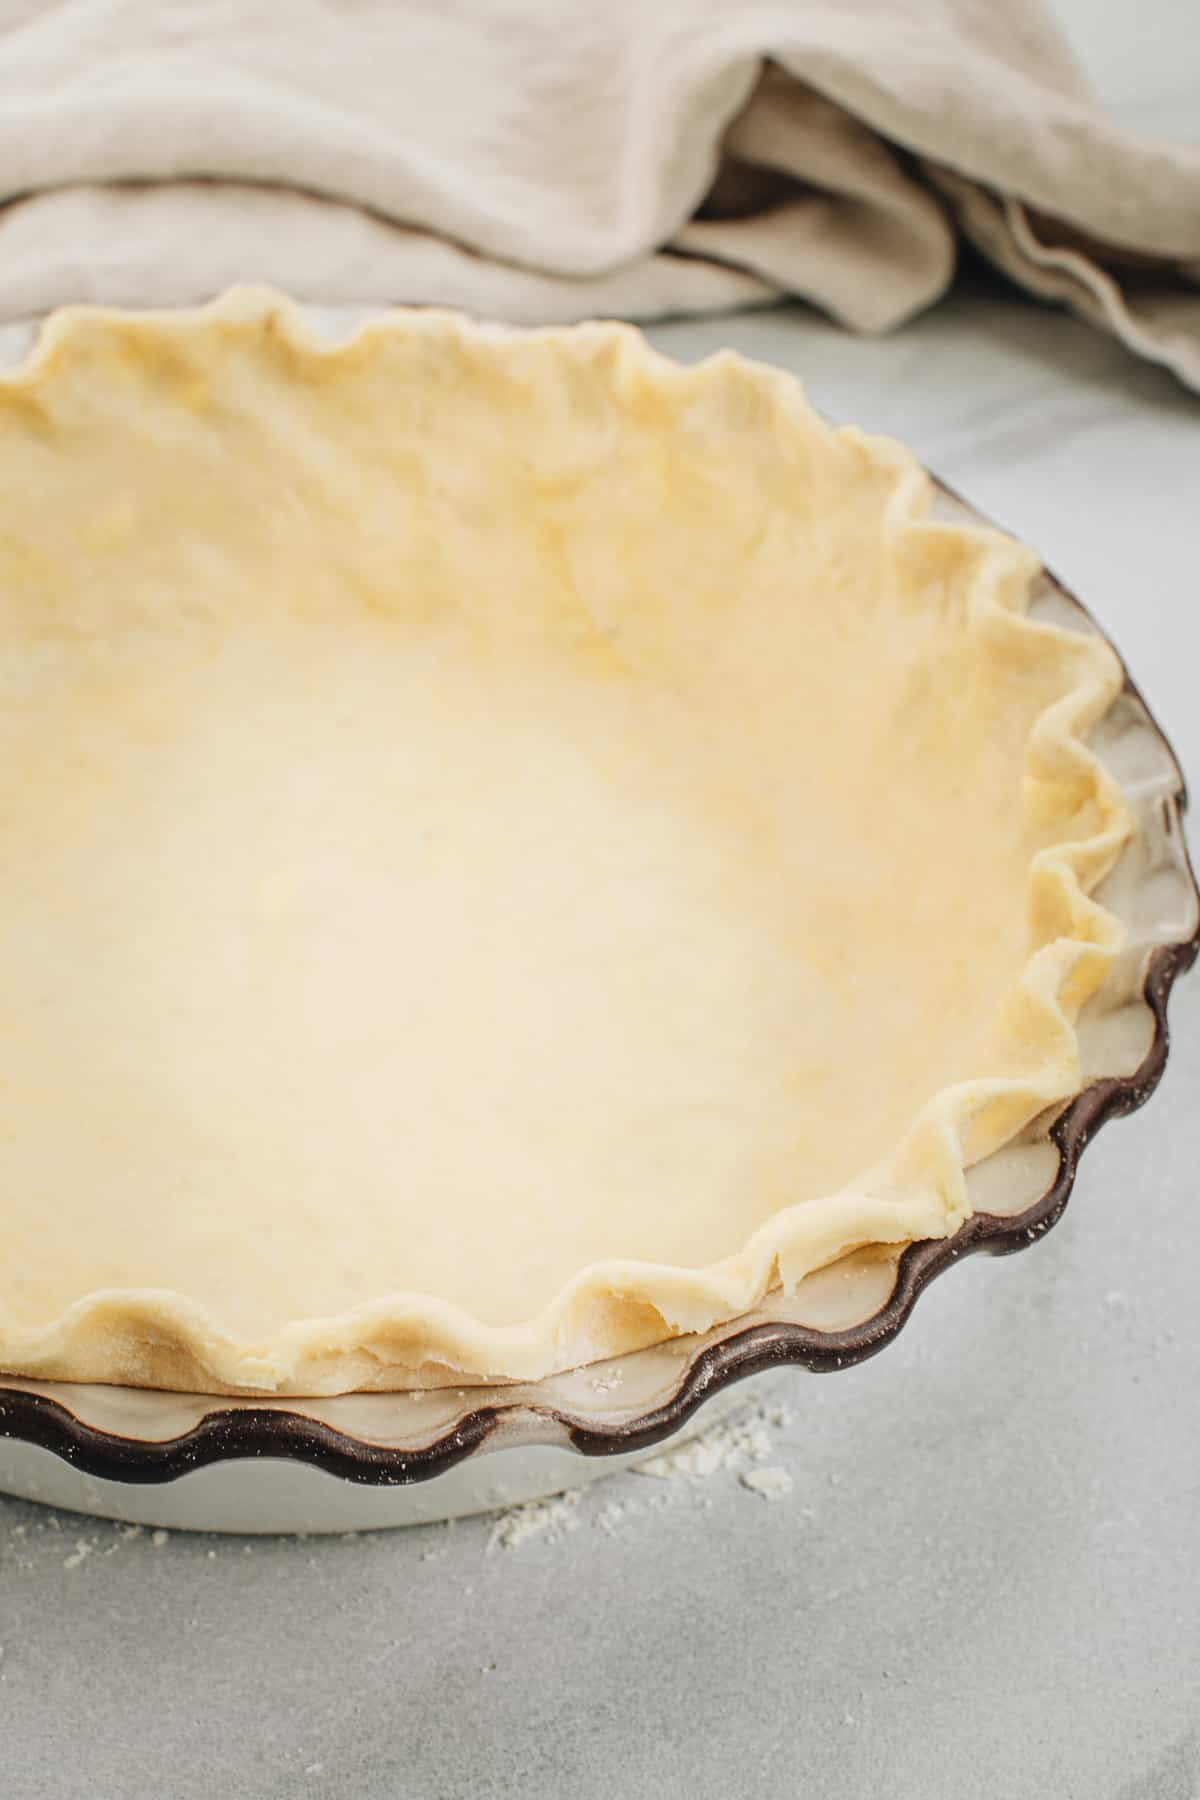
- Even out the dough. If the circle is uneven, stop using the rolling pin and use your hands to shape the edges into an even circle. Roll the dough to a 12-inch-sized circle that will fit a 9-inch pie dish (as well as a deep dish pie dish).
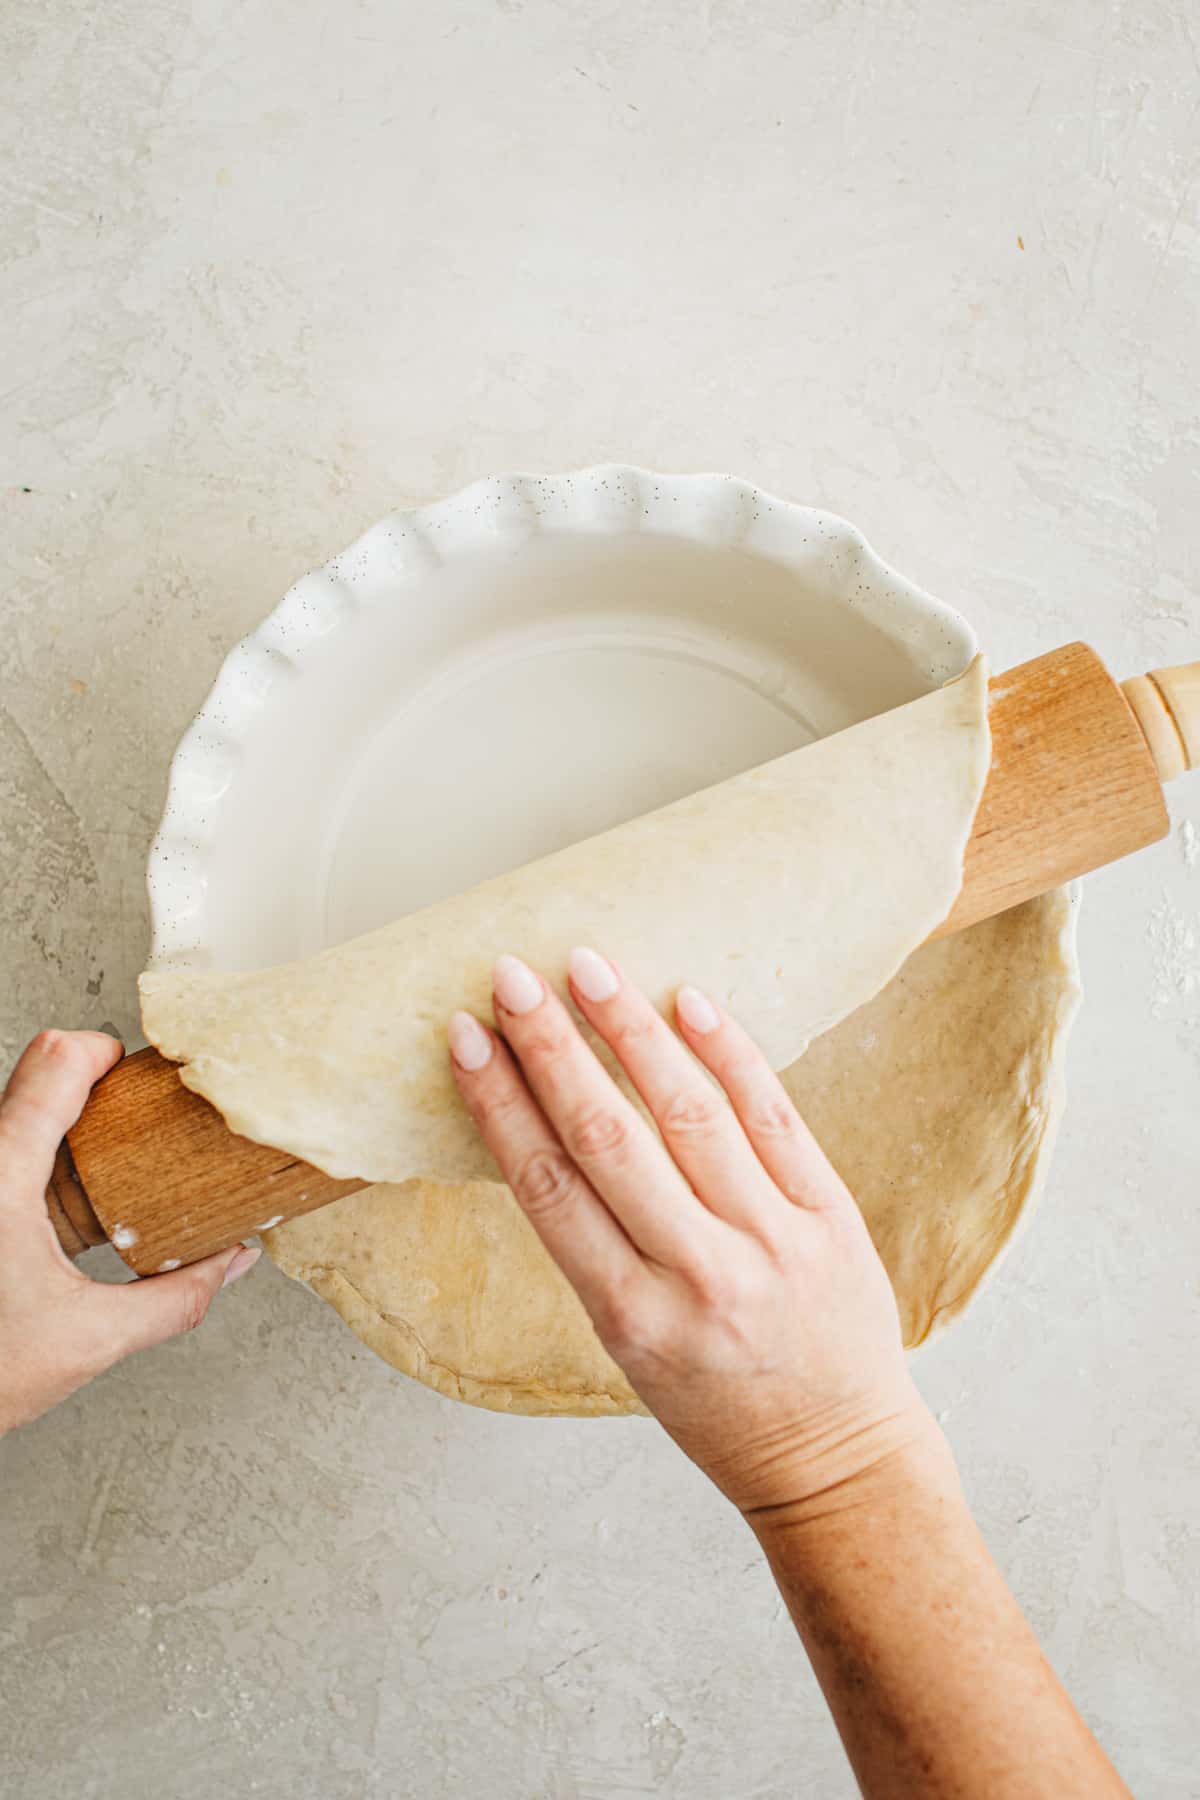
- Transfer the dough to the pie dish. Position the rolling pin in the middle of the rolled-out dough, then gently fold the dough over the pin. Lift the dough using the rolling pin and place it in the center of the pie dish. Unfold the dough and gently press it into place.
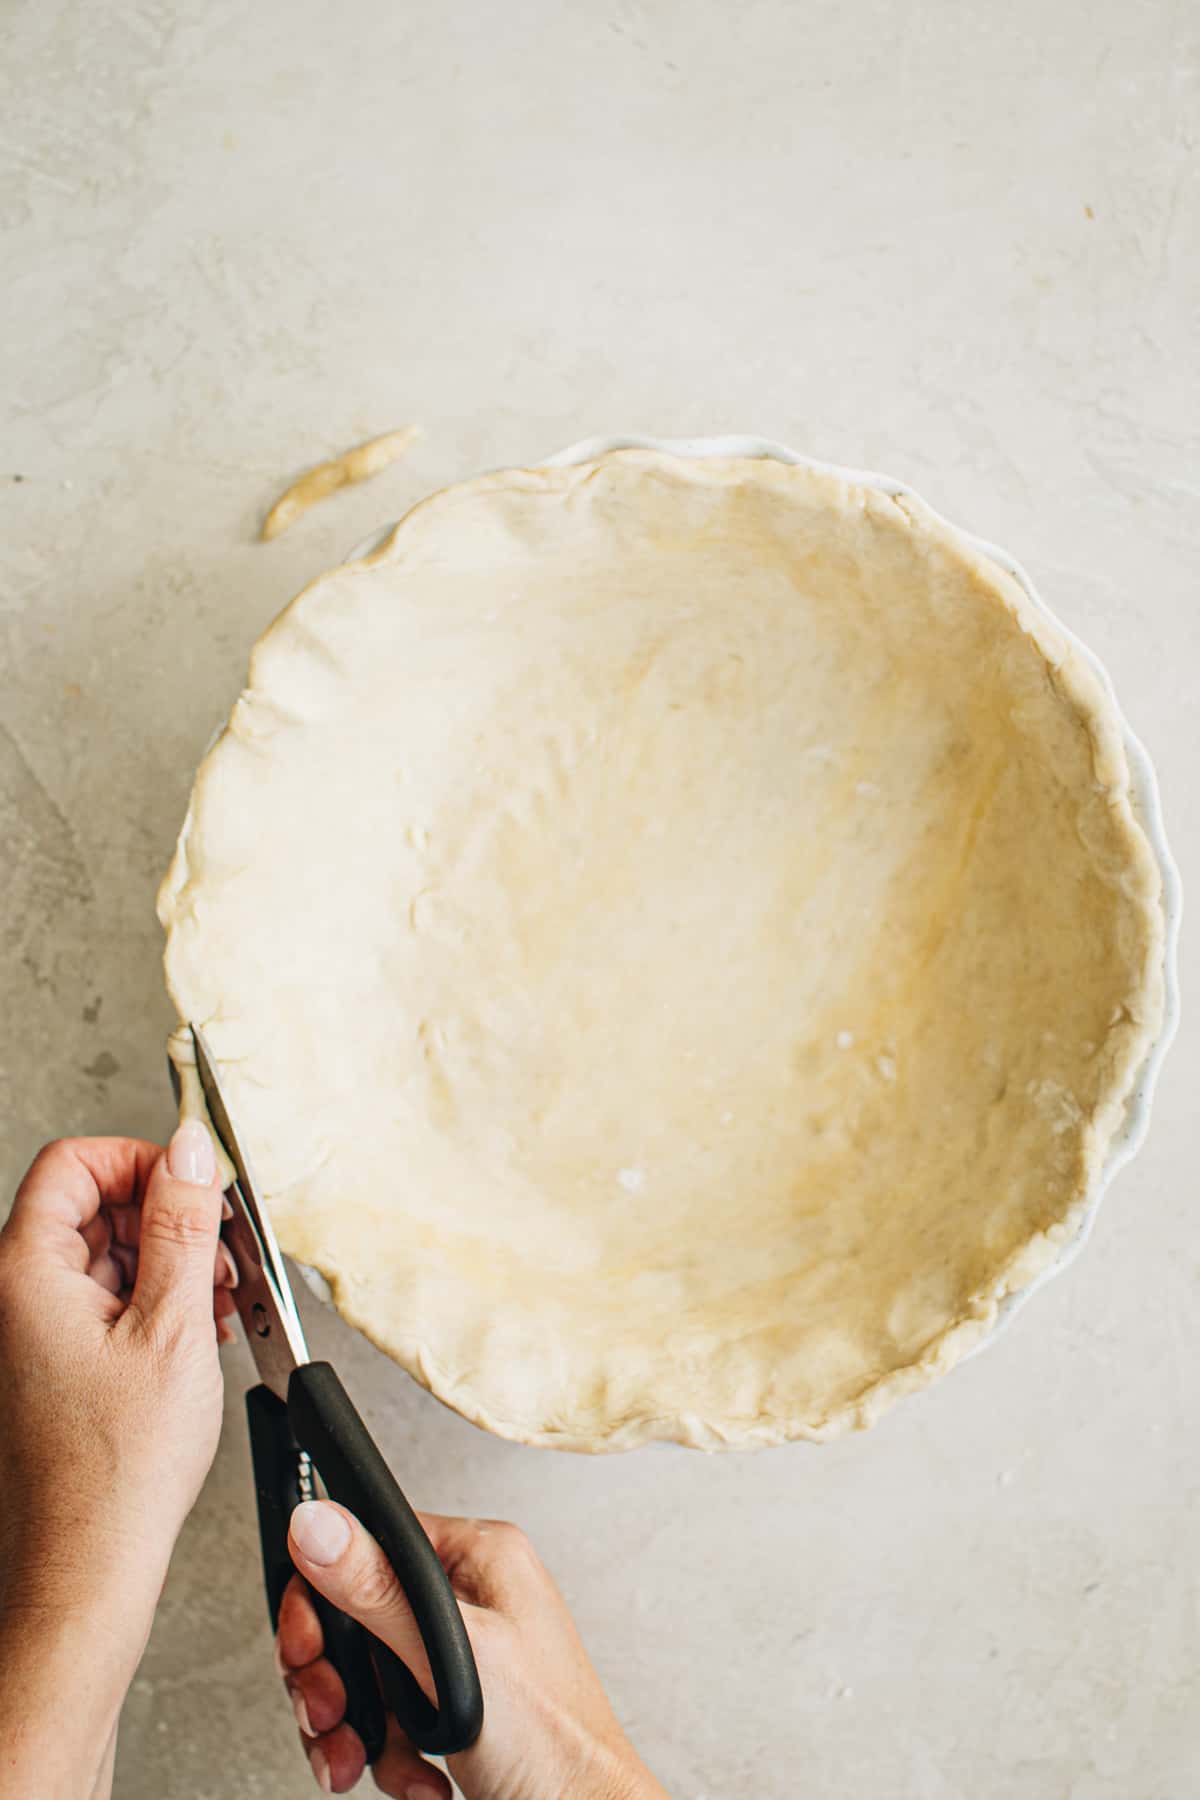
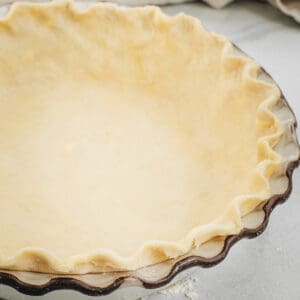
- Trim the dough around the edges. Trim any uneven overhang from the pie crust using scissors or a knife. Next, neatly fold the remaining crust over the edge.
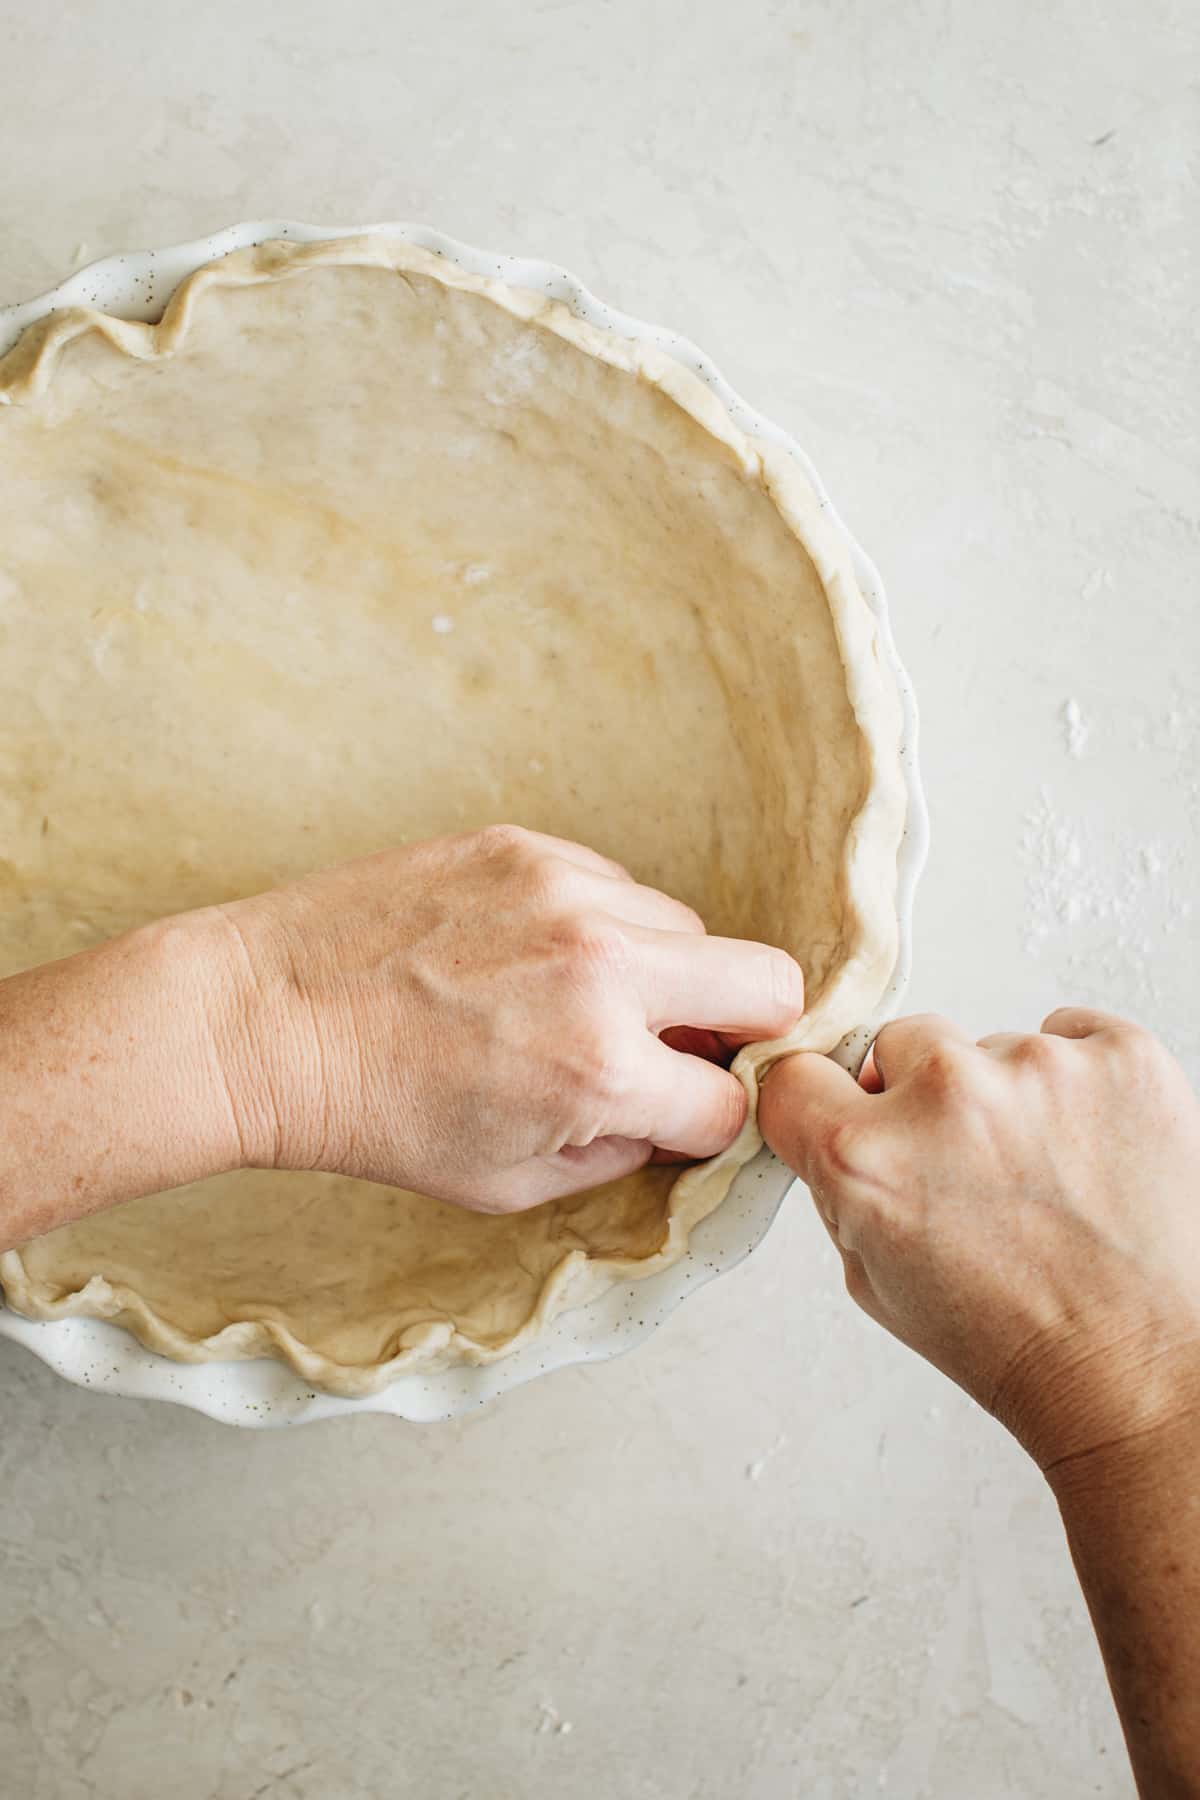
- Flute or crimp the edges. To flute the edge of your pie crust, press gently around the edges of the pie crust using a combination of your knuckle and two fingers. To crimp the edge firmly press the fork’s tines into the crust’s edge to create a pattern.
How to Blind Bake a Pie Crust
Some pie recipes require a fully baked or par-baked pie crust like this Chocolate Tart, especially if you want a flaky pie. You will need 2 sets of pie weights, which keep the crust from shrinking or puffing up and parchment paper.
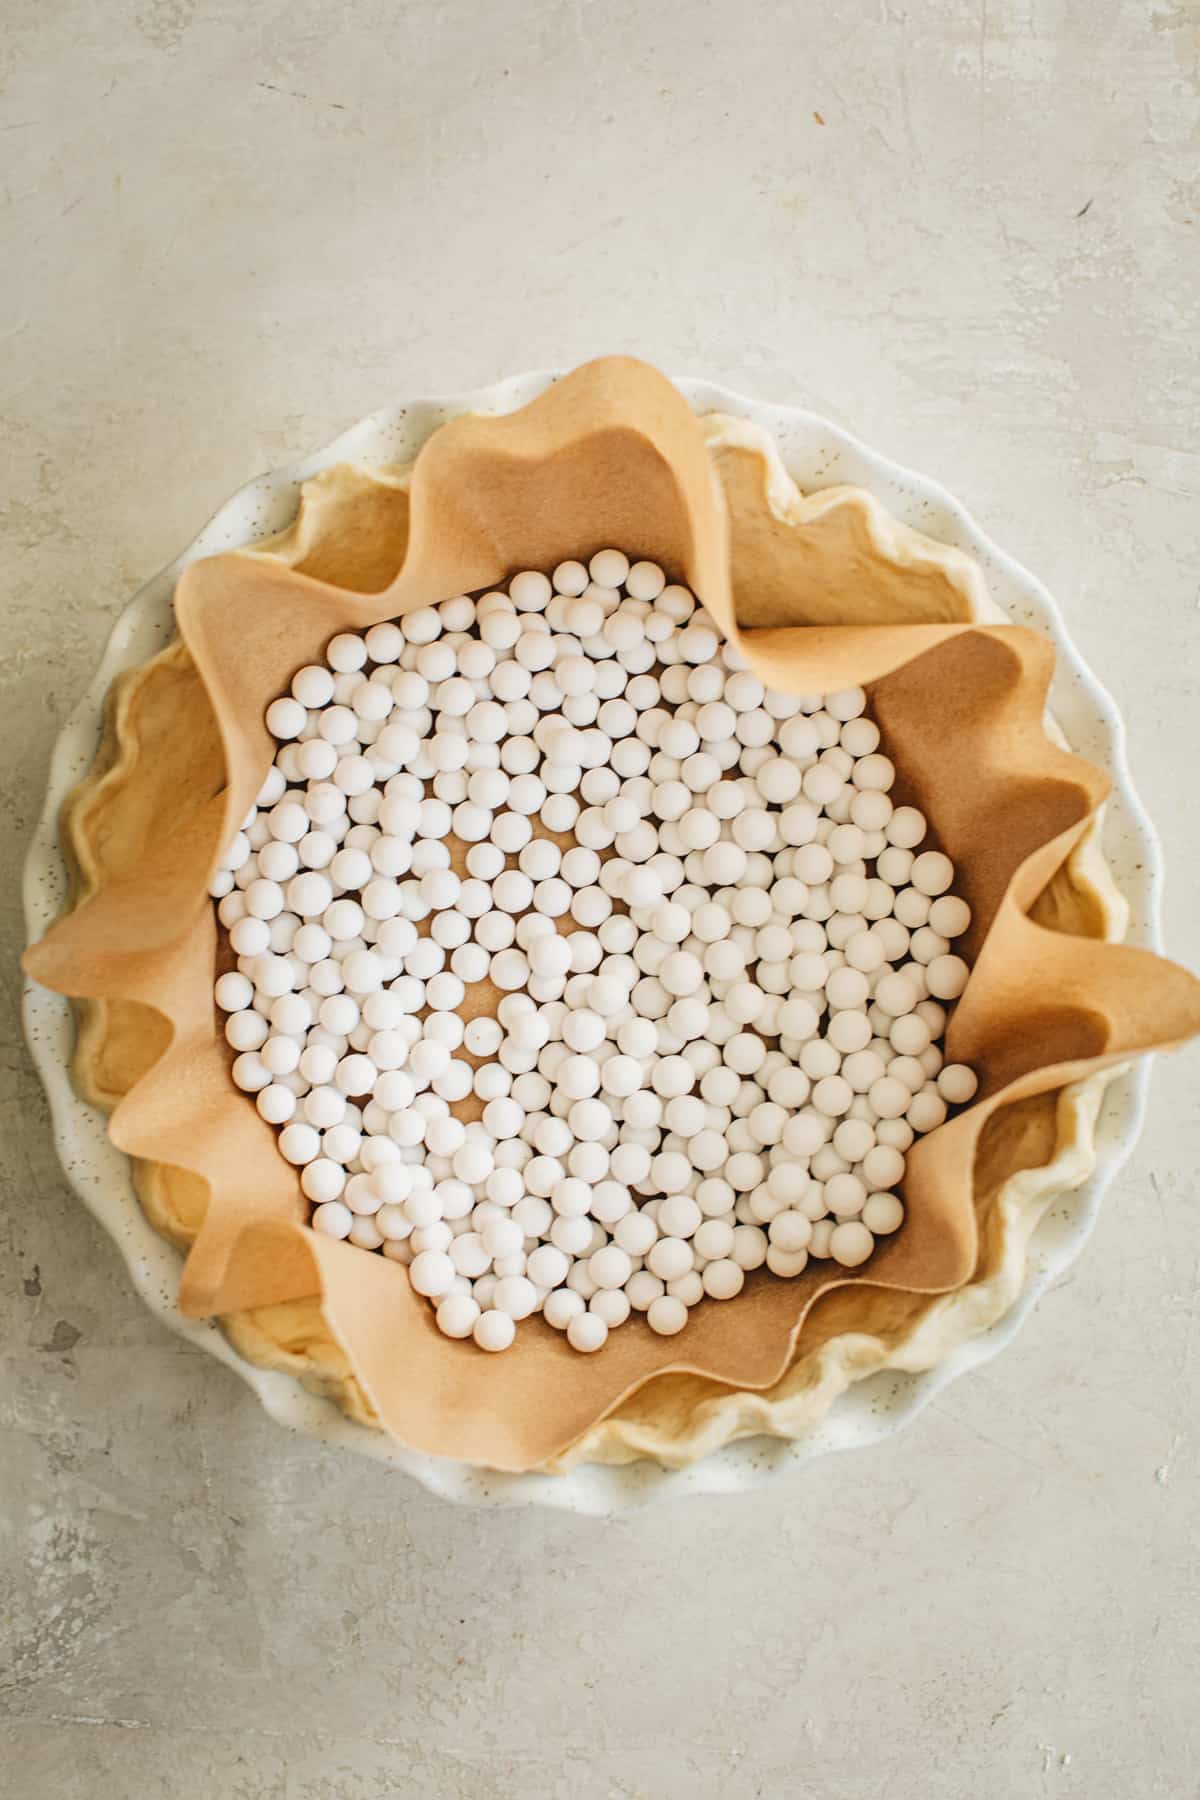
- Shape and chill. Shape the pie dough into the pie dish and place it in the refrigerator to chill for at least 30 minutes. This helps prevent shrinkage while it bakes.
- Line the pie dough with parchment. Place the parchment paper on top of the pie dough and crinkle the edges.
- Add the pie weights. Pour the pie weights, or you can use dried beans or rice, into the parchment and smooth into an even layer.
- Bake. Heat the oven to 375º F and bake for 15 to 16 minutes. Take the pie crust from the oven and remove the parchment with the weights. Using a fork, perforate the bottom crust by pricking holes. Then, place the pie crust back into the oven.
- Continue baking. Bake for an additional 7 to 8 minutes until the bottom of the crust begins to brown.
Freezing Instructions:
- To freeze pie crust dough: After preparing the pie dough, wrap the dough discs securely in plastic wrap, and then store them in a freezer-safe ziplock bag. They can be frozen for up to 3 months. When ready to use, thaw the dough in the refrigerator before rolling it out.
- To freeze unbaked pie crust: Place the pie crust in a freezer-safe pie dish and cover tightly. Freeze for up to 3 months. To thaw, place the dish in the refrigerator until the crust thaws completely before filling.
- To freeze baked pie crust: Once the baked pie crust has cooled completely, ensure it is tightly covered and then store it in the freezer for a maximum of 3 months.
Pie Crust with Shortening Recipe
Master the skill of creating a perfectly flaky pie crust from scratch, incorporating shortening. This comprehensive tutorial provides professional insights, clear step-by-step illustrations, and a precise recipe to guarantee your baking triumph.
Print
Pin
Rate
Servings: 2 Pie Crusts
Calories: 1549kcal
Equipment
- Pastry Cutter
- Rolling Pin
Ingredients
- 3 cups All-Purpose Flour spooned and leveled
- 1¼ teaspoons Salt
- 7 tablespoons Unsalted Butter cubed and chilled
- 1 cup Shortening chilled
- 3/4 cup Ice Water
Instructions
- Mix the flour and salt. In a large bowl, whisk the flour and salt together.
- Cut the fat into the flour. Using a pastry cutter cut the butter and shortening into the flour mixture.
- Add the water. Measure out a 1/2 cup of water and add some ice. Stir the water briefly to melt some of the ice. Using a tablespoon measure out 1 tablespoon of water and add it to the pie dough 1 Tablespoon at a time. Stir with a rubber spatula or wooden spoon after every Tablespoon has been added.
- Stop when the dough starts forming large clumps. I typically use around 1/2 cup of water, so be mindful not to add more than necessary. You don't want the dough to be sticky.
- Form the dough. Place the pie dough onto a floured surface. With floured hands, gently fold the dough into itself until the flour blends thoroughly with the fats. The dough should come together without being too sticky. Be careful not to overwork it. If the dough seems slightly dry or crumbly, dampen your fingers with ice water and continue to combine it. If it feels too sticky, sprinkle on more flour and proceed to shape it into a ball.
- Split the dough. Cut it in half with a sharp knife, and using your hands, gently flatten each half into 1-inch-thick discs.
- Wrap the dough and chill. Individually wrap each one tightly with plastic wrap, then refrigerate for a minimum of 2 hours, and you can keep them in the fridge for up to 5 days.
How to Roll Out Pie Crust
- Roll the dough using a rolling pin. Dust the work surface, rolling pin, and your hands with a light coating of flour, and add a small amount of flour atop the dough. Apply moderate but gentle pressure when using the rolling pin on the dough. When rolling dough, start from the center, working outward and turning as you go. Rotate and flip the crust between rolling to avoid sticking.
- Even out the dough. If the circle is uneven, stop using the rolling pin and use your hands to shape the edges into an even circle. Roll the dough to a 12-inch-sized circle that will fit a 9-inch pie dish (as well as a deep dish pie dish).
- Transfer the dough to the pie dish. Position the rolling pin in the middle of the rolled-out dough, then gently fold the dough over the pin. Lift the dough using the rolling pin and place it in the center of the pie dish. Unfold the dough and gently press it into place.
- Trim the dough around the edges. Trim any uneven overhang from the pie crust using scissors or a knife. Next, neatly fold the remaining crust over the edge.
- Flute or crimp the edges. To flute the edge of your pie crust, press gently around the edges of the pie crust using a combination of your knuckle and two fingers. To crimp the edge firmly press the fork's tines into the crust's edge to create a pattern.
Notes
Freezing Instructions:
- To freeze pie crust dough: After preparing the pie dough, wrap the dough discs securely in plastic wrap, and then store them in a freezer-safe ziplock bag. They can be frozen for up to 3 months. When ready to use, thaw the dough in the refrigerator before rolling it out.
- To freeze unbaked pie crust: Place the pie crust in a freezer-safe pie dish and cover tightly. Freeze for up to 3 months. To thaw, place the dish in the refrigerator until the crust thaws completely before filling.
- To freeze baked pie crust: Once the baked pie crust has cooled completely, ensure it is tightly covered and then store it in the freezer for a maximum of 3 months.
Nutrition
Serving: 1pie crust | Calories: 1549kcal | Carbohydrates: 119g | Protein: 16g | Fat: 112g | Saturated Fat: 41g | Cholesterol: 90mg | Sodium: 1177mg | Potassium: 167mg | Fiber: 4g | Sugar: 1g | Vitamin A: 1050IU | Calcium: 34mg | Iron: 7mg
Tried this Recipe? Pin it for Later!Mention @AimeeMarsLiving or tag #AimeeMarsLiving!