All Recipes
 Beverages
 Breakfast
 Appetizers
 Dinner
 Sides
Sides
 Dessert
 Videos
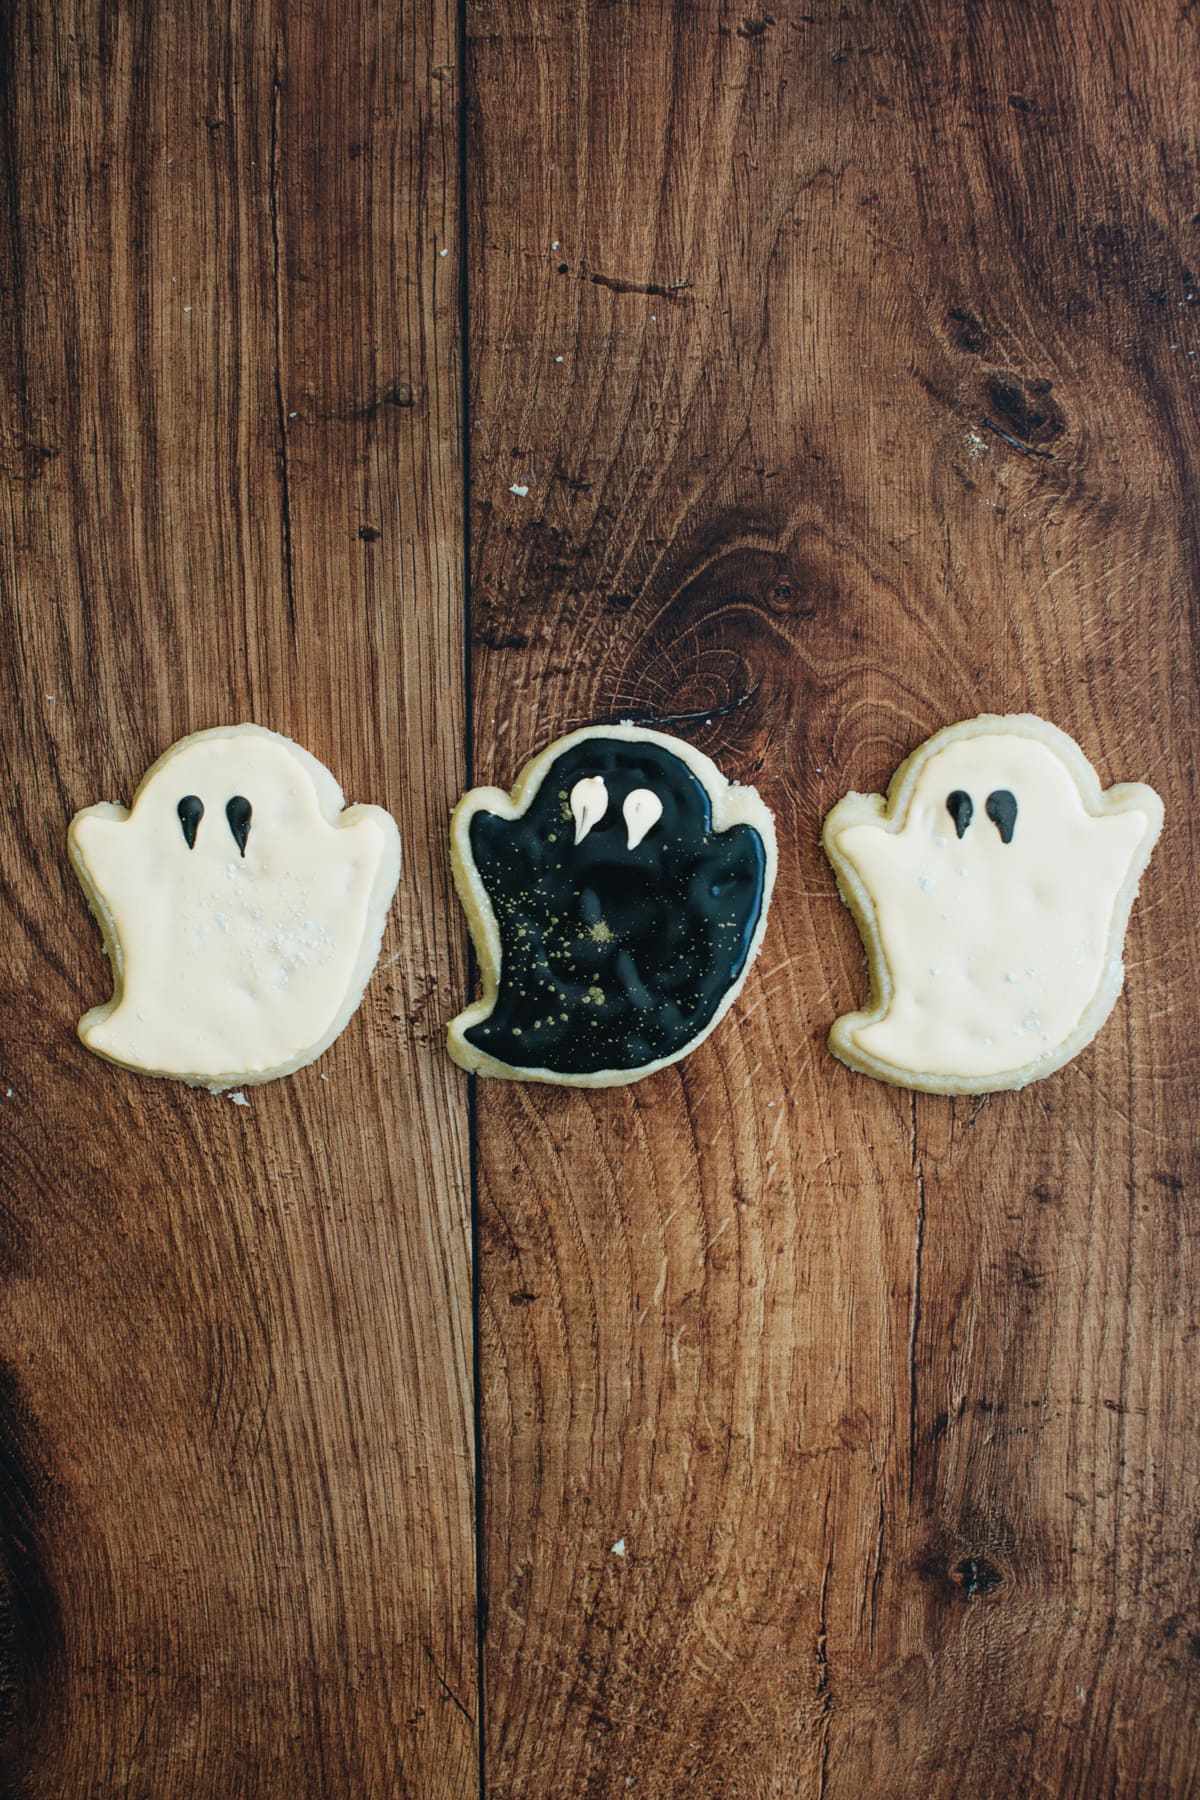
Indulge in the wickedly delicious world of Halloween Sugar Cookies! These simple sugar cookies decorated with royal icing will cast a spell on your taste buds and leave you craving more.
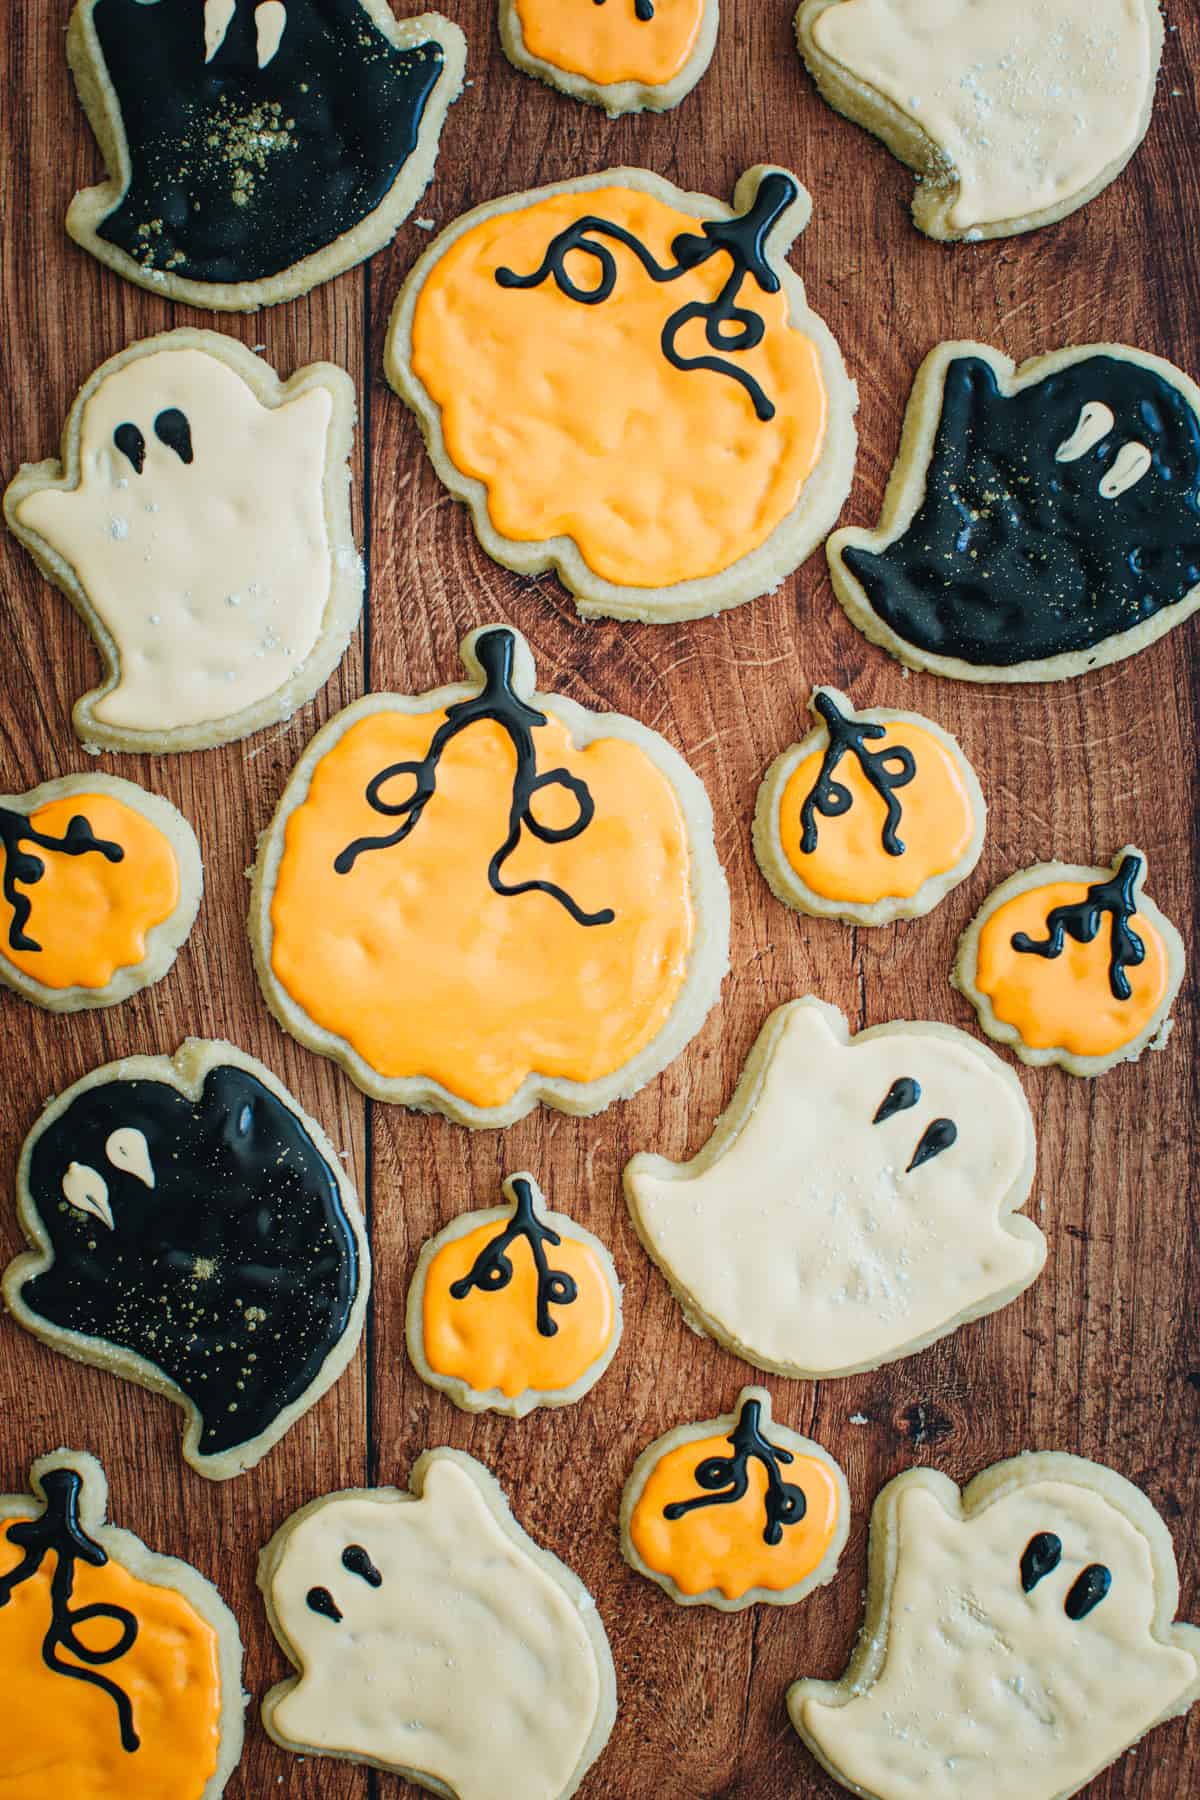
Halloween Decorated Cookies
Transform your Halloween into a spooktacular celebration with delectable treats! Begin with my luscious and flavorful sugar cookie recipe as your canvas. Once your cookies have cooled, the real fun begins – let your creativity run wild as you embark on a thrilling decorating adventure for Halloween.
Customize your cookies using royal icing with traditional ghostly whites or vibrant, festive hues to set the mood. This post offers a myriad of decorating ideas, suitable for all skill levels, making it a delightful project even for beginners! Get ready to craft your own Halloween cookie masterpiece.
Ingredients Needed
Creating Halloween sugar cookies is delightfully simple, requiring just basic ingredients. You’ll start with a standard cut-out sugar cookie.
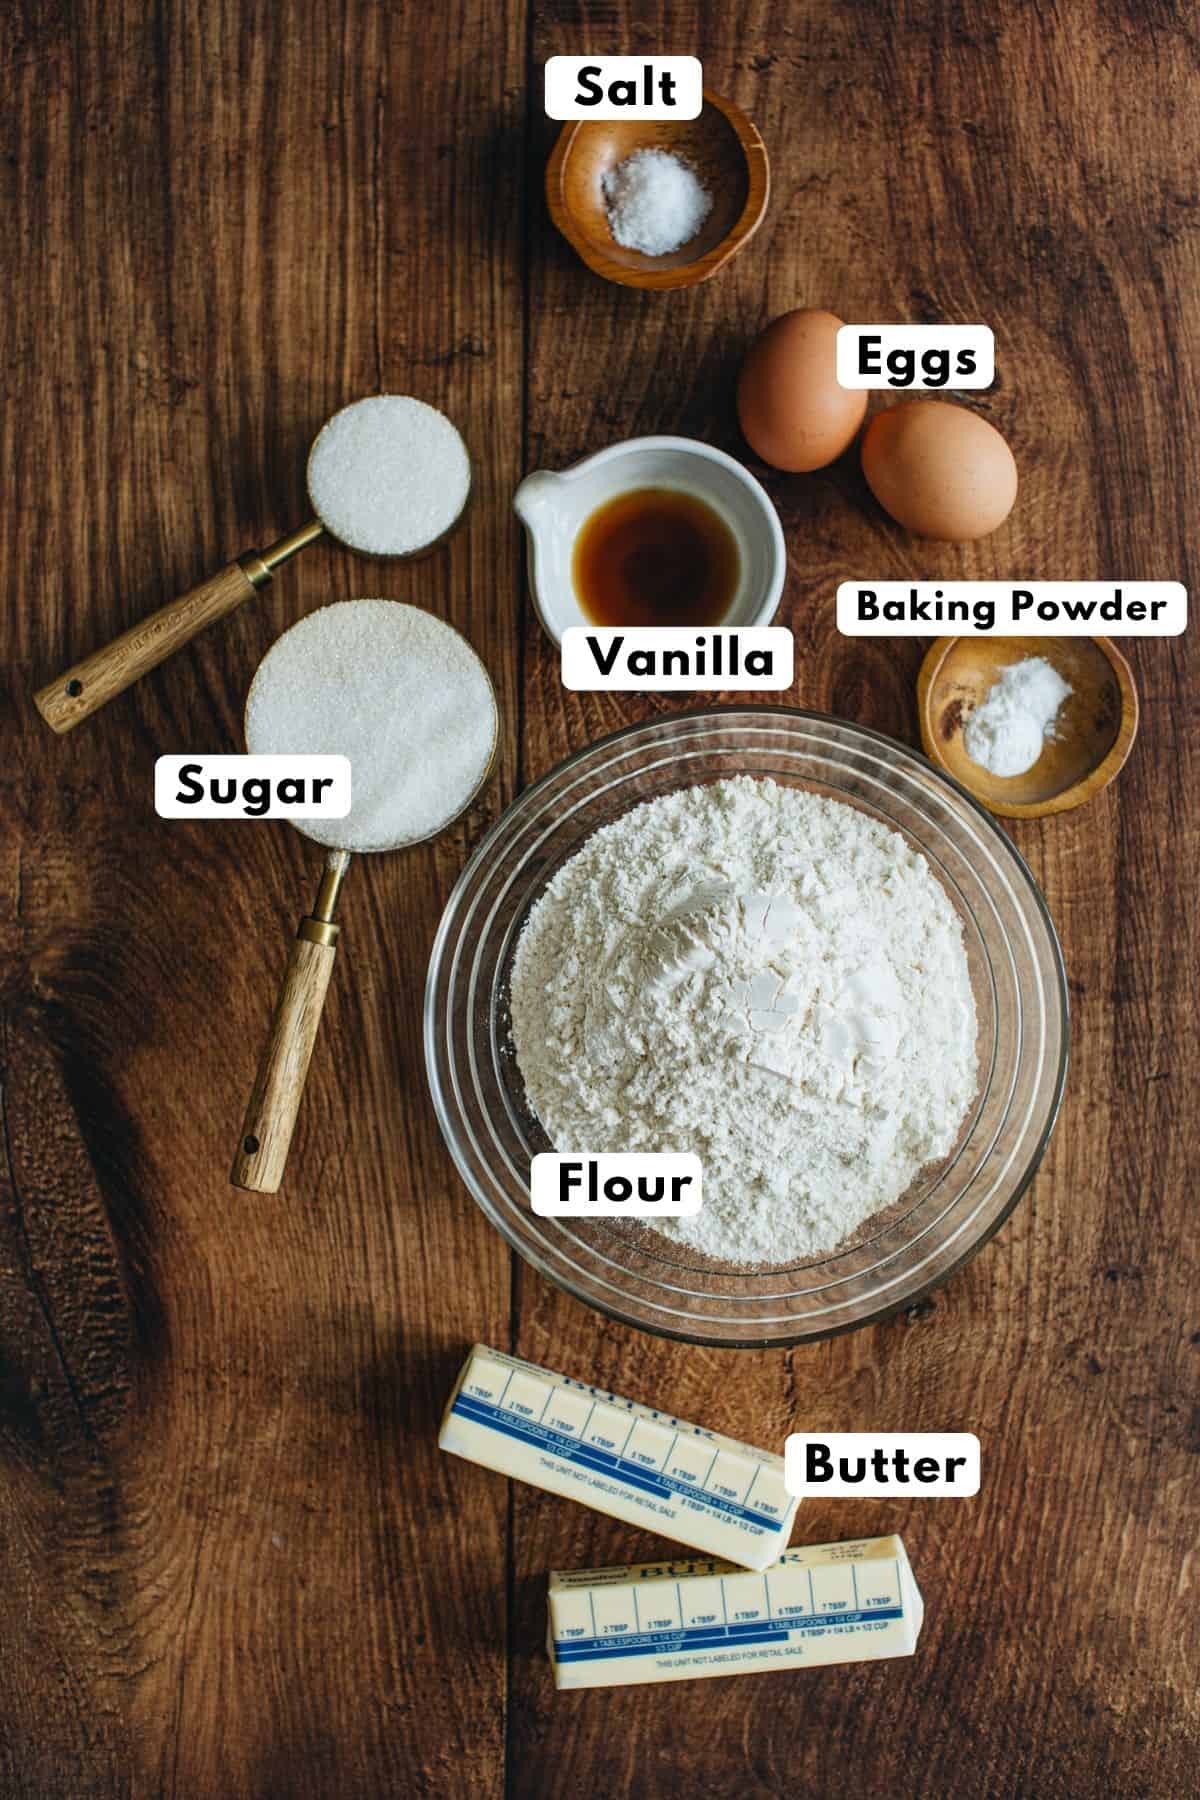
- Vanilla Extract – It’s common to use vanilla extract when flavoring sugar cookies, but you can also use almond extract for a nutty complimentary flavor.
- Eggs – You’ll need 1 whole egg and then just the egg yolk of another egg, which helps bind the cookies together and keep them dense at the same time.
- Butter – Use unsalted room temperature butter so you can cream it with the sugar. This creates a fluffy texture for the cookie batter.
How to Make Halloween Sugar Cookies
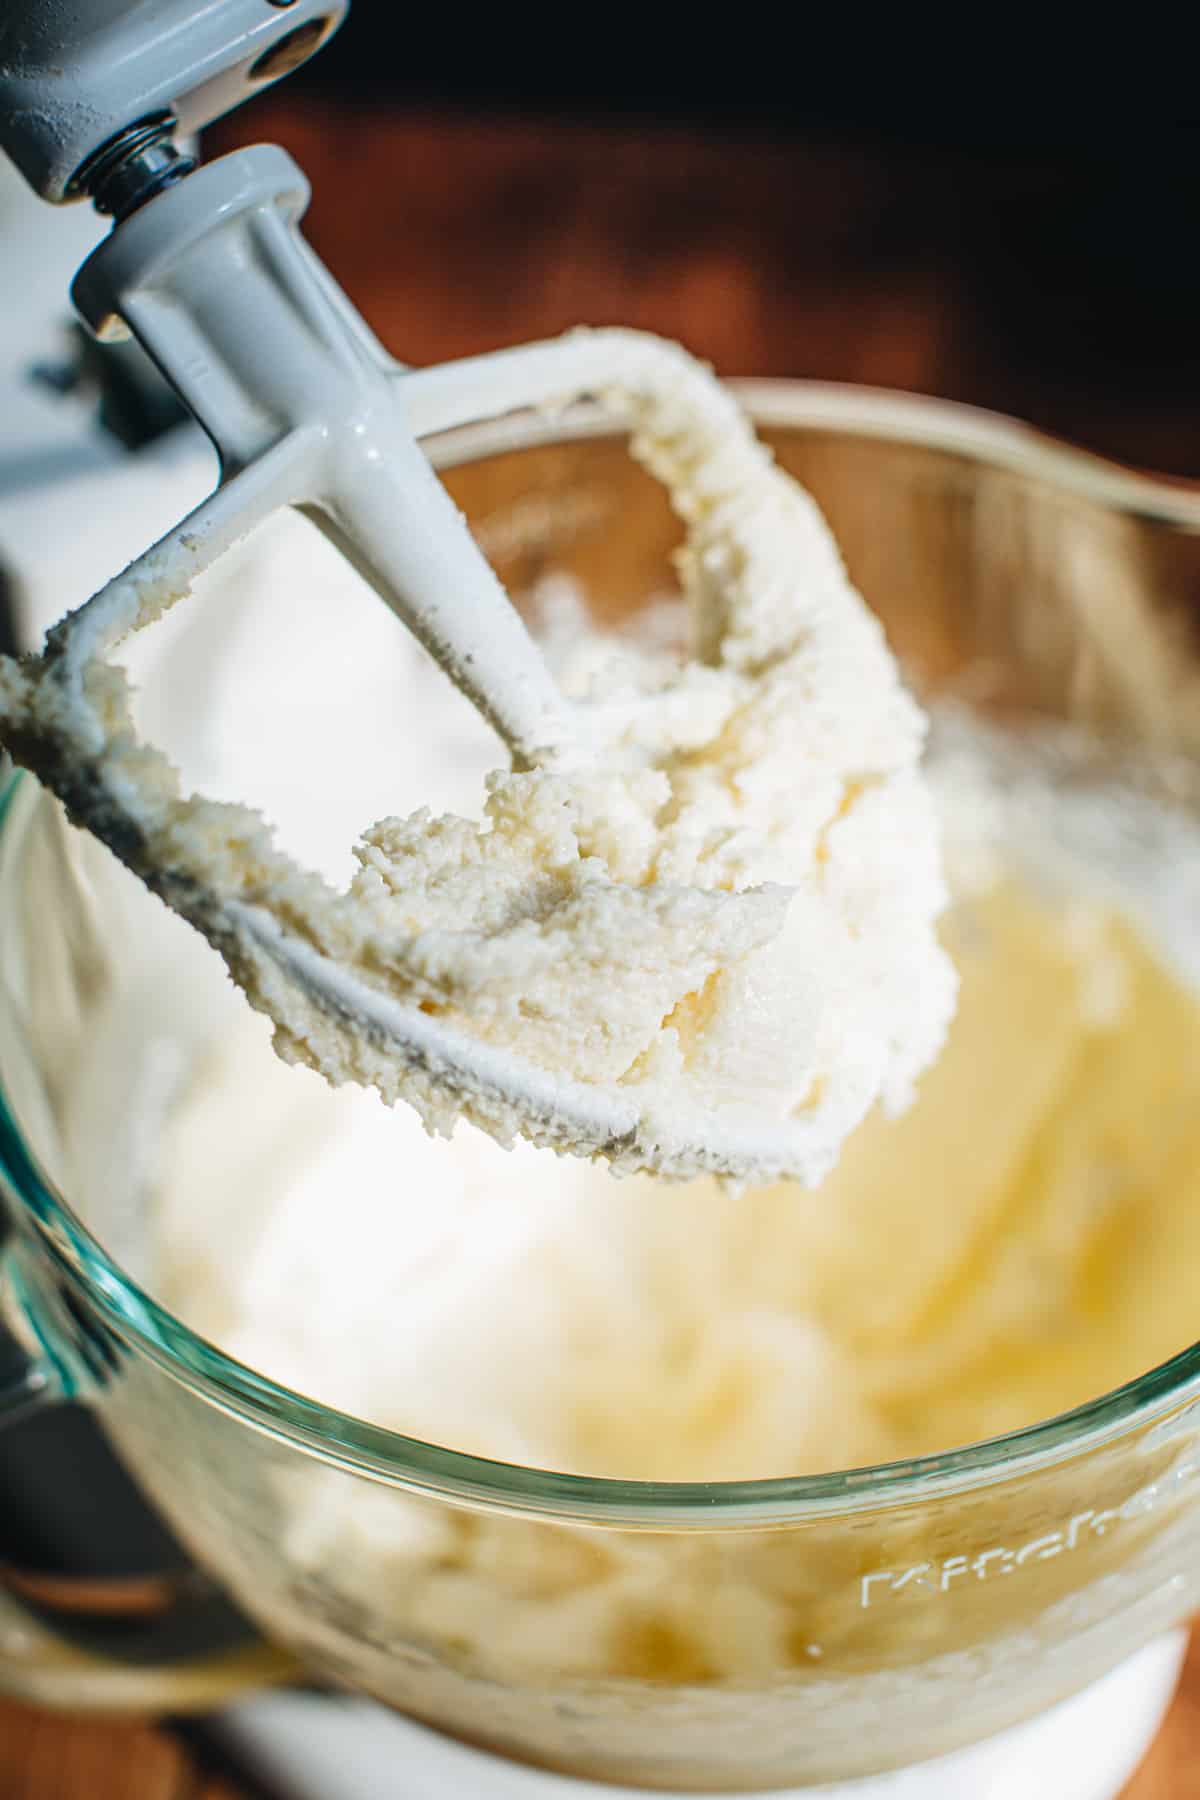

- Cream the butter and sugar. Place the butter and sugar into the bowl of an electric mixer and beat them together using the paddle attachment for 5 minutes or until light and fluffy.
- Scrape down the sides. Scrape the mixture down and add the egg, one egg yolk, and the vanilla. Mix until combined.
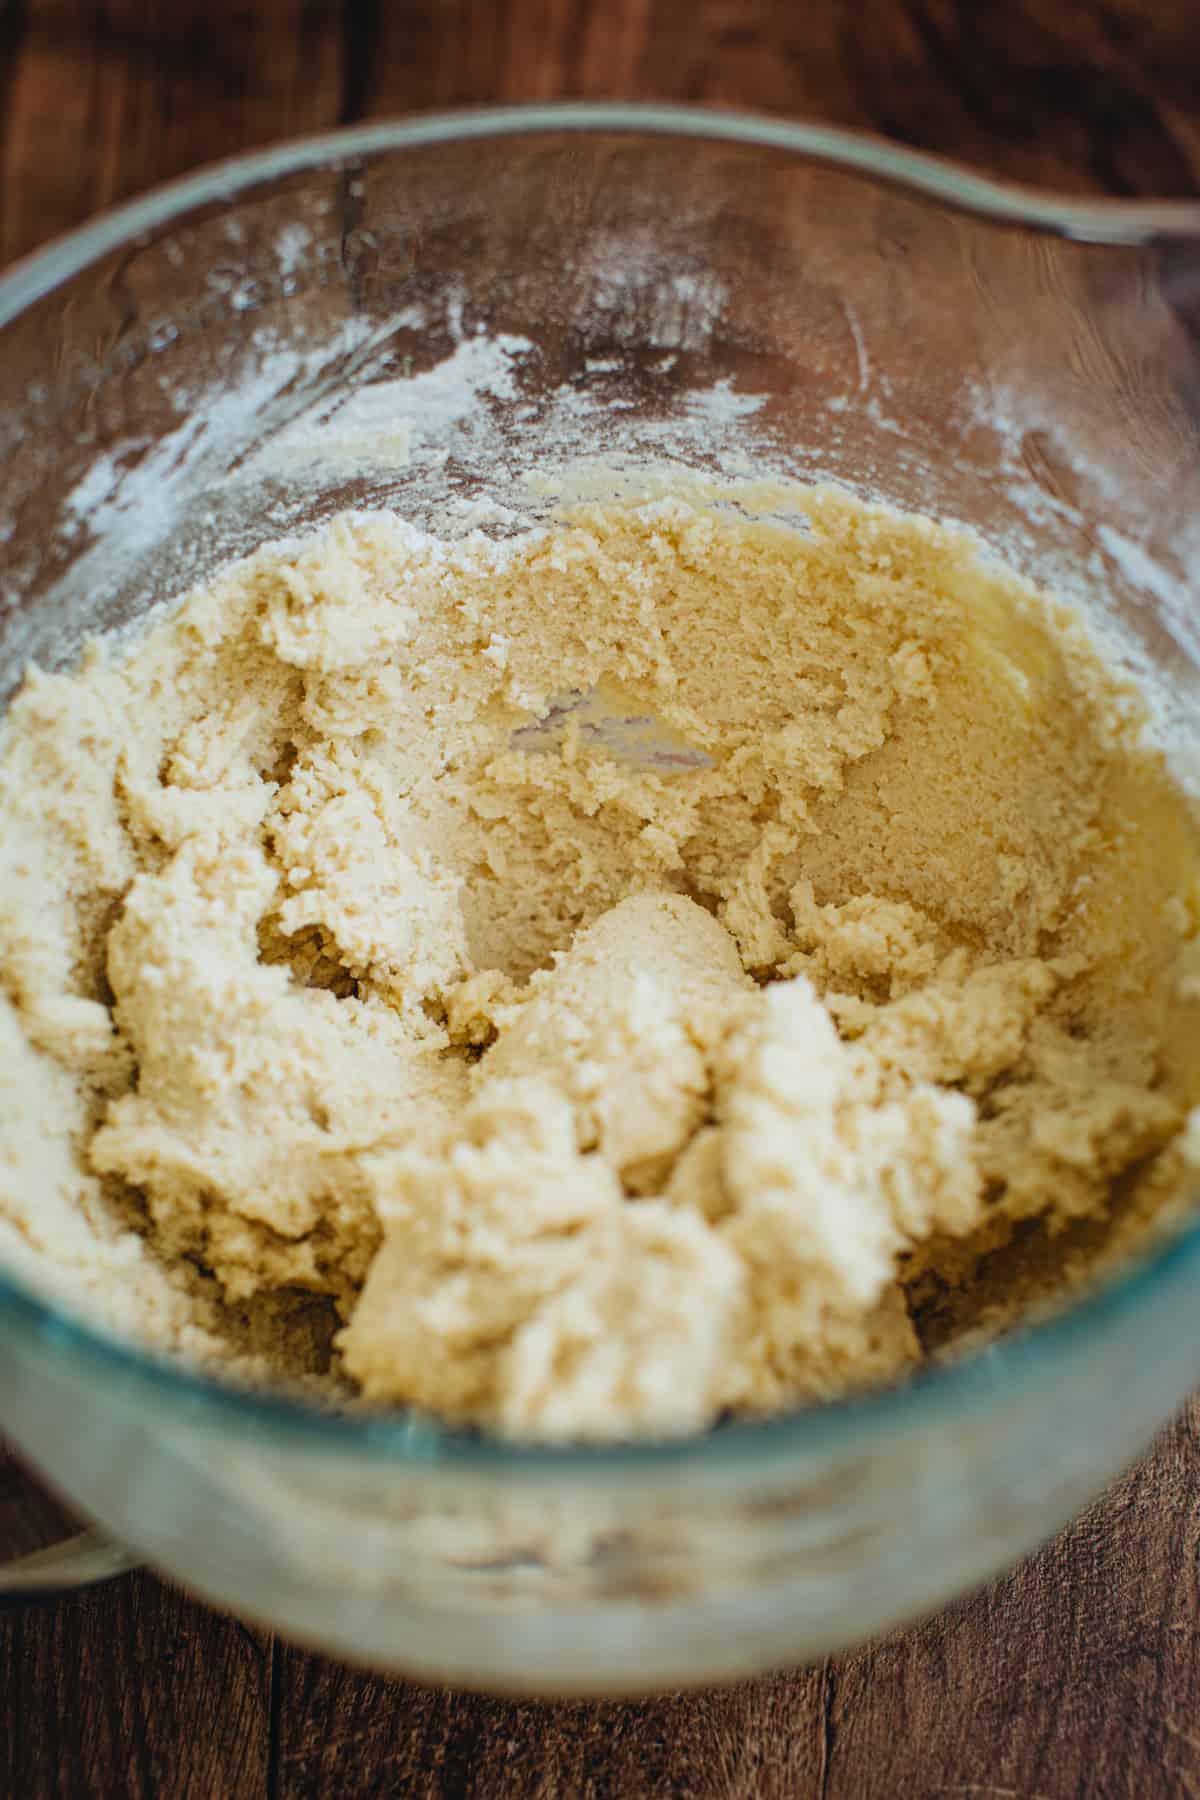
- Add the remaining ingredients. Pour the flour, salt, and baking powder into the mixing bowl and mix them into the batter until just combined.
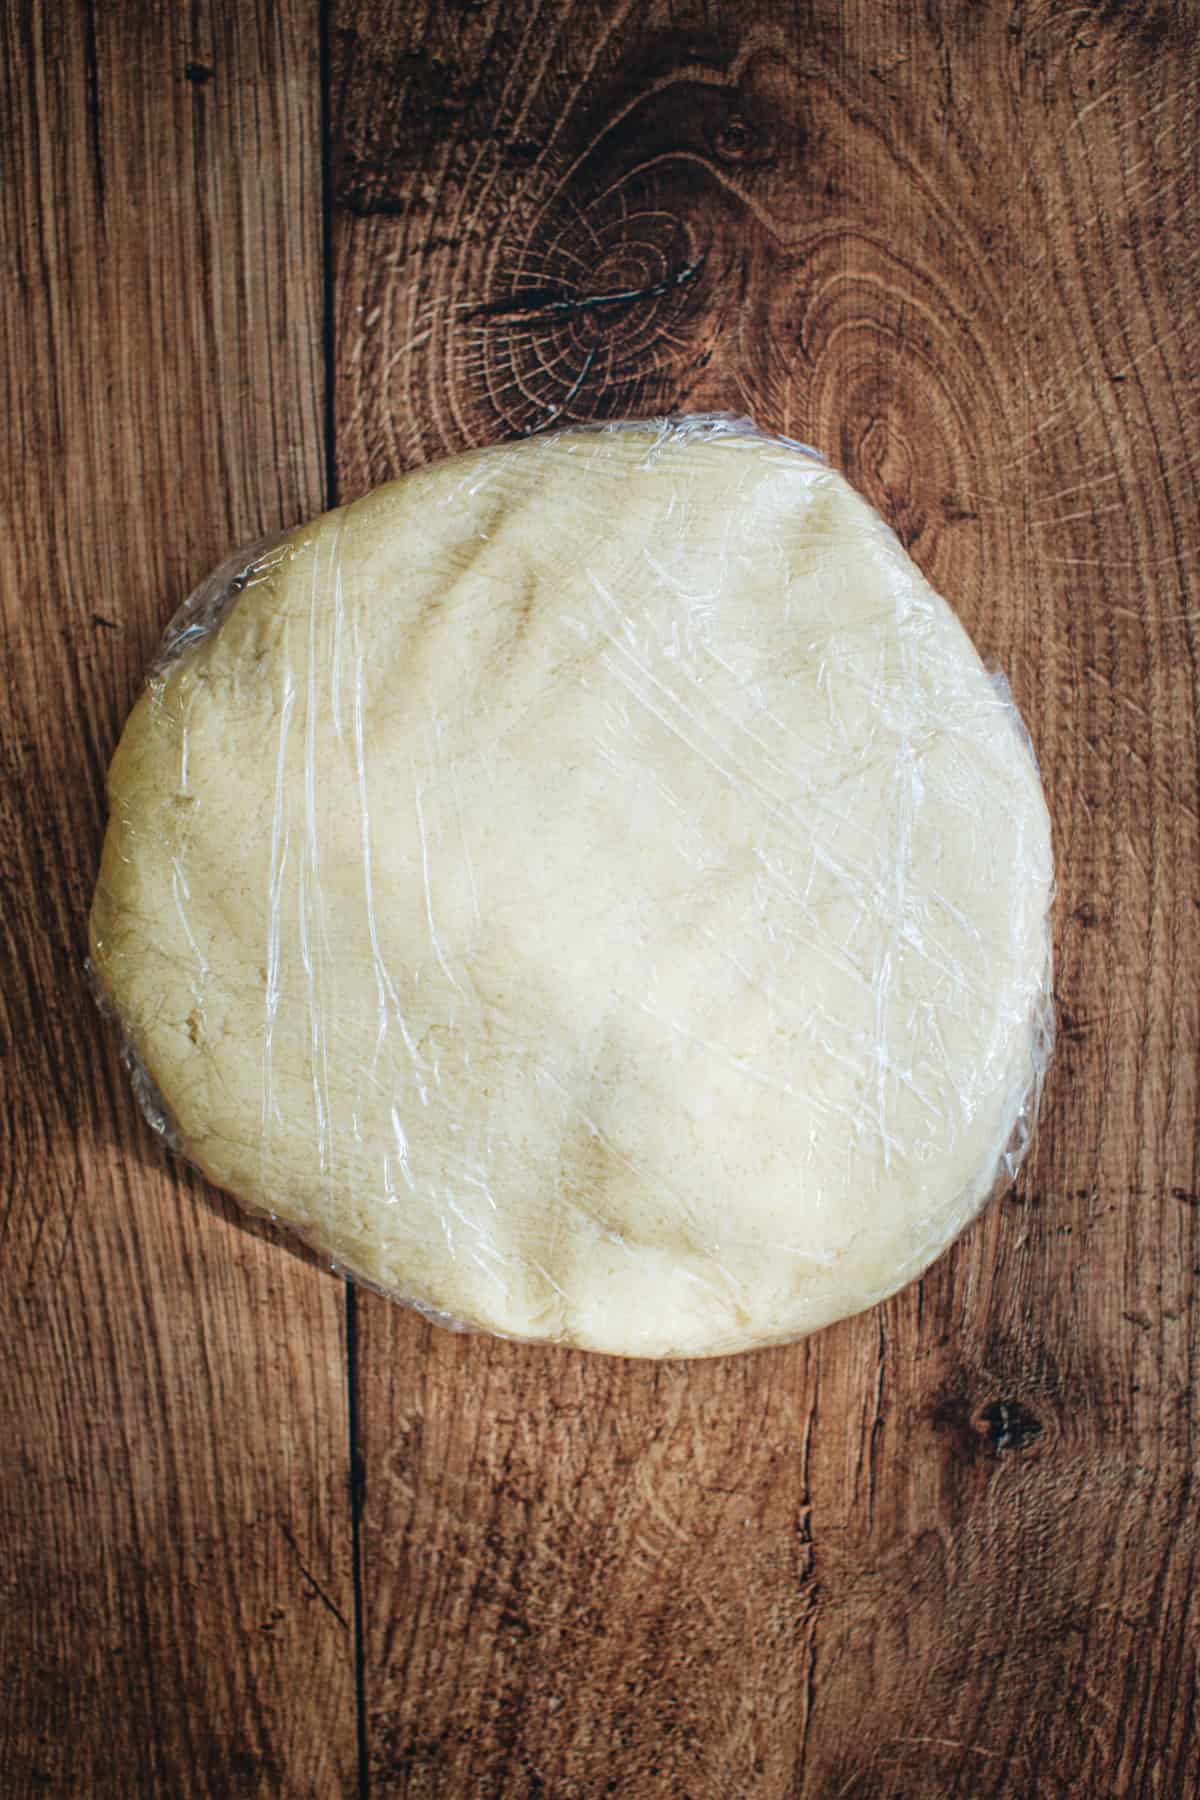
- Chill the dough. Turn the dough out onto a floured surface and shape it into a ball. Then flatten it into a disc. Cover with plastic wrap and place it in the fridge to chill for 1 to 2 hours.
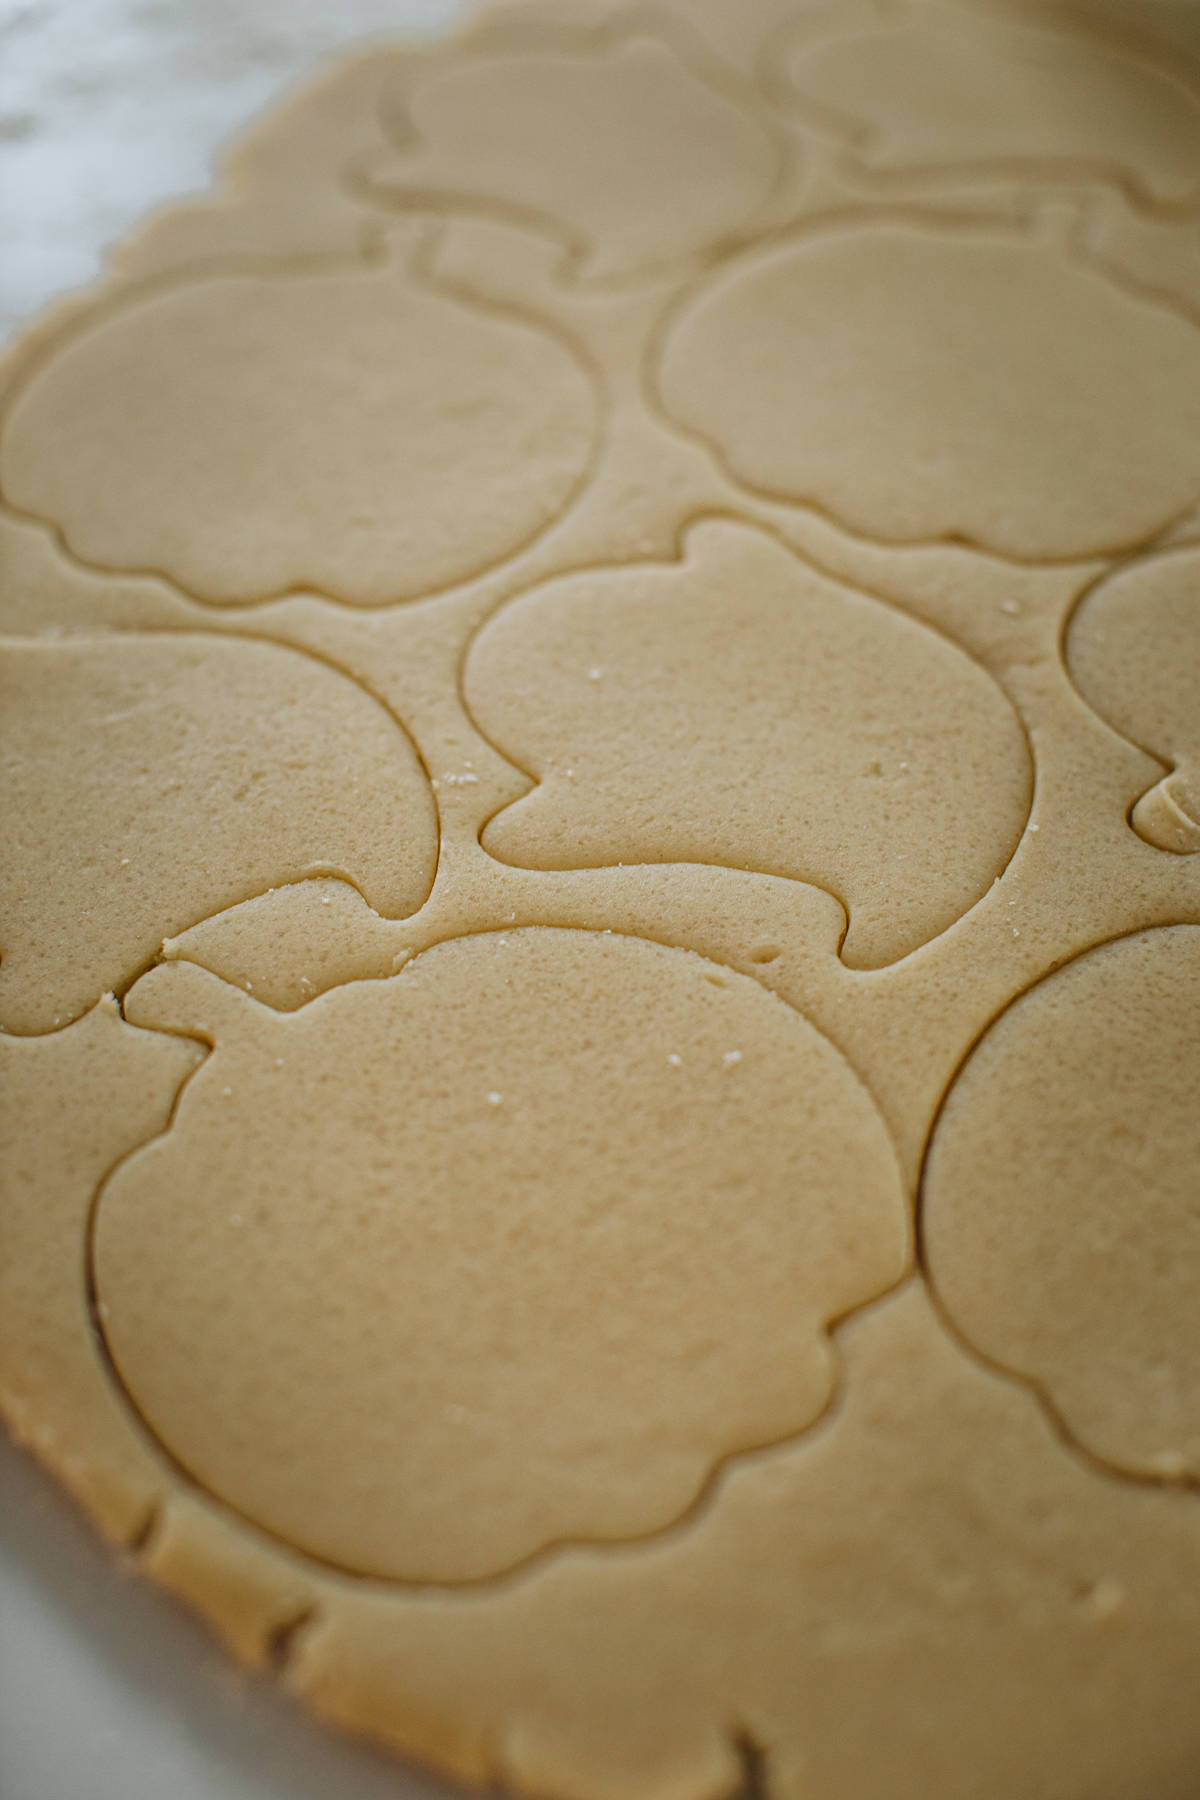

- Preheat the oven and shape the cookies. Once chilled preheat the oven to 325º F. Line 2 to 3 large baking sheets with parchment paper or silicone baking mats. Sprinkle your work surface with flour and roll the dough out to 1/4-inch thickness. Using cookie cutter cut out your cookies and place them on the prepared baking sheet. To maintain the ideal dough texture, be quick in your work to prevent it from warming up too much. Should you notice it getting too soft, pause your process and return any unused dough to the refrigerator. Allow it to chill for about 10 minutes to regain its desired firmness.
- Bake and cool. Place your formed cookies onto baking sheets, ensuring they’re spaced about 3 inches apart. Bake in the oven for approximately 12-15 minutes, or until the edges show signs of setting. If your oven has uneven heating, consider rotating the baking sheet halfway through the baking duration for uniform results. After baking, let the cookies cool on the baking sheet for 5 minutes before gently transferring them to a wire rack. Allow them to cool completely before starting the delightful decorating process.
How to Make Royal Icing
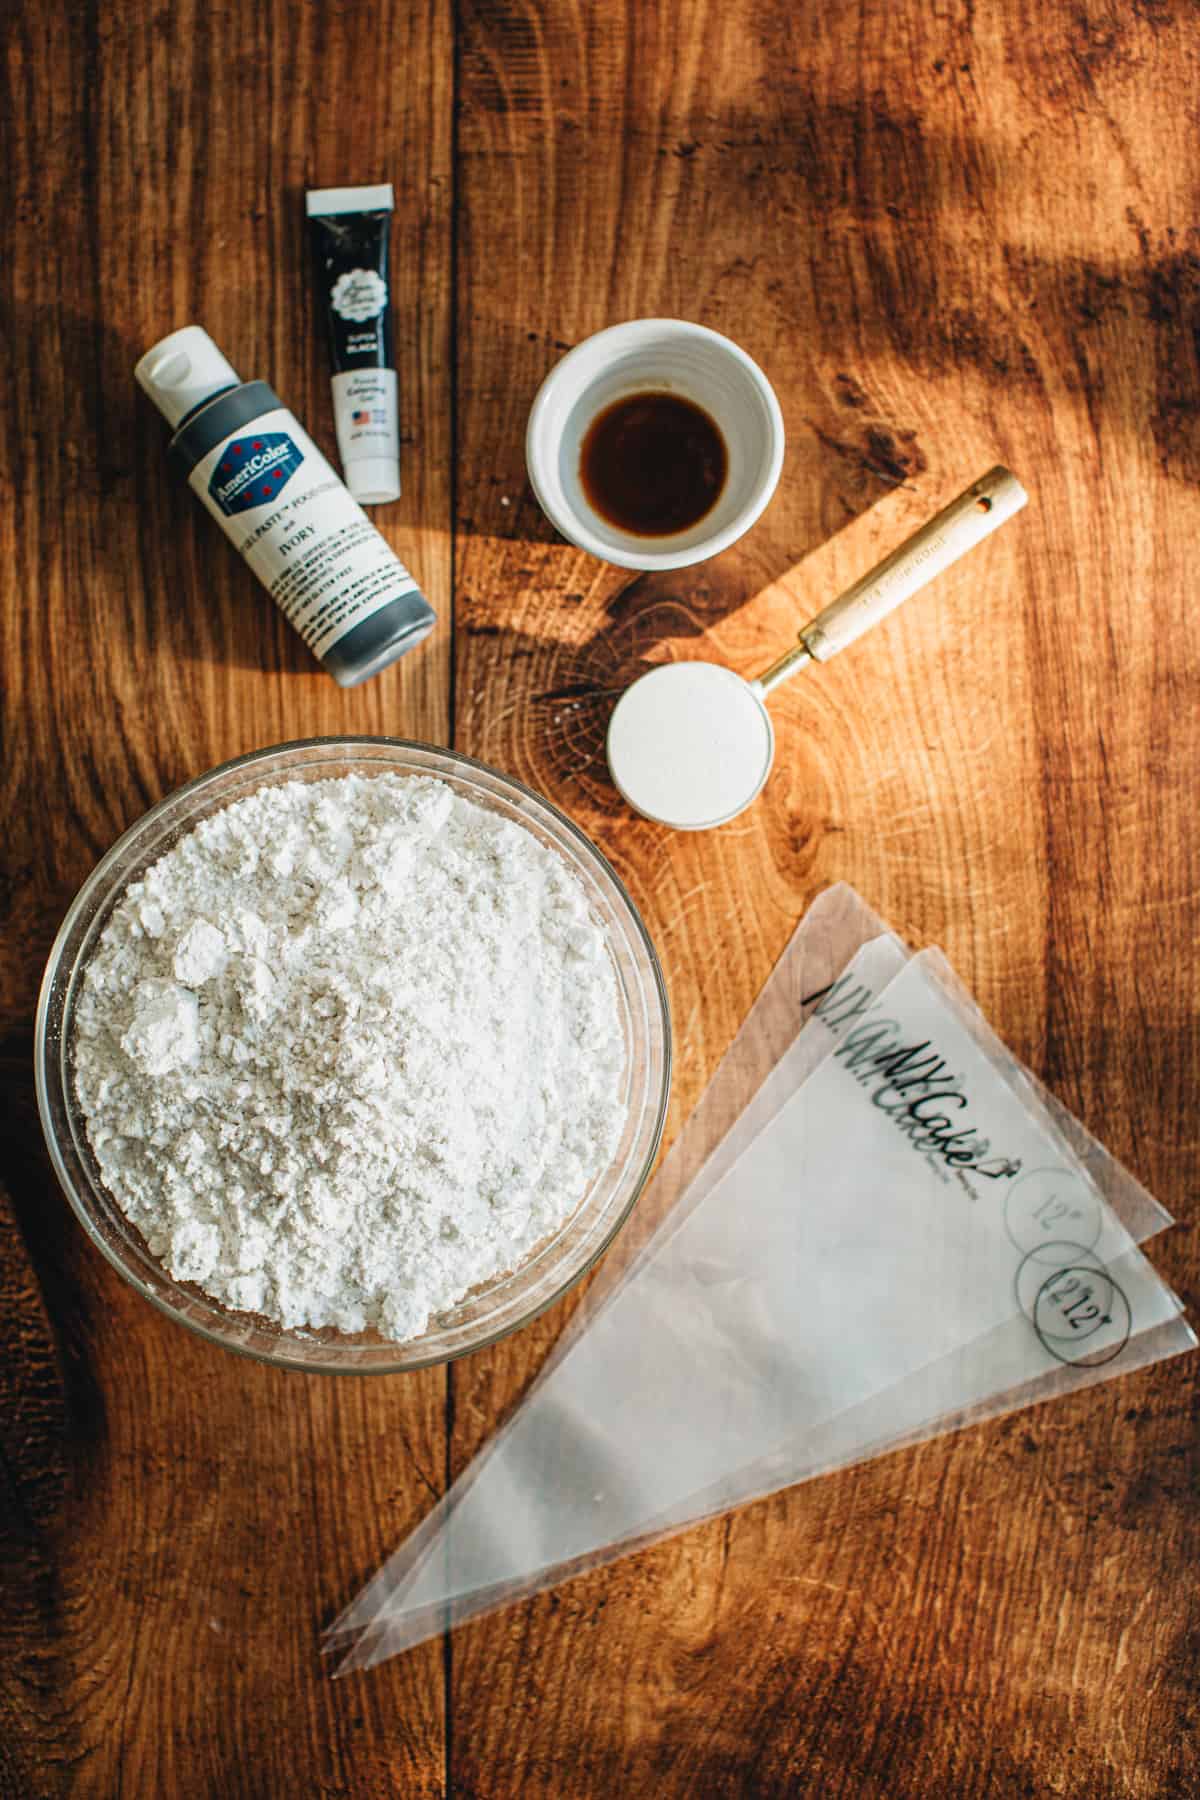
- Meringue Powder – Meringue powder serves as a key stabilizing ingredient in royal icing. It helps create a smooth, glossy, and firm consistency by providing the necessary proteins and structure when mixed with powdered sugar and water.
- Powdered Sugar – Powdered sugar, also known as confectioners’ sugar, provides sweetness and structure to the icing while serving as a base for its smooth texture. Sift it into the mixing bowl so any clumps will be broken up.
- Gel Food Coloring – The best food coloring for royal icing is gel-based or concentrated liquid food coloring. These types of food coloring are highly pigmented, allowing you to achieve vibrant and consistent colors in your icing without adding excess liquid.
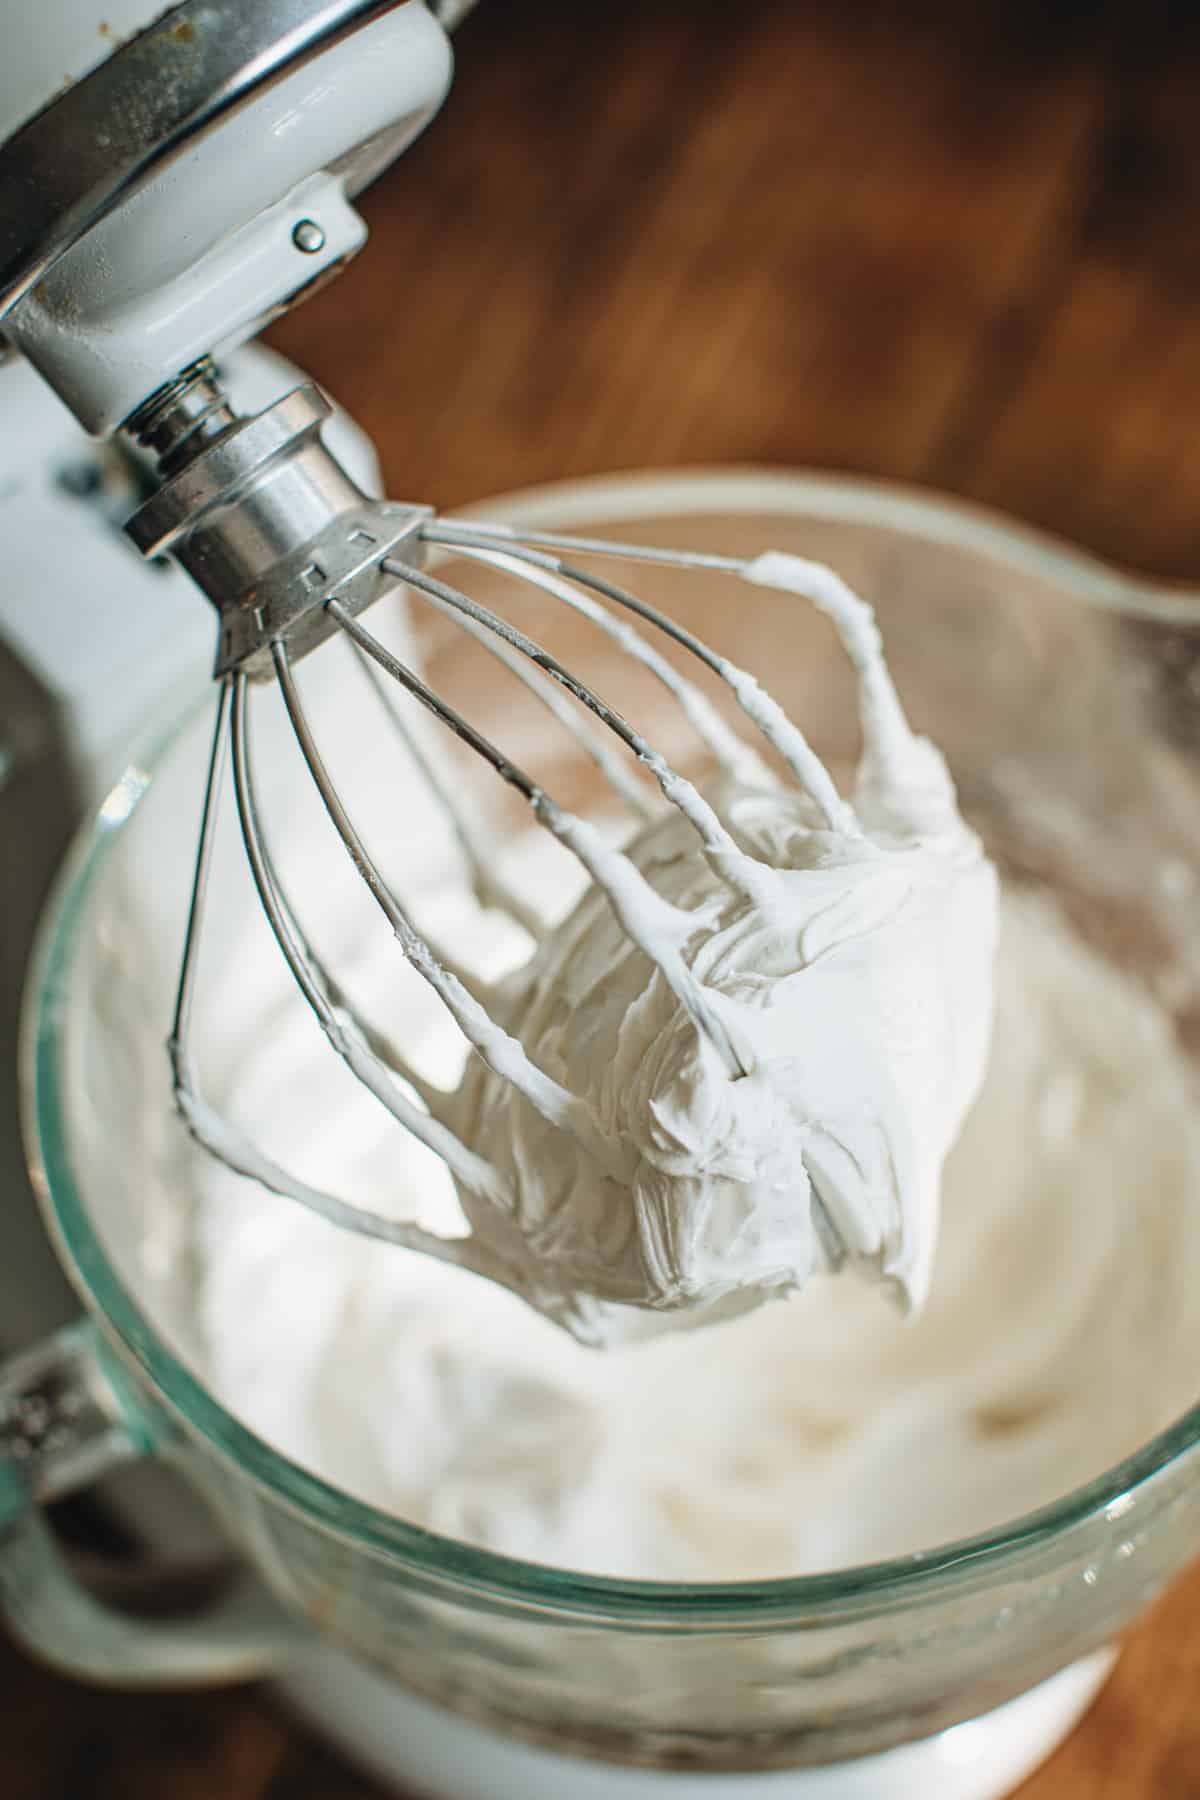
- Make the royal icing. Combine the powdered sugar and meringue powder in the mixing bowl of an electric mixer. Next, gradually incorporate the water until you achieve a pleasantly thick frosting consistency. Continue beating at a medium speed for approximately 5 minutes or until stiff peaks become evident.
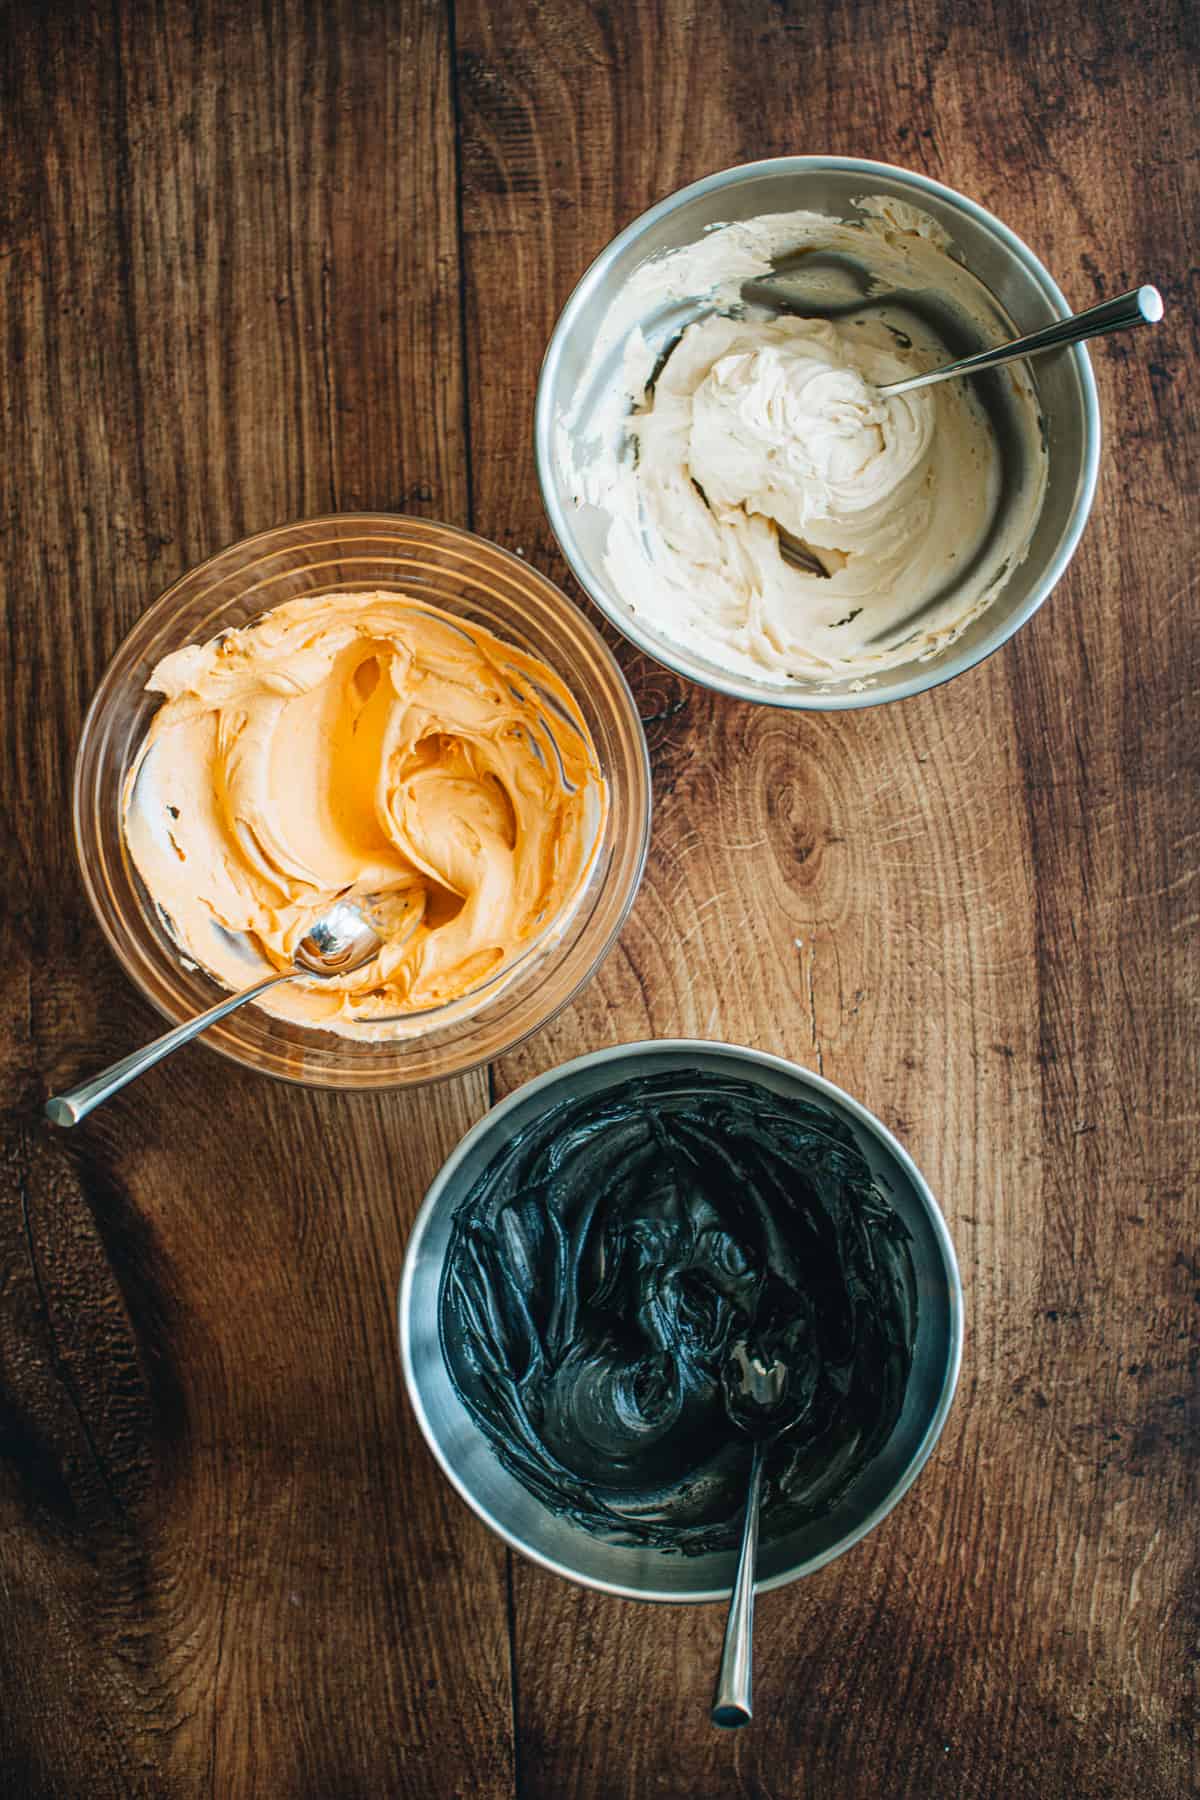
- Coloring the icing. Divide the frosting into separate bowls, each designated for the different colors you intend to employ in your decorating (the icing will be very thick). Introduce food coloring to each bowl until you attain your desired shade.
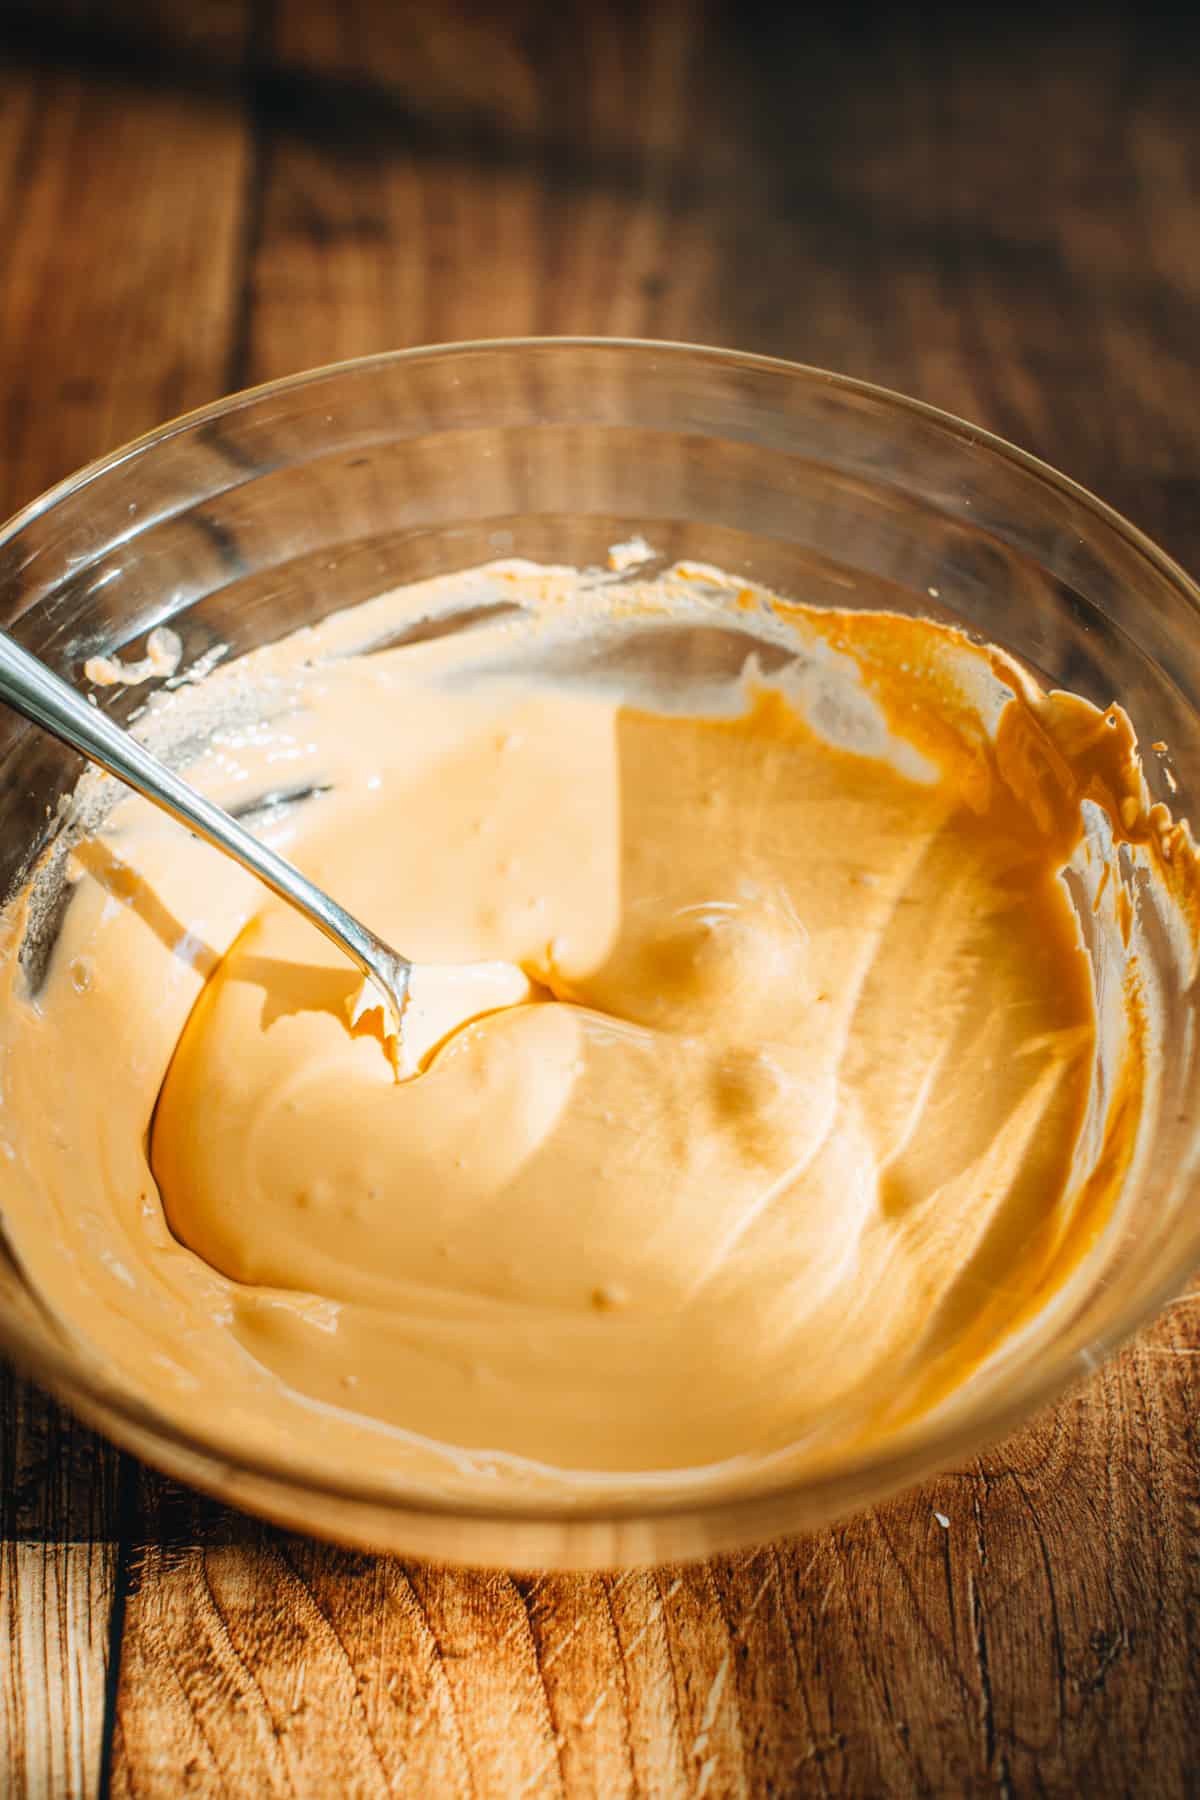
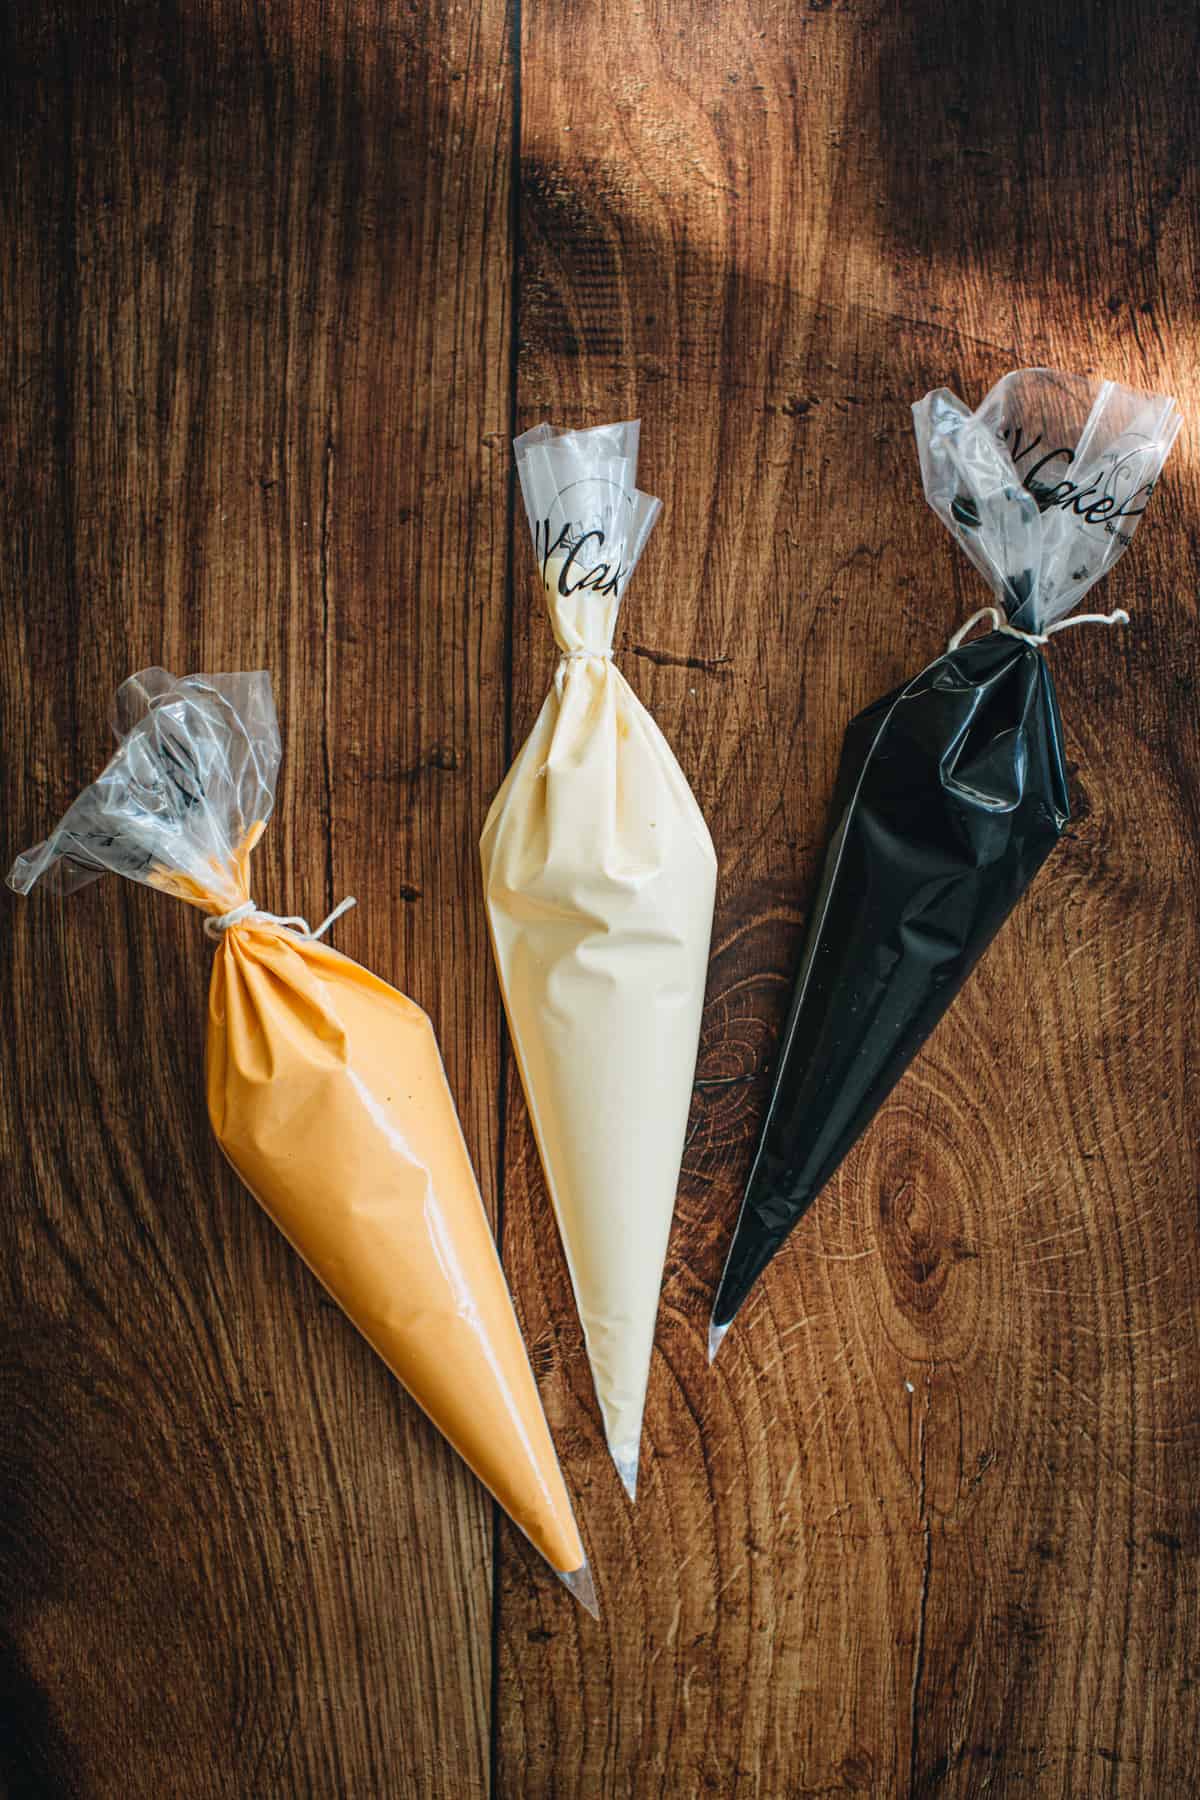
- Thin the icing. Gradually incorporate water into each color, adding one teaspoon at a time, until the consistency is akin to that of toothpaste. This will be your outlining consistency, suitable for piping borders, edges, or crafting intricate words and designs.
- Place the icing in bags. Transfer a portion of each color at this consistency into its own piping back and twist the ends closed. If you want to use “flood consistency” icing keep gradually diluting the remaining icing with additional water, adding one teaspoon at a time, until you achieve a pleasing consistency where it melds back into itself within 5-10 seconds. This texture should closely resemble that of honey.
Time to decorate the cookies! After preparing your cookies and icing, it’s time to dive into the creative process of decorating. For beginners, I recommend starting with the thicker icing to pipe borders along the edges. This will serve as a protective barrier to contain the royal icing and prevent it from overflowing. As you gain confidence, you can experiment with using flood consistency for most of your designs, bypassing the need for borders. However, employing this bordering technique can make a significant impact, especially if you’re trying your hand at royal icing for the first time.
FAQS
You can freeze sugar cookies with royal icing, but it’s essential to follow specific steps for the best outcome. Ensure the royal icing is completely dry before freezing. To prevent sticking, place parchment paper between the cookies and store them in an airtight container or bag, with layers separated by parchment. Label and date the container for reference. When ready to enjoy, thaw the cookies slowly in the refrigerator or at room temperature, avoiding heat or moisture. If the icing loses some shine or firmness, you can refresh it with water or fresh icing. Keep in mind that the icing’s texture and appearance may slightly change after thawing, so consider freezing the cookies unfrosted and decorating them later for a fresher look.
Gel-based or concentrated food coloring works best for vivid hues when making royal icing for Halloween cookies.
Store them in an airtight container with a slice of bread to maintain moisture.
Recipe Notes and Tips:
- Save time by rolling out the dough before chilling it. Flatten the cookie dough directly onto a silicone baking mat or parchment paper, allowing for convenient transfer to the refrigerator. In cases where your refrigerator lacks sufficient space for two baking sheets, you can stack the flattened dough pieces on top of each other.
- Use flour when rolling out the dough. Lightly flour your rolling pin to prevent sticking when rolling out the dough.
- Chill the cut-out shapes. Once you’ve cut out your Halloween shapes, place them in the refrigerator for about 10-15 minutes before baking. This helps the cookies maintain their shape during baking.
- Rotate the baking sheets during the baking. If you’re baking multiple sheets of cookies at once, rotate the sheets halfway through the baking time to ensure even browning. You can also do this if your oven has an uneven temperature.
- Cool the cookies before decorating. Allow the cookies to cool on the baking sheets for a few minutes before transferring them to a wire rack to cool completely. Decorating too soon can cause the icing to melt.
- For a full fall-flavored cut-out cookie, you can try a different sugar cookie base and make these Pumpkin Sugar Cookies.
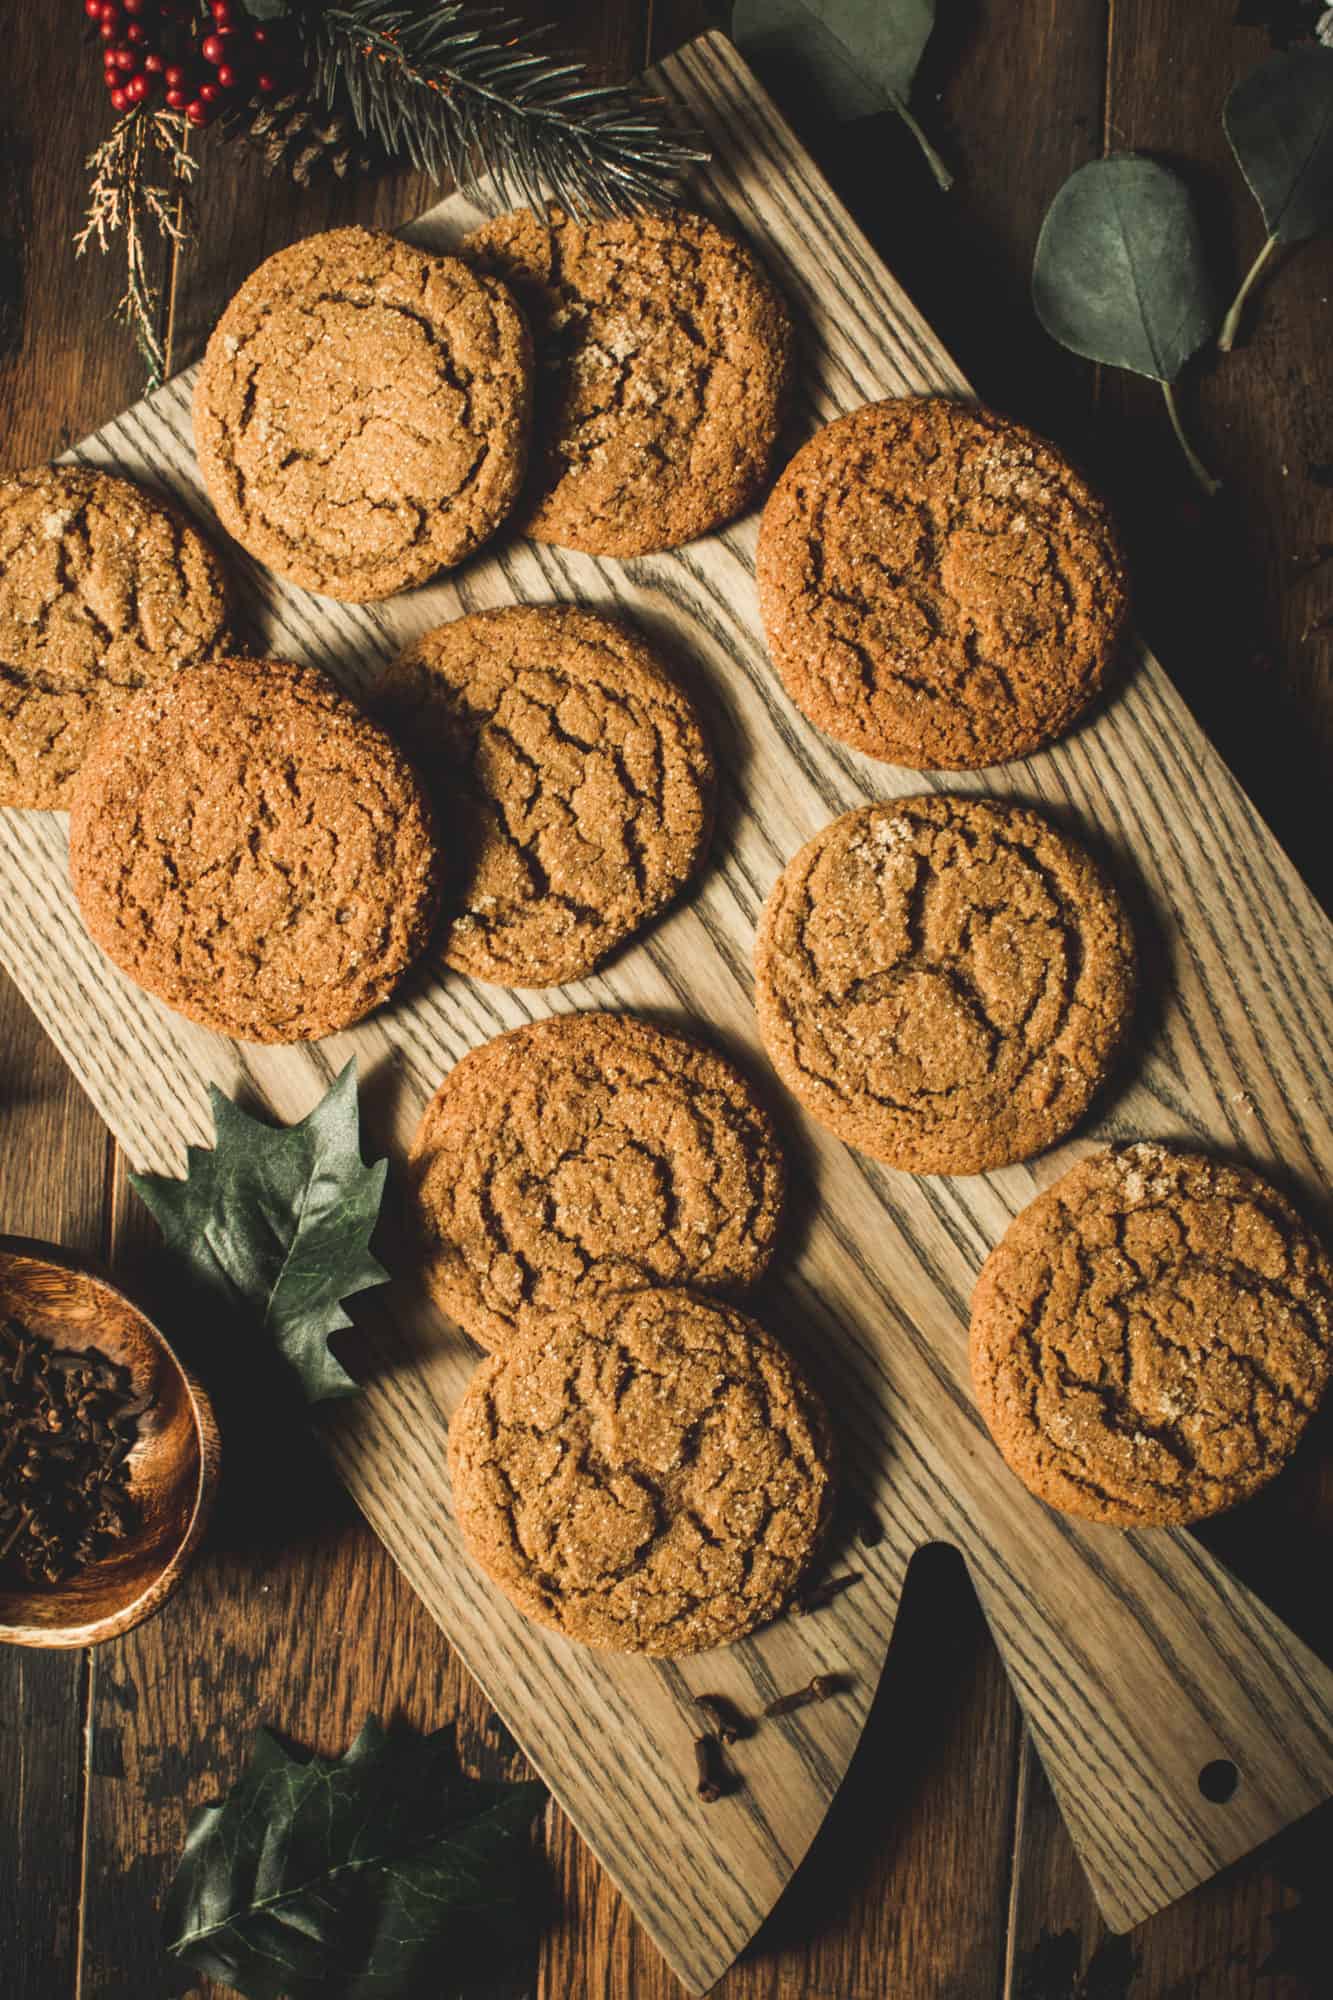
More Cookie Recipes

Halloween Sugar Cookies Recipe
Equipment
- Rolling Pin
- Parchment Paper or Silicone Baking Mat
- Halloween Cookie Cutters
- Piping Bags
- Piping Tips
- Gel Food Coloring
Ingredients
Sugar Cookies
- 1¼ cups Butter room temperature
- 1¼ cup Granulated Sugar
- 1 large Egg
- 1 Egg Yolk
- 1 teaspoon Vanilla Extract
- 3 cups All Purpose Flour
- 3/4 teaspoon Salt
- 1/2 teaspoon Baking Powder
Royal Icing
- 4 cups Powdered Sugar
- 1/4 cup Meringue Powder
- 6 – 8 tablespoons Water
- 1 teaspoon Vanilla
- Gel Food Coloring
Instructions
- Cream the butter and sugar. Place the butter and sugar into the bowl of an electric mixer and beat them together using the paddle attachment for 5 minutes or until light and fluffy.
- Scrape down the sides. Scrape the mixture down and add the egg, one egg yolk, and the vanilla. Mix until combined.
- Add the remaining ingredients. Pour the flour, salt, and baking powder into the mixing bowl and mix them into the batter until just combined.
- Chill the dough. Turn the dough out onto a floured surface and shape it into a ball. Then flatten it into a disc. Cover with plastic wrap and place it in the fridge to chill for 1 to 2 hours.
- Preheat the oven and shape the cookies. Once chilled preheat the oven to 325º F. Line 2 to 3 large baking sheets with parchment paper or silicone baking mats. Sprinkle your work surface with flour and roll the dough out to 1/4-inch thickness. Using cookie cutter cut out your cookies and place them on the prepared baking sheet. To maintain the ideal dough texture, be quick in your work to prevent it from warming up too much. Should you notice it getting too soft, pause your process and return any unused dough to the refrigerator. Allow it to chill for about 10 minutes to regain its desired firmness.
- Bake and cool. Place your formed cookies onto baking sheets, ensuring they're spaced about 3 inches apart. Bake in the oven for approximately 12-15 minutes, or until the edges show signs of setting. If your oven has uneven heating, consider rotating the baking sheet halfway through the baking duration for uniform results. After baking, let the cookies cool on the baking sheet for 5 minutes before gently transferring them to a wire rack. Allow them to cool completely before starting the delightful decorating process.
Royal Icing
- Make the royal icing. Combine the powdered sugar and meringue powder in the mixing bowl of an electric mixer. Next, gradually incorporate the water until you achieve a pleasantly thick frosting consistency. Continue beating at a medium speed for approximately 5 minutes or until stiff peaks become evident.
- Coloring the icing. Divide the frosting into separate bowls, each designated for the different colors you intend to employ in your decorating (the icing will be very thick). Introduce food coloring to each bowl until you attain your desired shade.
- Thin the icing. Gradually incorporate water into each color, adding one teaspoon at a time, until the consistency is akin to that of toothpaste. This will be your outlining consistency, suitable for piping borders, edges, or crafting intricate words and designs.
- Place the icing in bags. Transfer a portion of each color at this consistency into its own piping back and twist the ends closed. If you want to use "flood consistency" icing keep gradually diluting the remaining icing with additional water, adding one teaspoon at a time, until you achieve a pleasing consistency where it melds back into itself within 5-10 seconds. This texture should closely resemble that of honey.