All Recipes
 Beverages
 Breakfast
 Appetizers
 Dinner
 Sides
Sides
 Dessert
 Videos
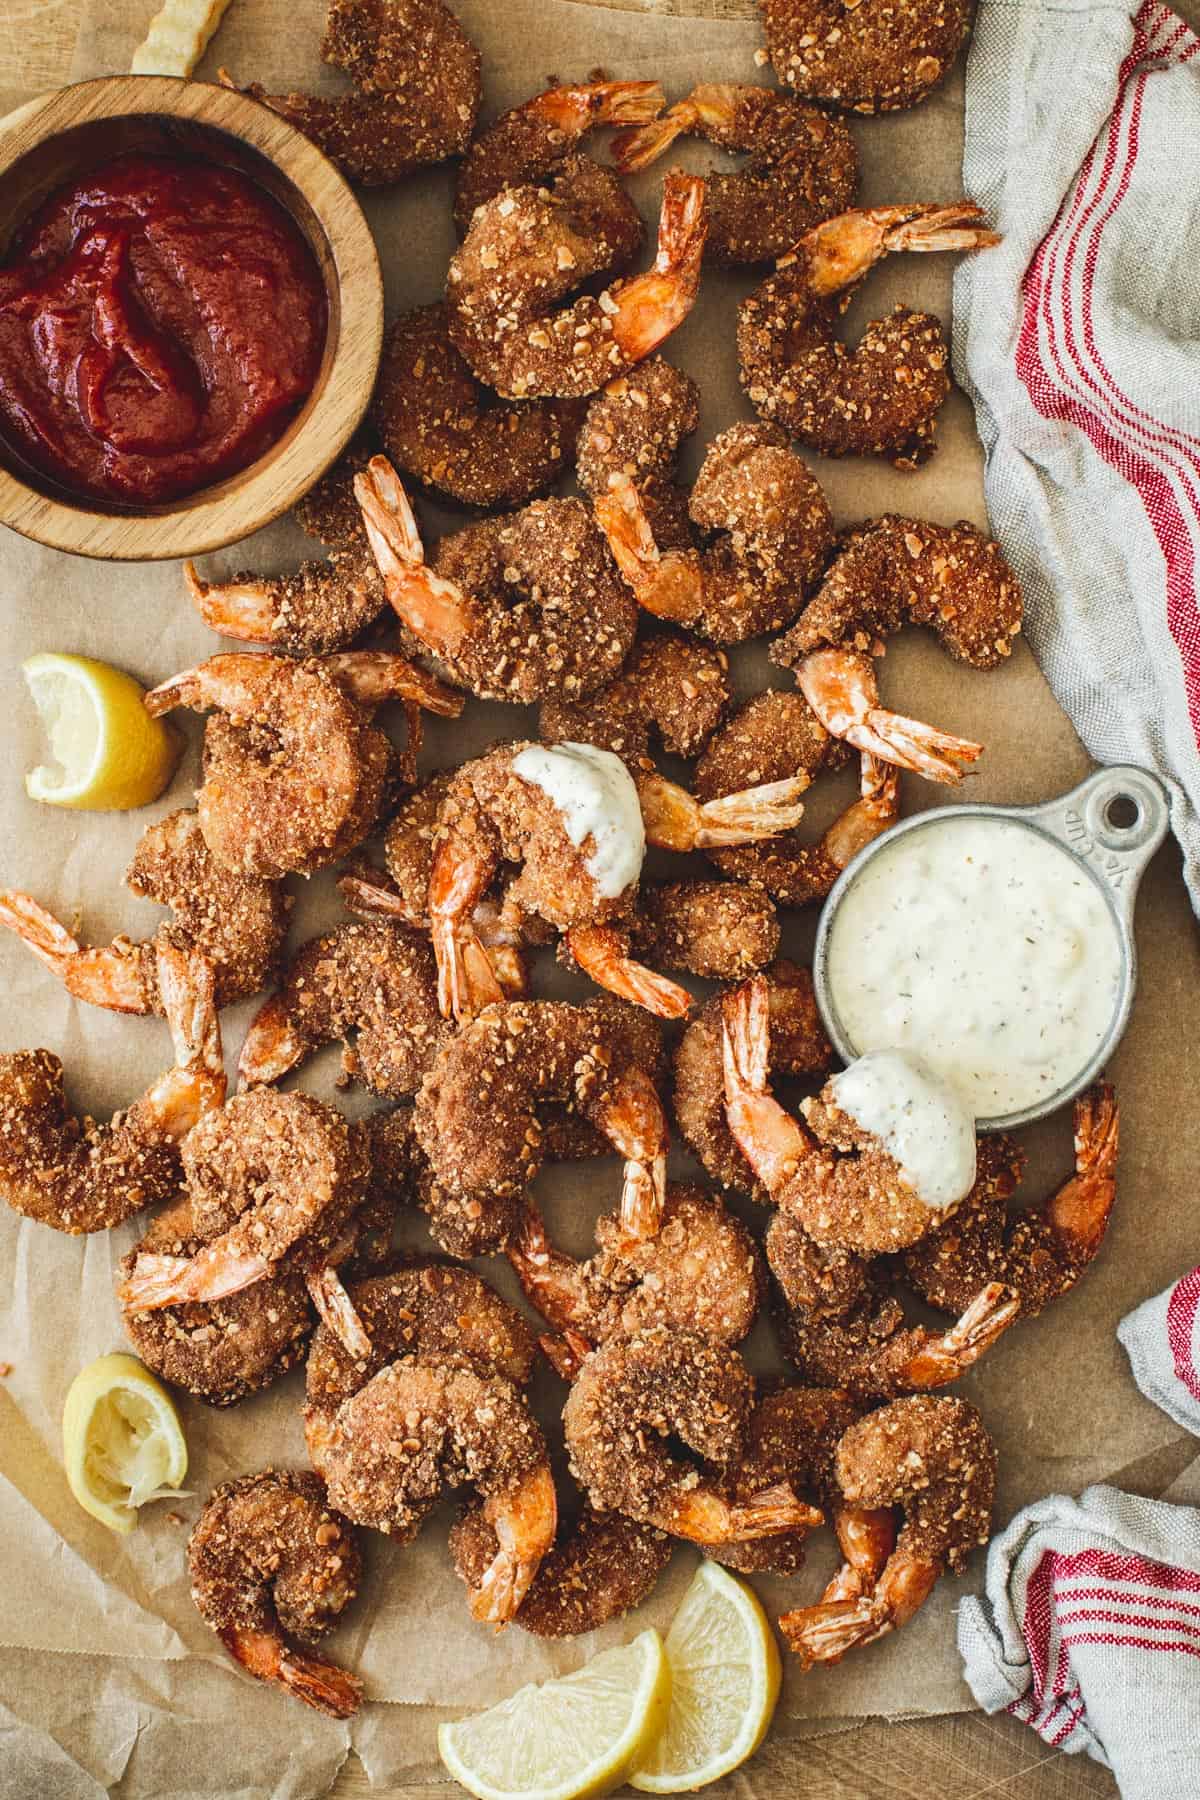
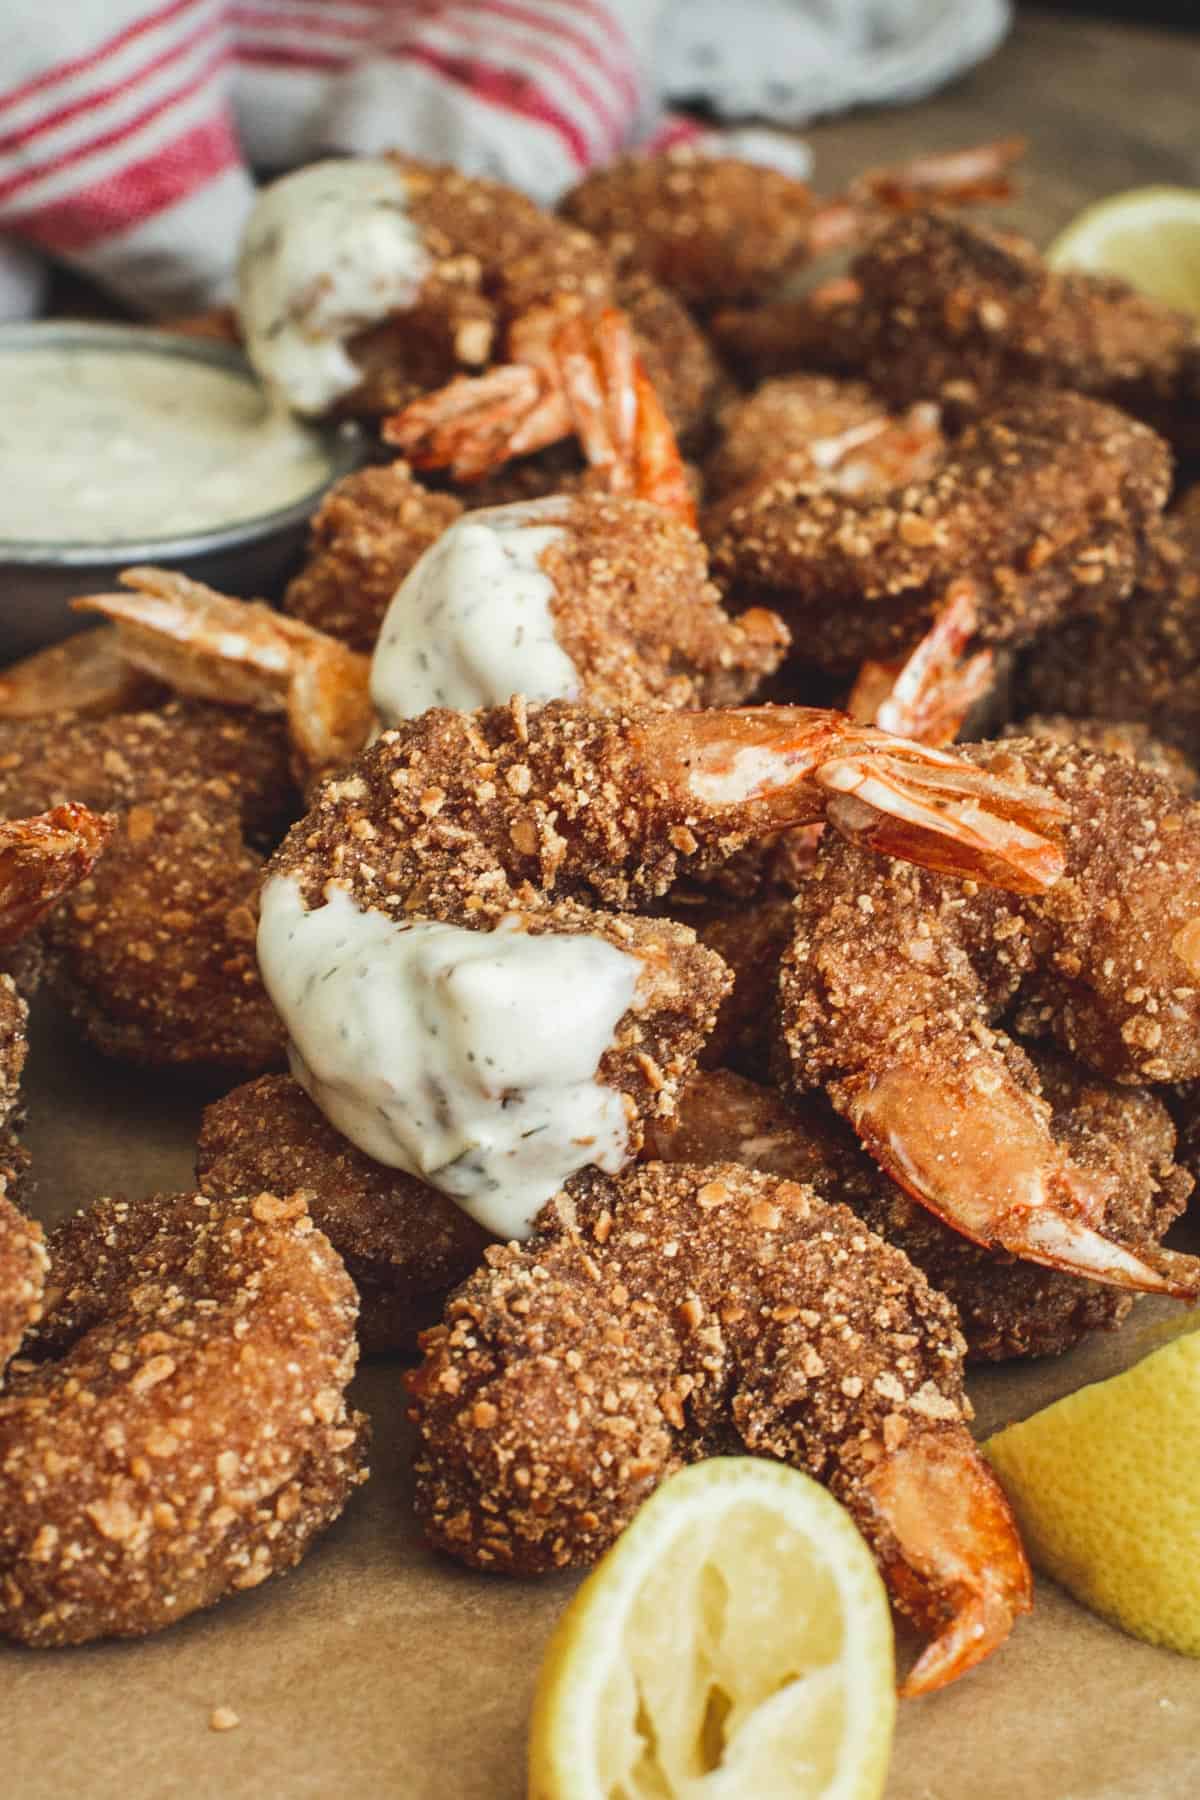
Covered in a crunchy breadcrumb and panko coating with hints of seasoning and then fried until golden. Crispy Breaded Shrimp is easy to make and perfect for a party appetizer or as a main dish to dip in tartar sauce or cocktail sauce.
Why This Recipe Works
Fried shrimp or crispy breaded shrimp is one of my favorite appetizers to order and one that reminds me of childhood beach trips. Now that I live at the beach and also in an area with fresh shrimp is in abundance I’ve found that making it at home is even better than indulging in it at a restaurant.
Everything about this recipe is fresher and crispier than what you would get in a restaurant and it’s absolutely easy to make. After setting up an assembly line of bowls filled with the coating the only next step is to coat the shrimp and fry it, which takes only minutes.
Whether you’re looking for a fun finger-food appetizer or just some deliciously crispy fried shrimp this recipe is one everyone will find irresistible. Try dipping it in some lime crema for an extra tangy flavory.
You can also just as easily bake the shrimp for a healthier option that’s just as crispy and crunchy and will work great in Baked Crispy Tacos.. I’ve included instructions below.
Ingredients Needed
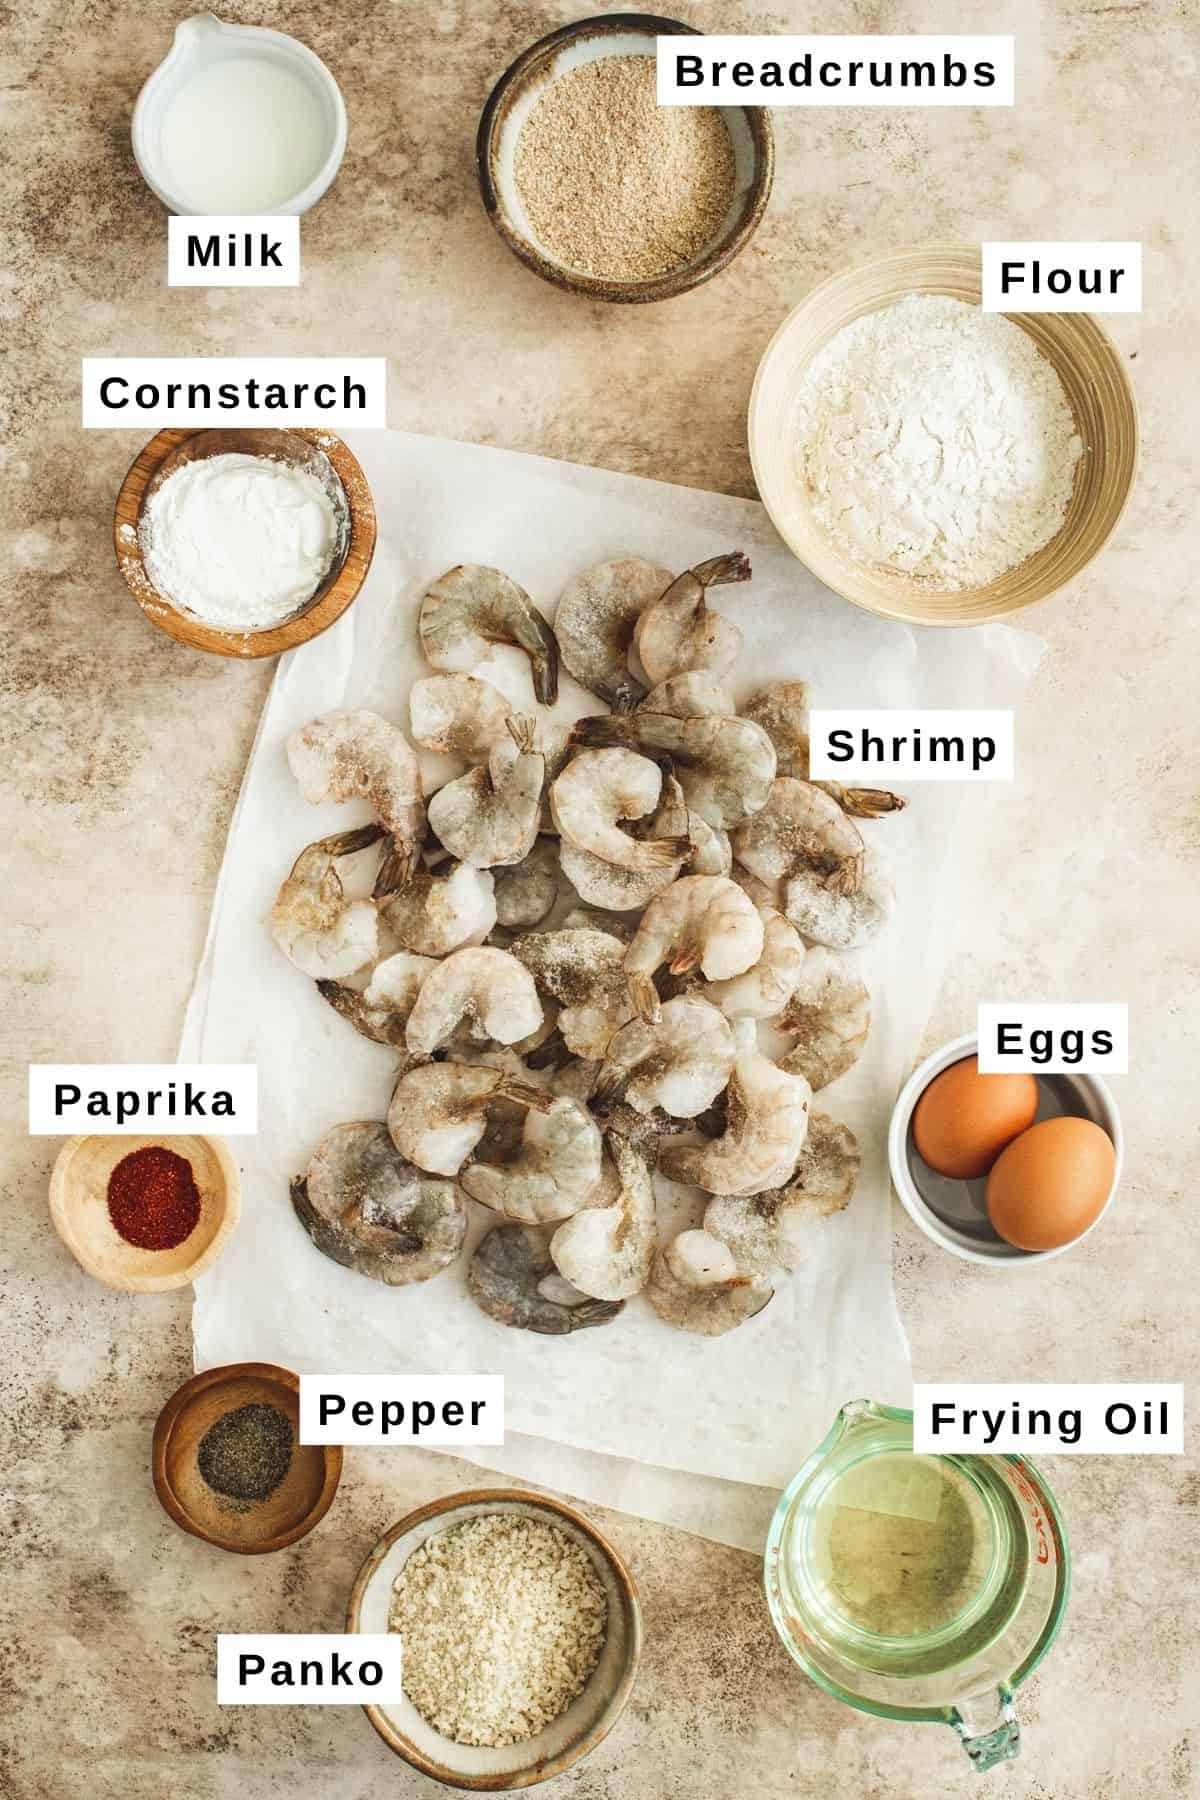
Ingredient Notes
- Shrimp: for this recipe you will need shrimp that are peeled and deveined, but I prefer them to have the tails on. This makes it easier when serving them because you can pick them up by the tail piece. Large sized shrimp will also work best and they can be fresh or previously frozen.
- Oil: you will need an oil with a high smoke point for frying and the one that is best for frying fish or shrimp is peanut oil, which has a slightly nutty flavor. Other oils that will work are safflower oil, soybean oil, corn oil, sunflower oil, cottonseed oil, and canola oil.
- Breadcrumbs and Panko: The combination of both breadcrumbs and panko crumbs mixed together gives the outer coating a super crispy texture that covers each shrimp completely. You can use one or the other, but my preference is a combination of the two.
Additional Seasoning
The seasoning mixture in this recipe is simple and subtle, however, you can change it up to add some additional flavors and seasoning if you’d like.
- Citrus: squeeze some lemon or lime juice into the second coating mixture for a tangy twist on the flavor and then squeeze some additional juice on top after you’ve fried the shrimp.
- Spices: adding in some spices to the first coating for the shrimp will bring in some additional flavor as well as a little kick depending on what you choose. Some great options are chili powder, cajun seasoning, Italian seasoning, curry powder, or Chinese five spice.
- Sauces: there are so many sauces you can can dip these shrimp into. Some of my favorites are cocktail sauce, tartar sauce, sweet and sour sauce, or honey mustard.
Step-by-Step Instructions
Frying shrimp is easy and this recipe includes a three-step coating process to ensure you get perfectly crispy and crunchy breaded shrimp. To set it up arrange the 3 different coatings in an assembly line to make covering the shrimp easy before you fry it.
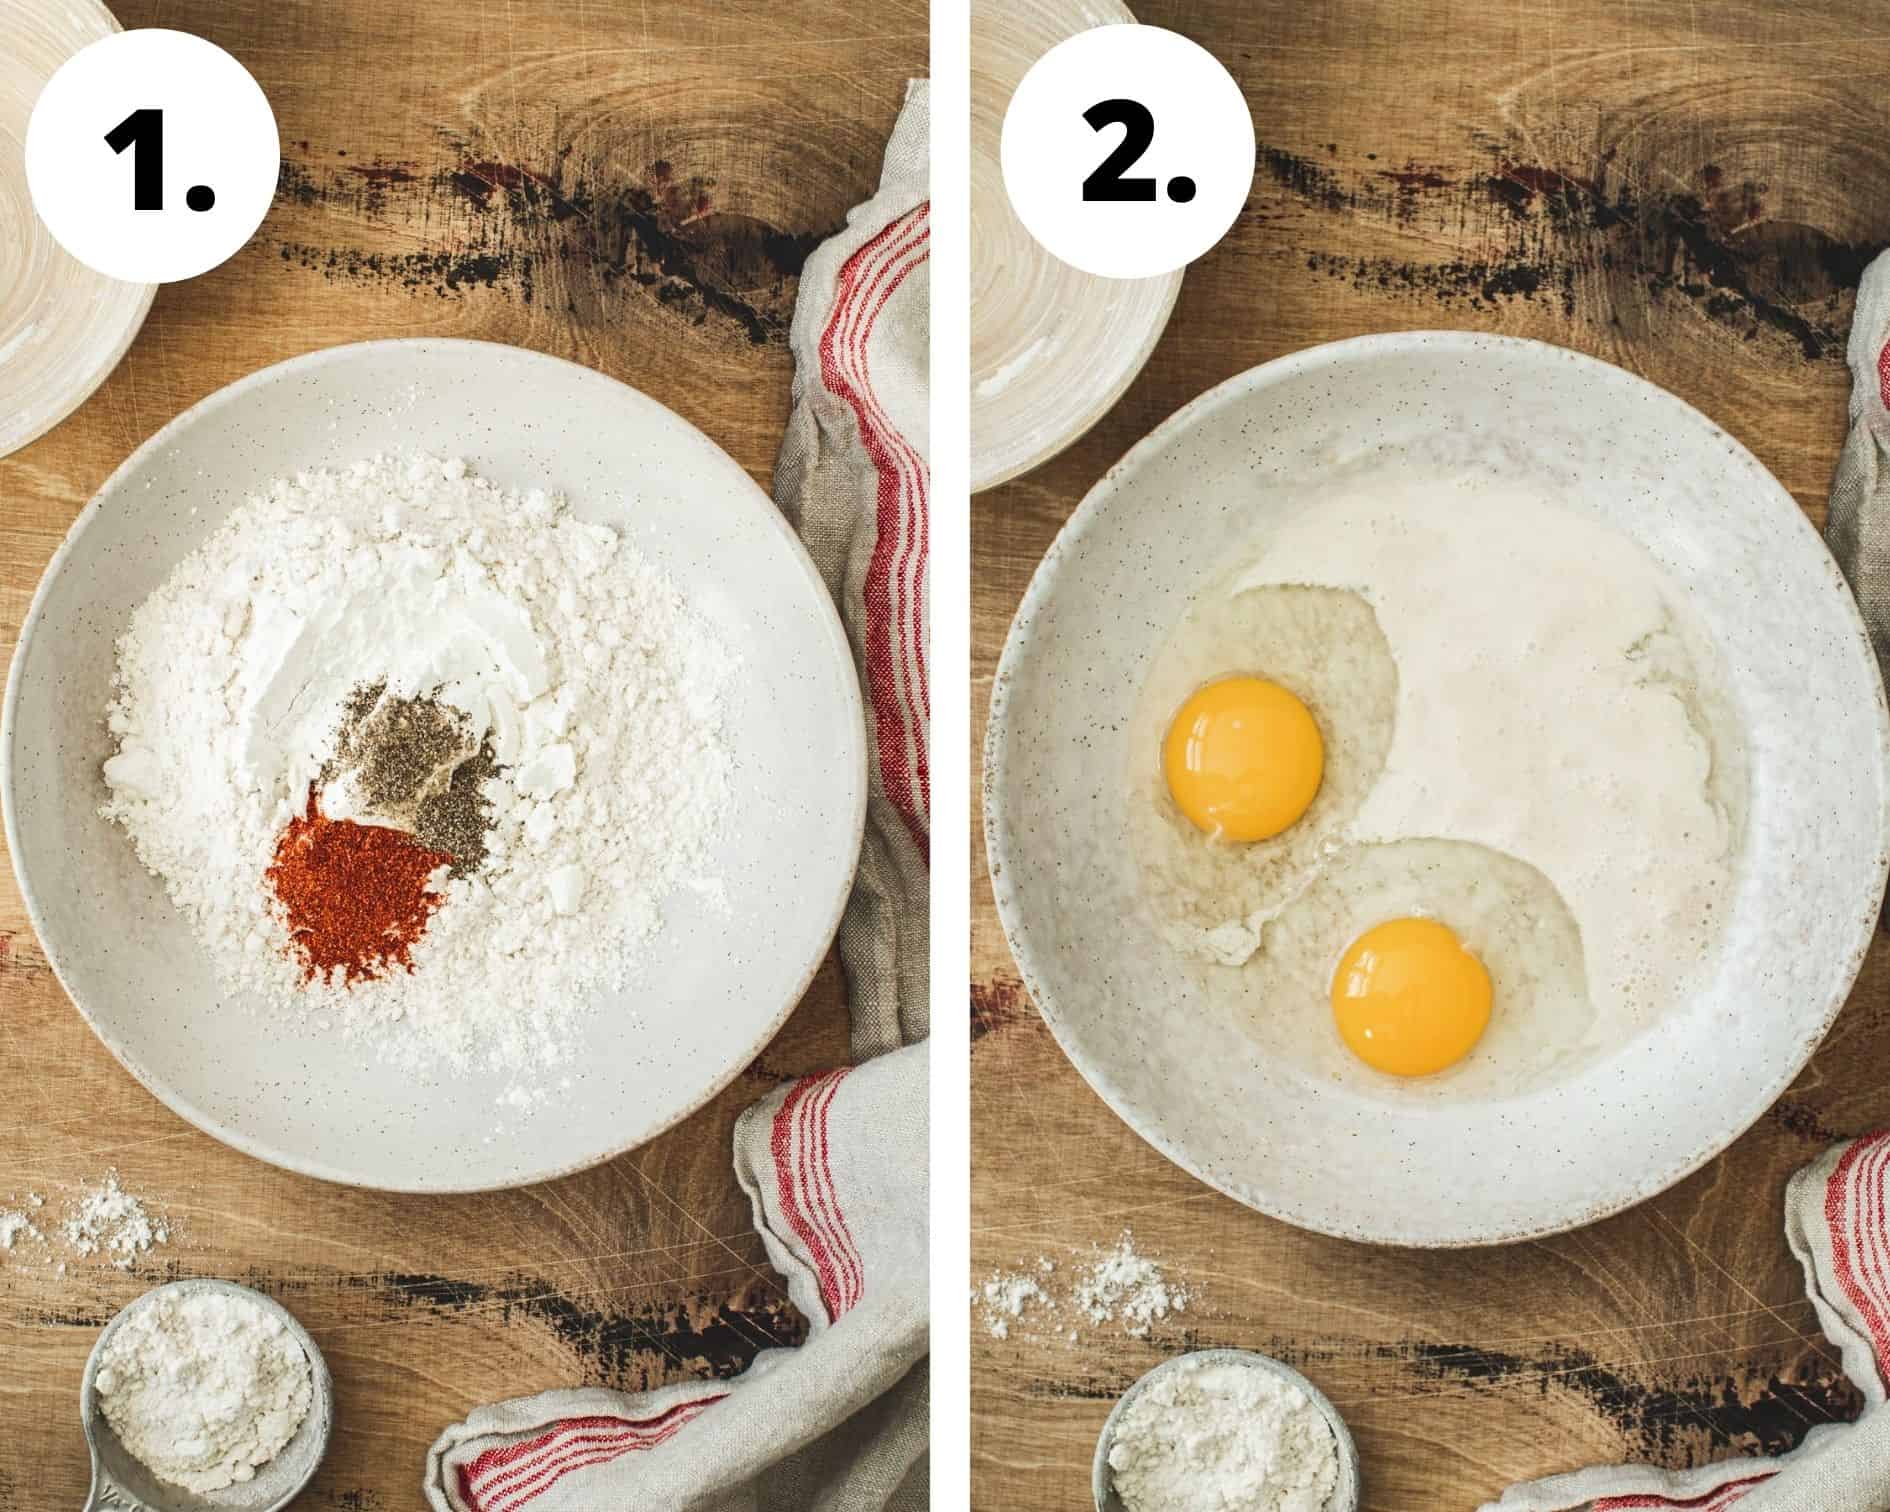
- Whisk the flour, cornstarch, pepper, and paprika (all of the first coating ingredients) together until well mixed in a medium-sized bowl.
- Using a separate medium-sized mixing bowl beat the eggs and milk together and place it next to the other first coating ingredients (If your bowls are all different sizes this is okay, just don’t use one that’s too small otherwise it will make a mess).
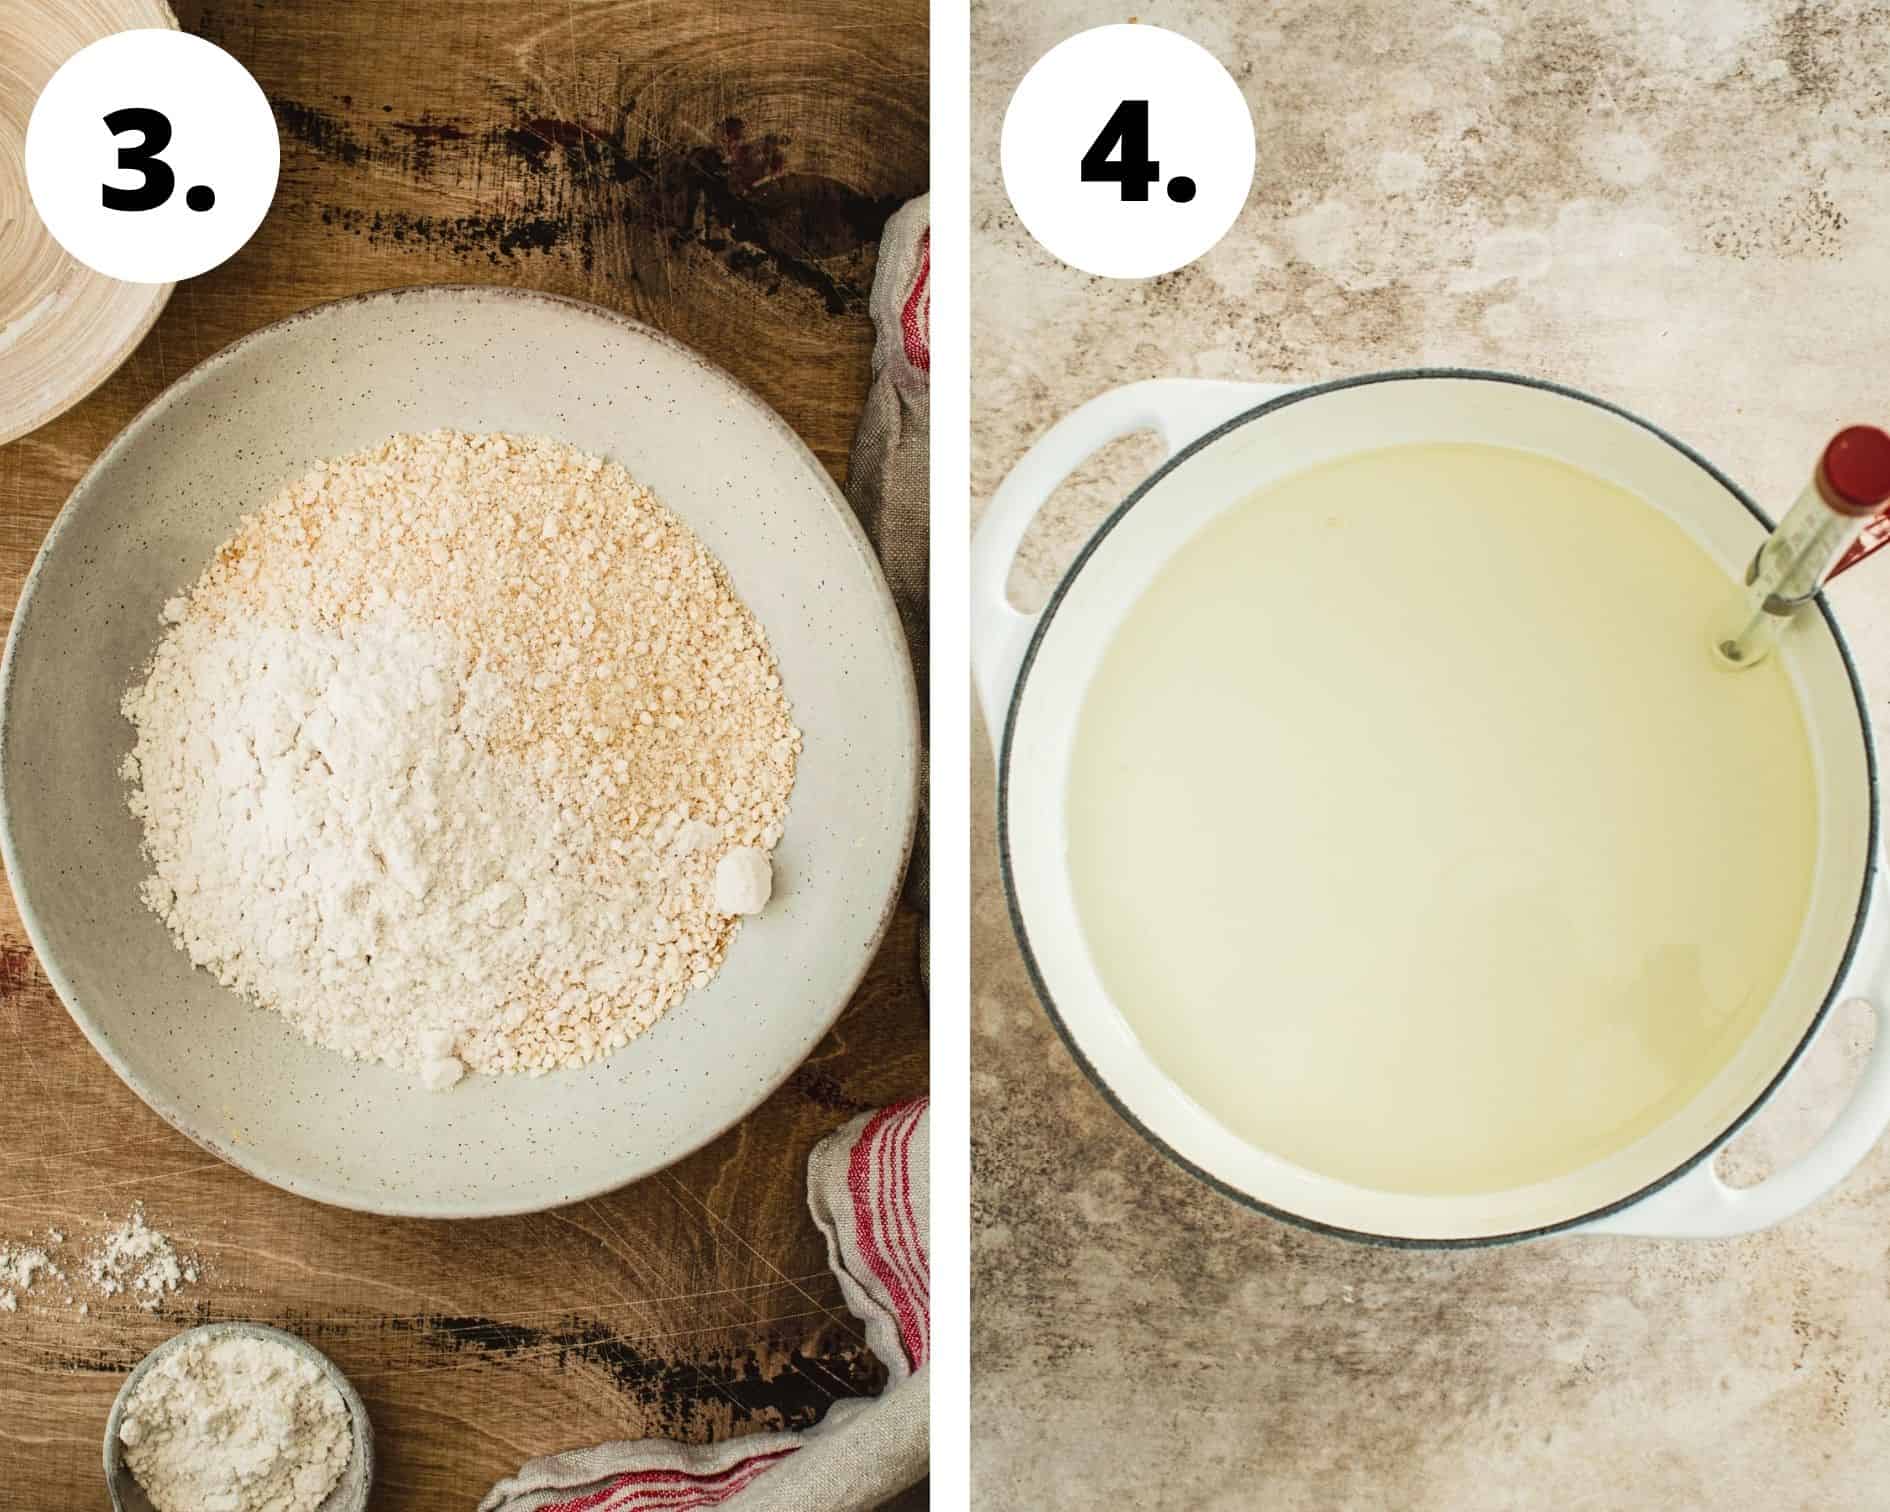
- In another separate medium-sized mixing bowl whisk the third coating ingredients, breadcrumbs, panko crumbs, and flour together and sit it with the other coating bowls (it’s easiest to place them in a row like an assembly line).
- Place about 2 inches of oil, about 4 to 6 cups (depending on the size of your pot) in a Dutch oven or skillet with high sides. Clip a candy thermometer to the size of the pot or skillet and heat the oil over medium-high heat until it reaches 375ºF or when the oil sizzles when a few breadcrumbs are dropped in.
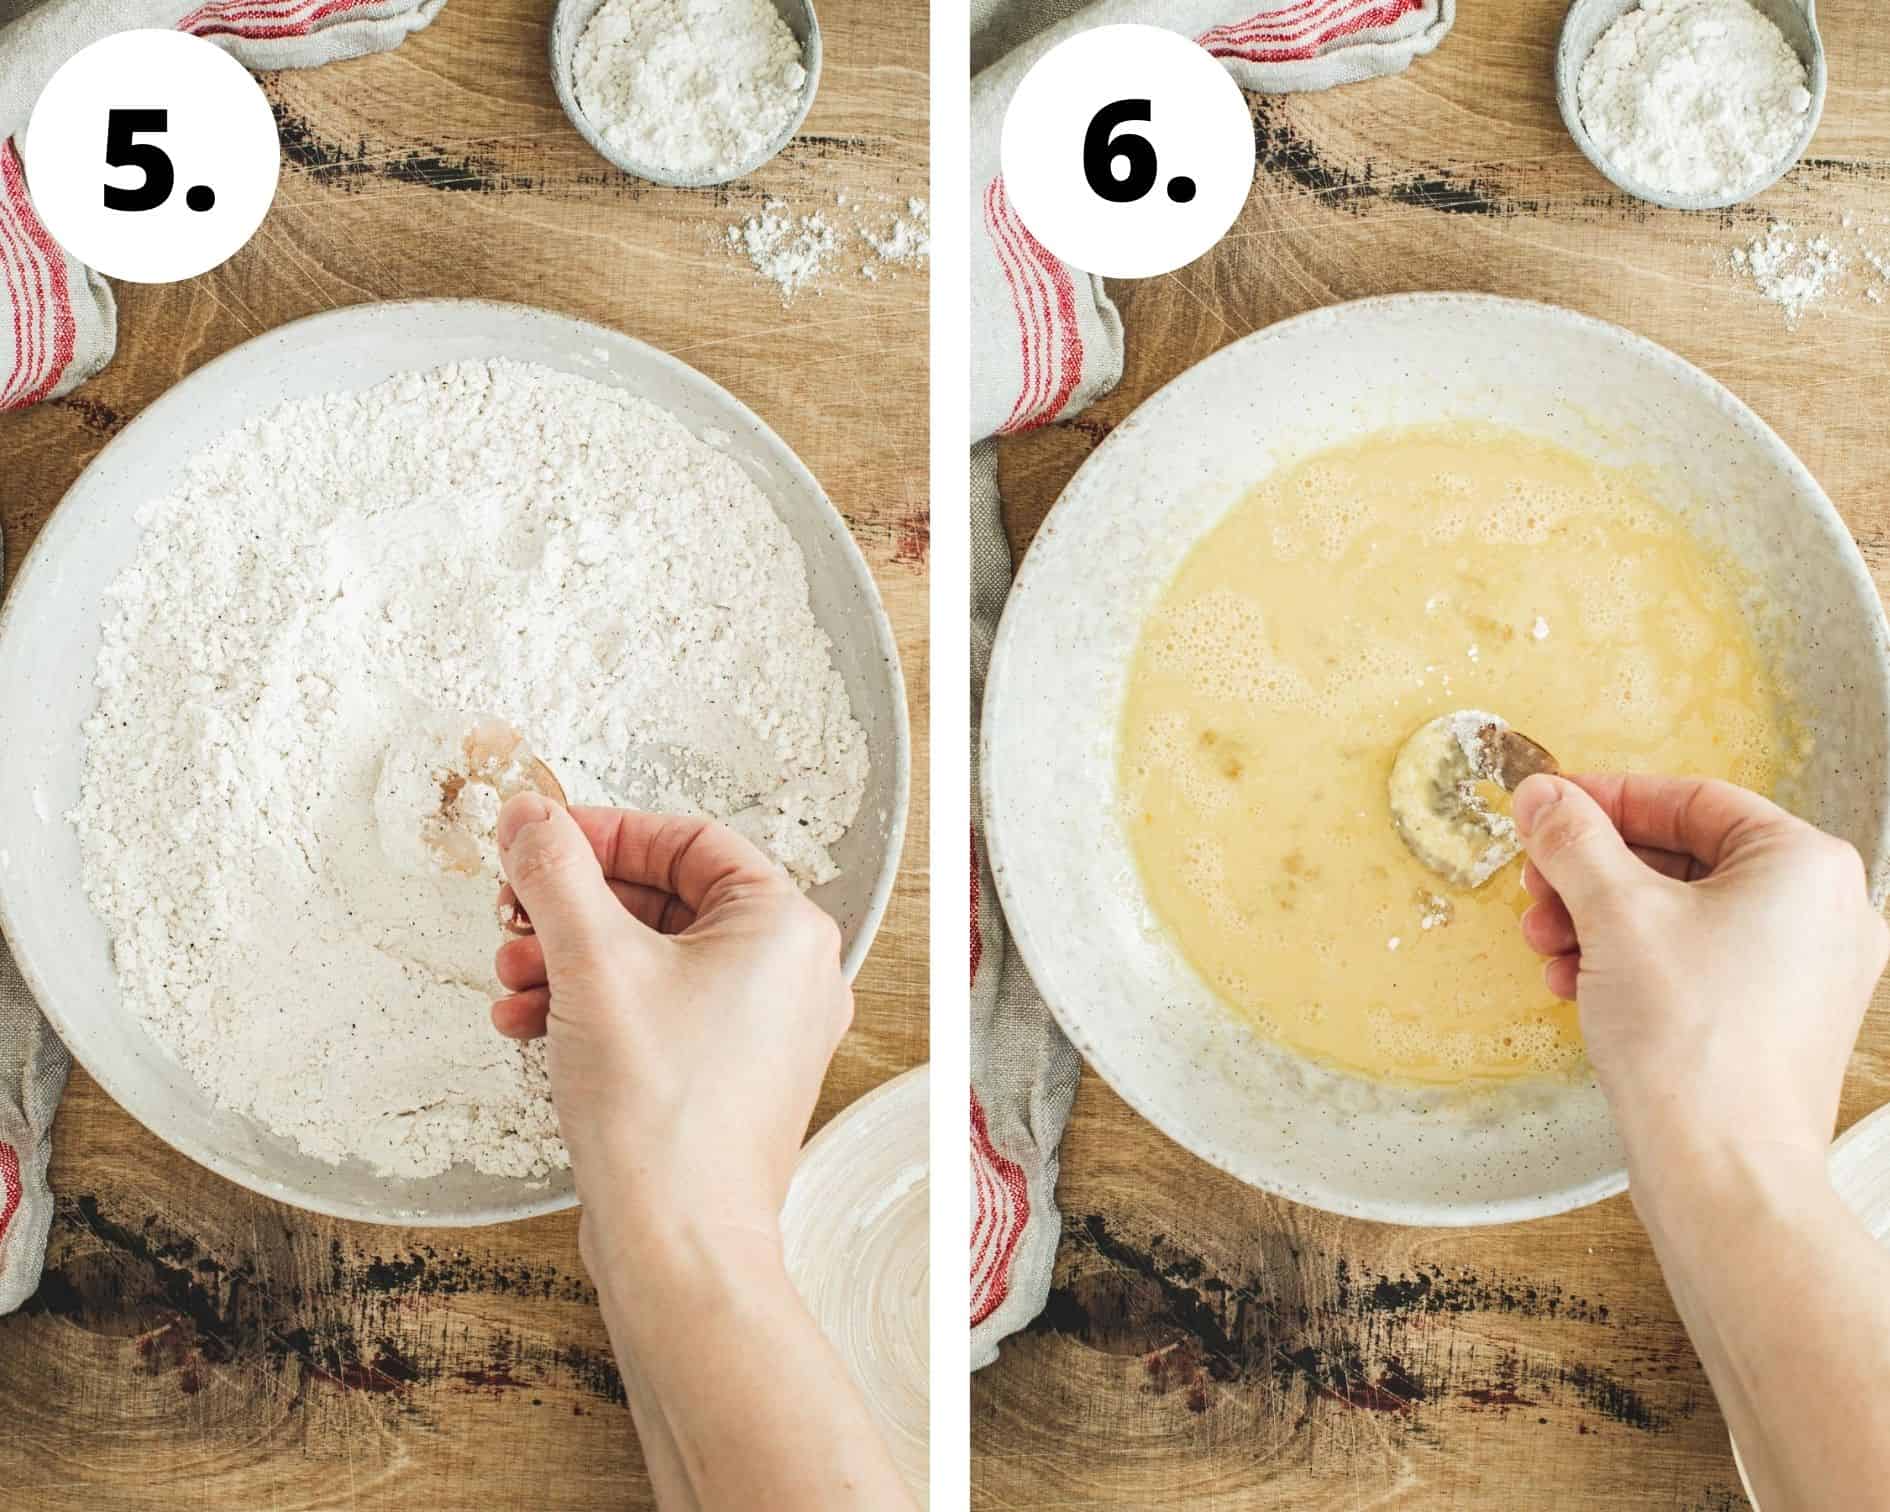
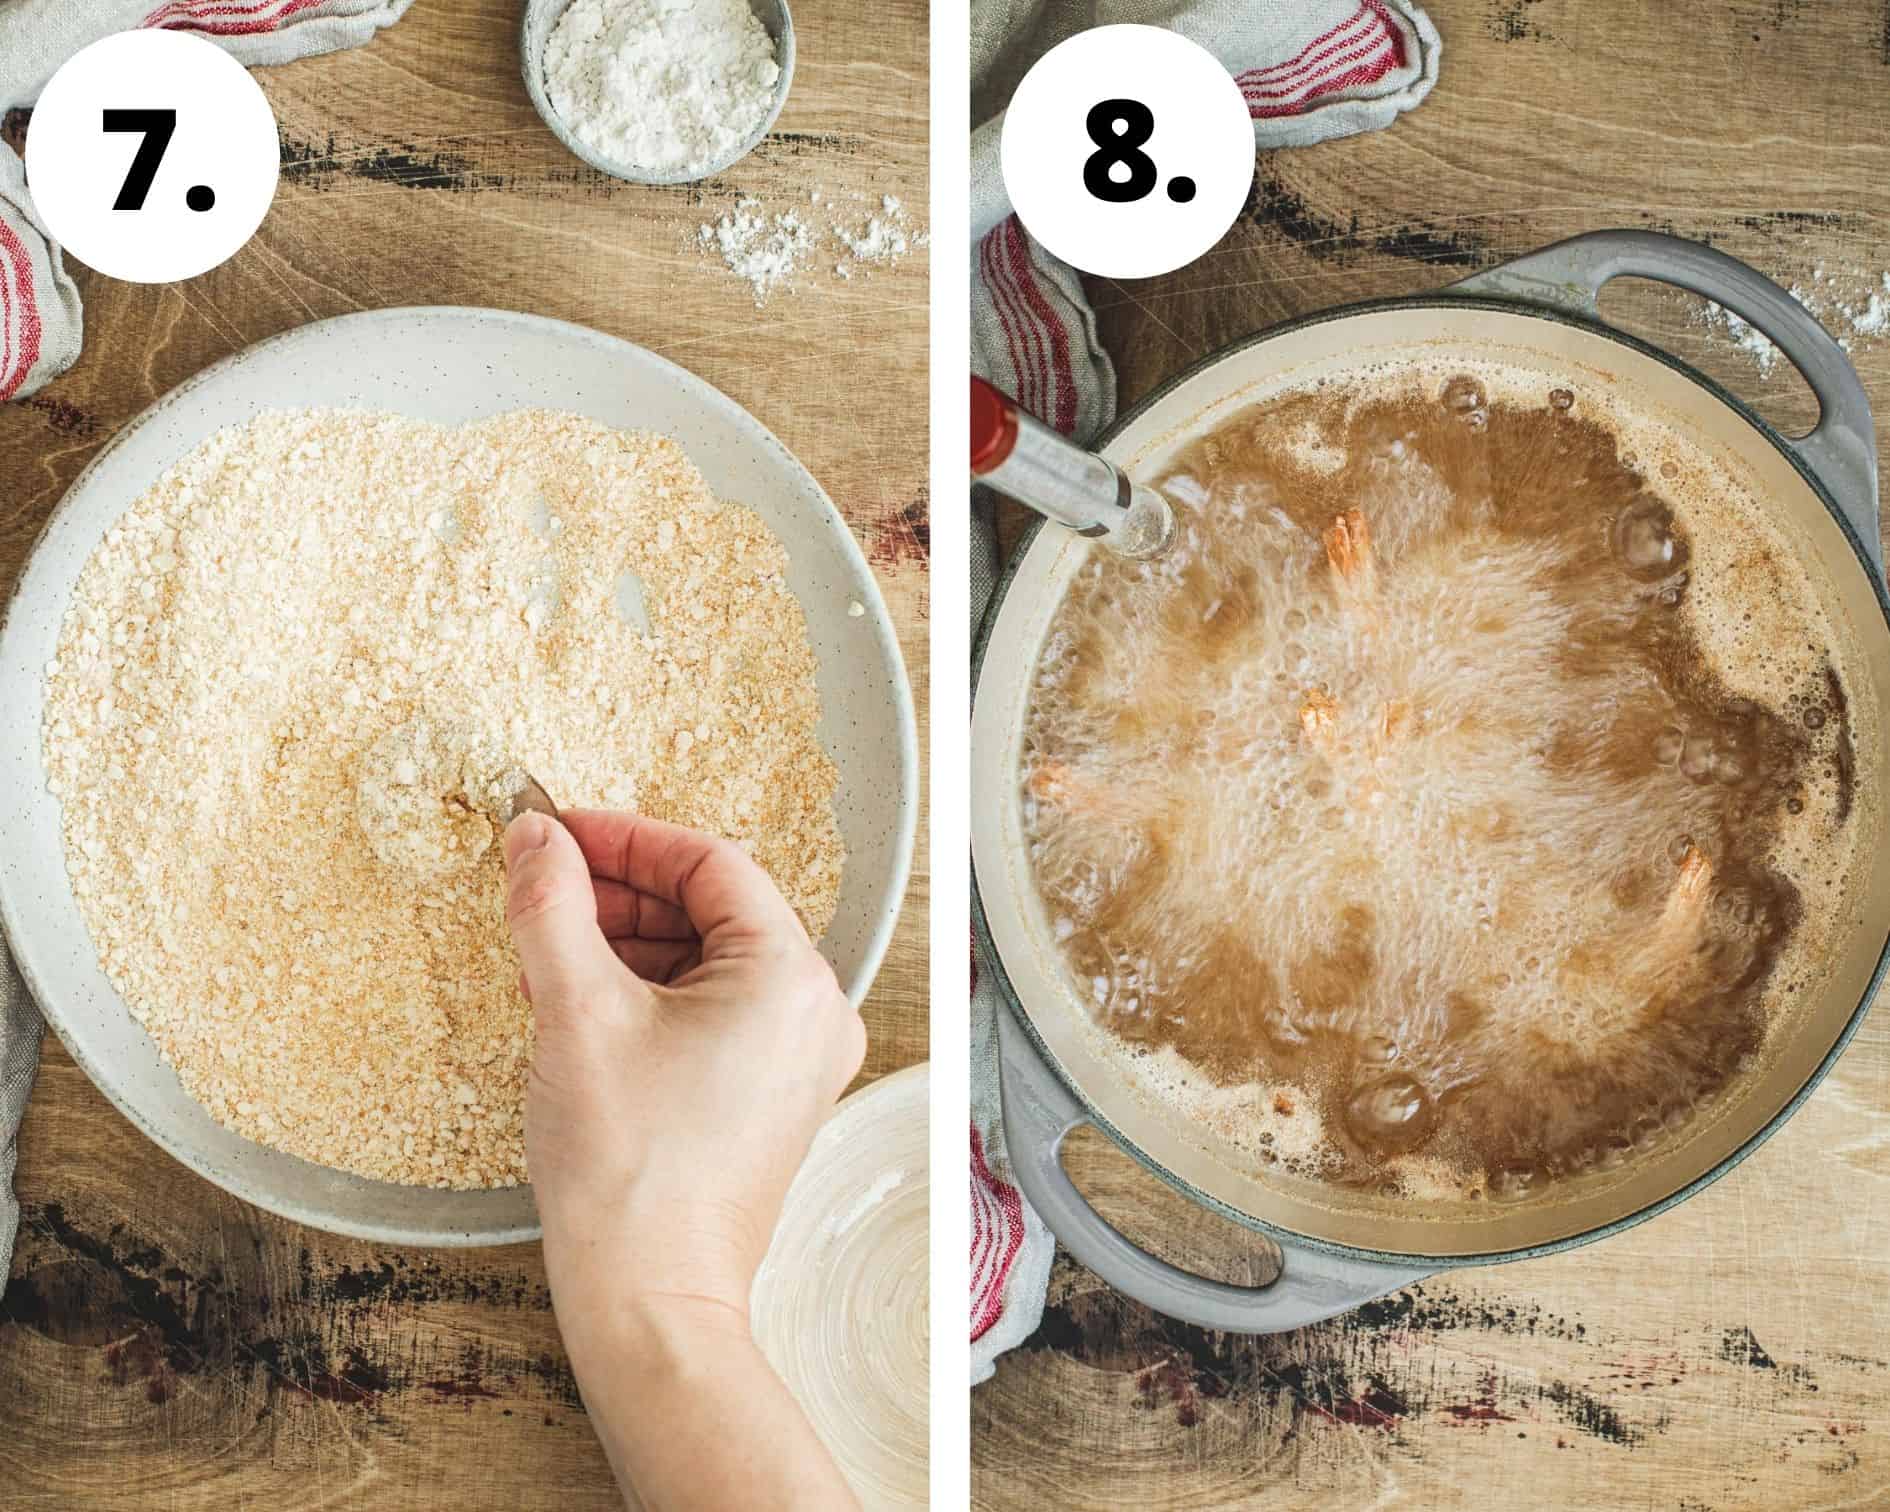
- Take the shrimp and first dredge it into the flour/cornstarch mixture first, then the egg/milk mixture second, and lastly into the breadcrumb mixture making sure you fully coat the entire shrimp each time. Set the shrimp aside on a plate or wire rack.
- Working in batches carefully drop about 5 to 6 coated shrimp into the oil and fry for about 2 to 3 minutes (depending on size) and flip for another 2 minutes.
- Use a slotted spoon or a wire skimmer to remove the shrimp from the oil and place it on a paper towel-lined plate or a wire rack fitted over a baking sheet.

Oven-Baked Instructions
- Preheat the oven to 400ºF and place a wire rack on top of a rimmed baking sheet. Coat the wire rack with cooking spray and set aside.
- Follow recipe instructions 1 through 3 for preparing the three coatings and arrange your assembly line for coating the shrimp in the batter.
- Take the shrimp and first dredge it into the flour/cornstarch mixture, then the egg/milk mixture second, and lastly into the breadcrumb mixture making sure you fully coat the entire shrimp each time.
- Place the shrimp in a single layer on the prepared baking sheet leaving room between each piece.
- Bake for 12 to 15 minutes until the outer layer turns a golden brown. Serve immediately.
How to Peel and Devein Shrimp
I prefer to purchase the shrimp I cook with already peeled and deveined, but for this recipe, I like them to have the tails on. This makes serving them as an appetizer easier. If you can’t find peeled and deveined shrimp with the tails on then here’s how to do it yourself.
- If the shrimp was previously frozen let it thaw compeltely.
- Remove the legs completely first, then firmly hold the tail and peel off the shell (if the tail piece comes off too that’s okay). Leave the last piece of the shell closest to the tail in tact.
- Using a sharp pairing knife, carefully slice about 1/8 into the shrimp along the back from the top/front of the shrimp to the tail.
- You will then see a dark vein which you can use the tip of your knife to scrape out.
Helpful Equipment
- Large Dutch Oven: I love my Dutch oven in use it all the time. It’s especially great for recipes like this but for all boiling and making large batches of soups and stews.
- Candy Thermometer: anytime I’m frying something I clip a thermometer to the side of my pot. This will ensure the oil is always at the correct temperature.
- Wire Skimmer: a slotted spoon will work just fine, but a wire skimmer is one of those essential tools that makes frying anything easier.
- Baking Sheet with Wire Rack: once you’ve fried the shrimp it’s best to place them on a wire rack. Then place the wire rack on top of a rimmed baking sheet. This allows the shrimp to cool evenly without getting soggy on the bottom. Paper towels will absorb the steam from the shrimp, which then makes the bottom breading layer damp and not crispy.
Serving Suggestions
There’s more than one way to enjoy these shrimp and all my favorite options are listed below.
- Appetizer: serve these shrimp at a party or as an app when entertaining.
- Tacos: remove the tails and add these shrimp to a taco for one great option for Taco Tuesday.
- Main Dish: add some fries and hush puppies and you’ll have one delicious southern style meal.
- Sandwiches: you can use these shrimp to make a tasty Po’ Boy or a delicious shrimp roll.
Storage Information
- Freezing Instructions: You can freeze these fried shrimp by first flash freesing them. To do this place the shrimp in a single layer on a baking sheet. Then place it in the freezer for about 1 hour. Then place the shrimp in a freezer-safe container or a resealable freezer-safe bag. The shrimp will last for about 2 months. Note: these shrimp are best enjoyed fresh. While they will freeze and still taste good, they’re much better eaten after they’re first fried.
- Leftovers: these shrimp tend to lose their crispiness over time. If you end up with leftovers you can store it in an ait-tight container in the fridge for up to 3 days.
Reheating Instructions
The best way to reheat the shrimp is in the oven. Other methods such as the microwave leave the shrimp slightly soggy. Trying to re-fry them will add too much oil to the outer coating. Below are the instructions for reheating it in the oven.
- Arrange a wire rack over a baking sheet. Place the leftover shrimp in a single layer on the rack with space in between.
- Heat the oven to 350º F and cook the shrimp for about 5 minutes or until heated through. A toaster oven will also work for reheating.
Recipe Notes and Expert Tips
- If the egg mixture gets to sticky from the egg white whisk in an additional 1 tablespoon of milk to smooth it out. This way it’s not clumping to the shrimp when dipped in.
- Watch the temperature of the oil. As you fry the shrimp the temperature of the oil will decrease. You may need to slightly increase the temperature of your stove to get back to 375ºF. I keep a candy thermometer clipped to the side of my pan so I always know the exact temp of the oil.
- Don’t overcrowd the shrimp while frying it. Work in batches and make sure there is room between each piece of shrimp. Avoid them sticking together and then not cooking entirely.
- Flip the shrimp halfway through frying. You will only need to fry the shrimp for a couple of minutes. To get an even golden brown color flip the shrimp over to the other side halfway through the frying.
FAQs
Since there are 3 coats of batter on these shrimp only a little bit, crumbs really will fall off when you’re frying it. The batter should remain intact during the frying process.
Absolutely. You’ll need to swap the flour, breadcrumbs, and panko crumbs for gluten-free versions and then double-check all the other ingredients to make sure they don’t contain gluten.
Related Recipes
If you made this Crispy Breaded Shrimp I want to hear all about it! Share a photo and tag me on Instagram using @AimeeMarsLiving and #AimeeMars so I can see your beautiful work. Enjoy!
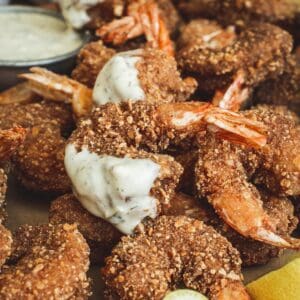
Crispy Breaded Shrimp
Equipment
- 1 Large Dutch Oven
- 1 Candy Thermometer
- 1 Wire Skimmer or Slotted Spoon
- 1 Wire Rack and Baking Sheet optional
Ingredients
- 1 lb Large Shrimp peeled and deveined
- Peanut Oil or other frying oil with a high smoke point.
First Coating
- 3/4 cup Flour
- 1/4 cup Cornstarch
- 1/2 teaspoon Ground Black Pepper
- 1/2 teaspoon Paprika
Second Coating
- 2 large Eggs
- 2 tablespoons Milk
Third Coating
- 1/2 cup Breadcrumbs
- 1/2 cup Panko Crumbs
- 1/4 cup Flour
Instructions
- In a medium-sized mixing bowl whisk the flour, cornstarch, pepper, and paprika (all of the first coating ingredients) together until well mixed.
- Using a separate medium-sized mixing bowl beat the eggs and milk together and place it next to the other first coating ingredients.
- In another separate medium-sized mixing bowl whisk the third coating ingredients, breadcrumbs, panko crumbs, and flour together and sit it with the other coating bowls (it's easiest to place them in a row like an assembly line).
- Place about 2 inches of oil, about 4 to 6 cups (depending on the size of your pot) in a Dutch oven or skillet with high sides. Clip a candy thermometer to the size of the pot or skillet and heat the oil over medium-high heat until it reaches 375ºF or when the oil sizzles when a few breadcrumbs are dropped in.
- Take the shrimp and first dredge it into the flour/cornstarch mixture, then the egg/milk mixture, then into the breadcrumb mixture making sure you fully coat the entire shrimp each time. Set the shrimp aside on a plate or wire rack.
- Working in batches carefully drop about 5 to 6 coated shrimp into the oil and fry for about 2 to 3 minutes (depending on size) and flip for another 2 minutes.
- Use a slotted spoon or a wire skimmer to remove the shrimp from the oil and place it on a paper towel-lined plate or a wire rack fitted over a baking sheet.
- Before adding the next batch of shrimp to the oil make sure the temperature returns to 375ºF. Repeat until all the shrimp have been cooked.
Notes
- If the egg mixture gets to sticky from the egg white you can whisk in an additional 1 tablespoon of milk to smooth it out so it’s not clumping to the shrimp when dipped in.
- Watch the temperature of the oil. As you fry the shrimp the temperature of the oil will decrease. You may need to slightly increase the temperature of your stove to get back to 375ºF. I keep a candy thermometer clipped to the side of my pan so I always know the exact temp of the oil.
- Don’t overcrowd the shrimp while frying it. Work in batches and make sure there is room between each piece of shrimp to avoid them sticking together and then not cooking entirely.
- Flip the shrimp halfway through frying. You will only need to fry the shrimp for a couple of minutes, but to get an even golden brown color flip the shrimp over to the other side halfway through the frying.
Reheating Instructions
- Arrange a wire rack over a baking sheet and place the leftover shrimp in a single layer on the rack with space in between.
- Heat the oven to 350º F and cook the shrimp for about 5 minutes or until heated through. A toaster oven will also work for reheating.