All Recipes
 Beverages
 Breakfast
 Appetizers
 Dinner
 Sides
Sides
 Dessert
 Videos
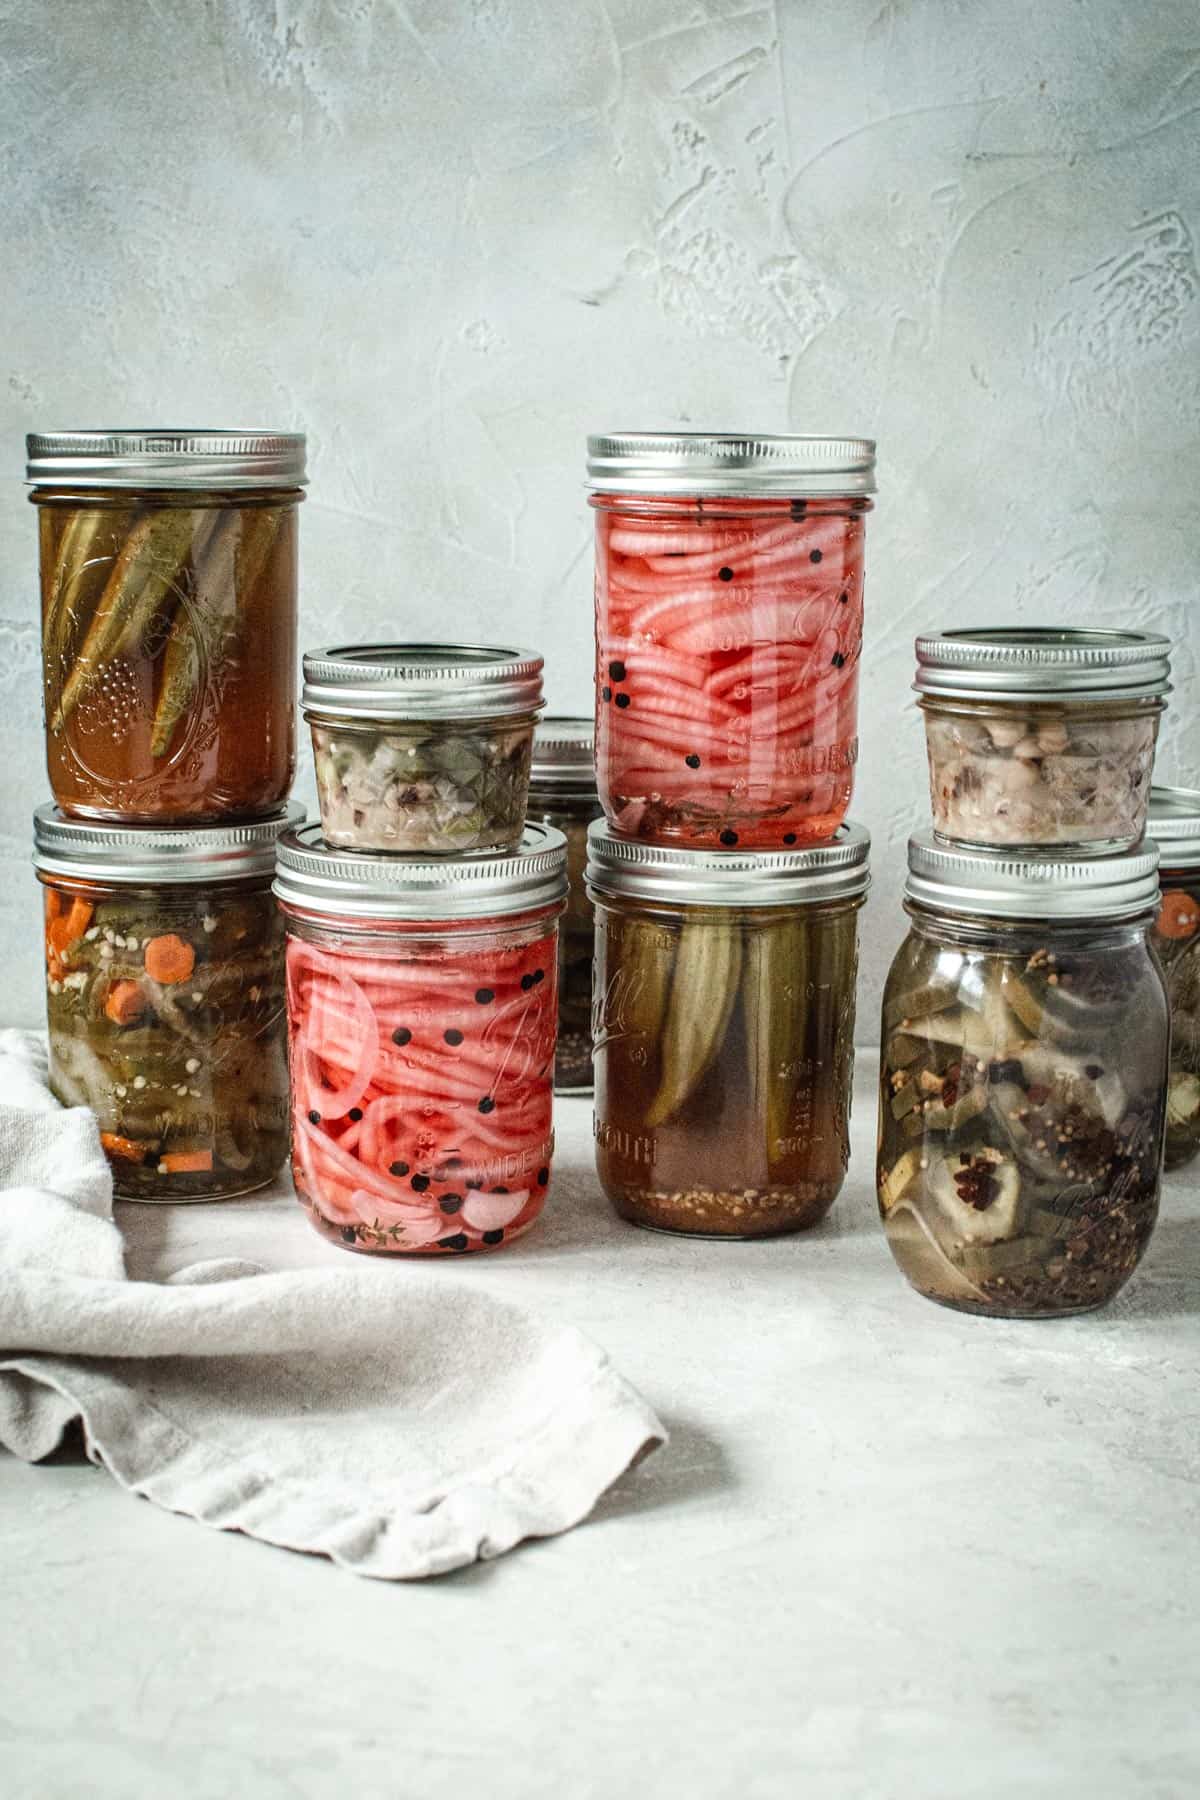
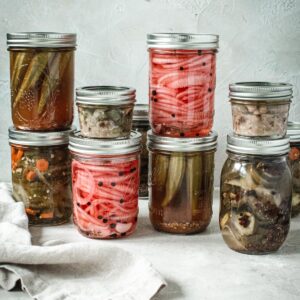
Want to preserve fresh summer vegetables and add a deliciously tangy and tart flavor in the process? This guide for making refrigerator Quick Pickled Vegetables will show you how to extend the shelf-life of just about any vegetable, which results in a tasty snack, side dish, or topping for sandwiches.
Why this Guide Works
This simple process of preserving just about any type of vegetable is a quick one that results in a super satisfying snack or side that can also be used as a sandwich topper. Bring it to your next backyard barbecue, potluck, or just top your pulled pork sandwiches or weeknight Sloppy Joes with some.
There are many vegetable and flavor options you can mix to create your own favorite combination. Pickling brings a new flavor to any vegetable or fruit (yes, fruit!). Using spices and herbs, as well as different kinds of vinegar you can create any variety you like.
This method extends the shelf-life of your vegetables or fruit so they last for about 2 to 3 weeks in the refrigerator. There’s also no canning involved. Once you prepare your vegetables you can put them directly in the fridge.
What is Quick Pickling?
The process of quick pickling is used to slightly preserve vegetables in a brine or vinegar base, which then alters the taste and texture creating a tangy finish. This version won’t have that rich flavor that fermenting creates, but they’re ready to eat in a matter of days and don’t require canning. Pickling involves a simple brine and then marinating, which is then stored in the refrigerator.
A stronger base or brine is needed for canning on the other hand as well as a hot liquid, which is then placed into sterilized jars and placed in a water bath canner for processing. The canning method extends the shelf-life significantly but is a bit more involved.
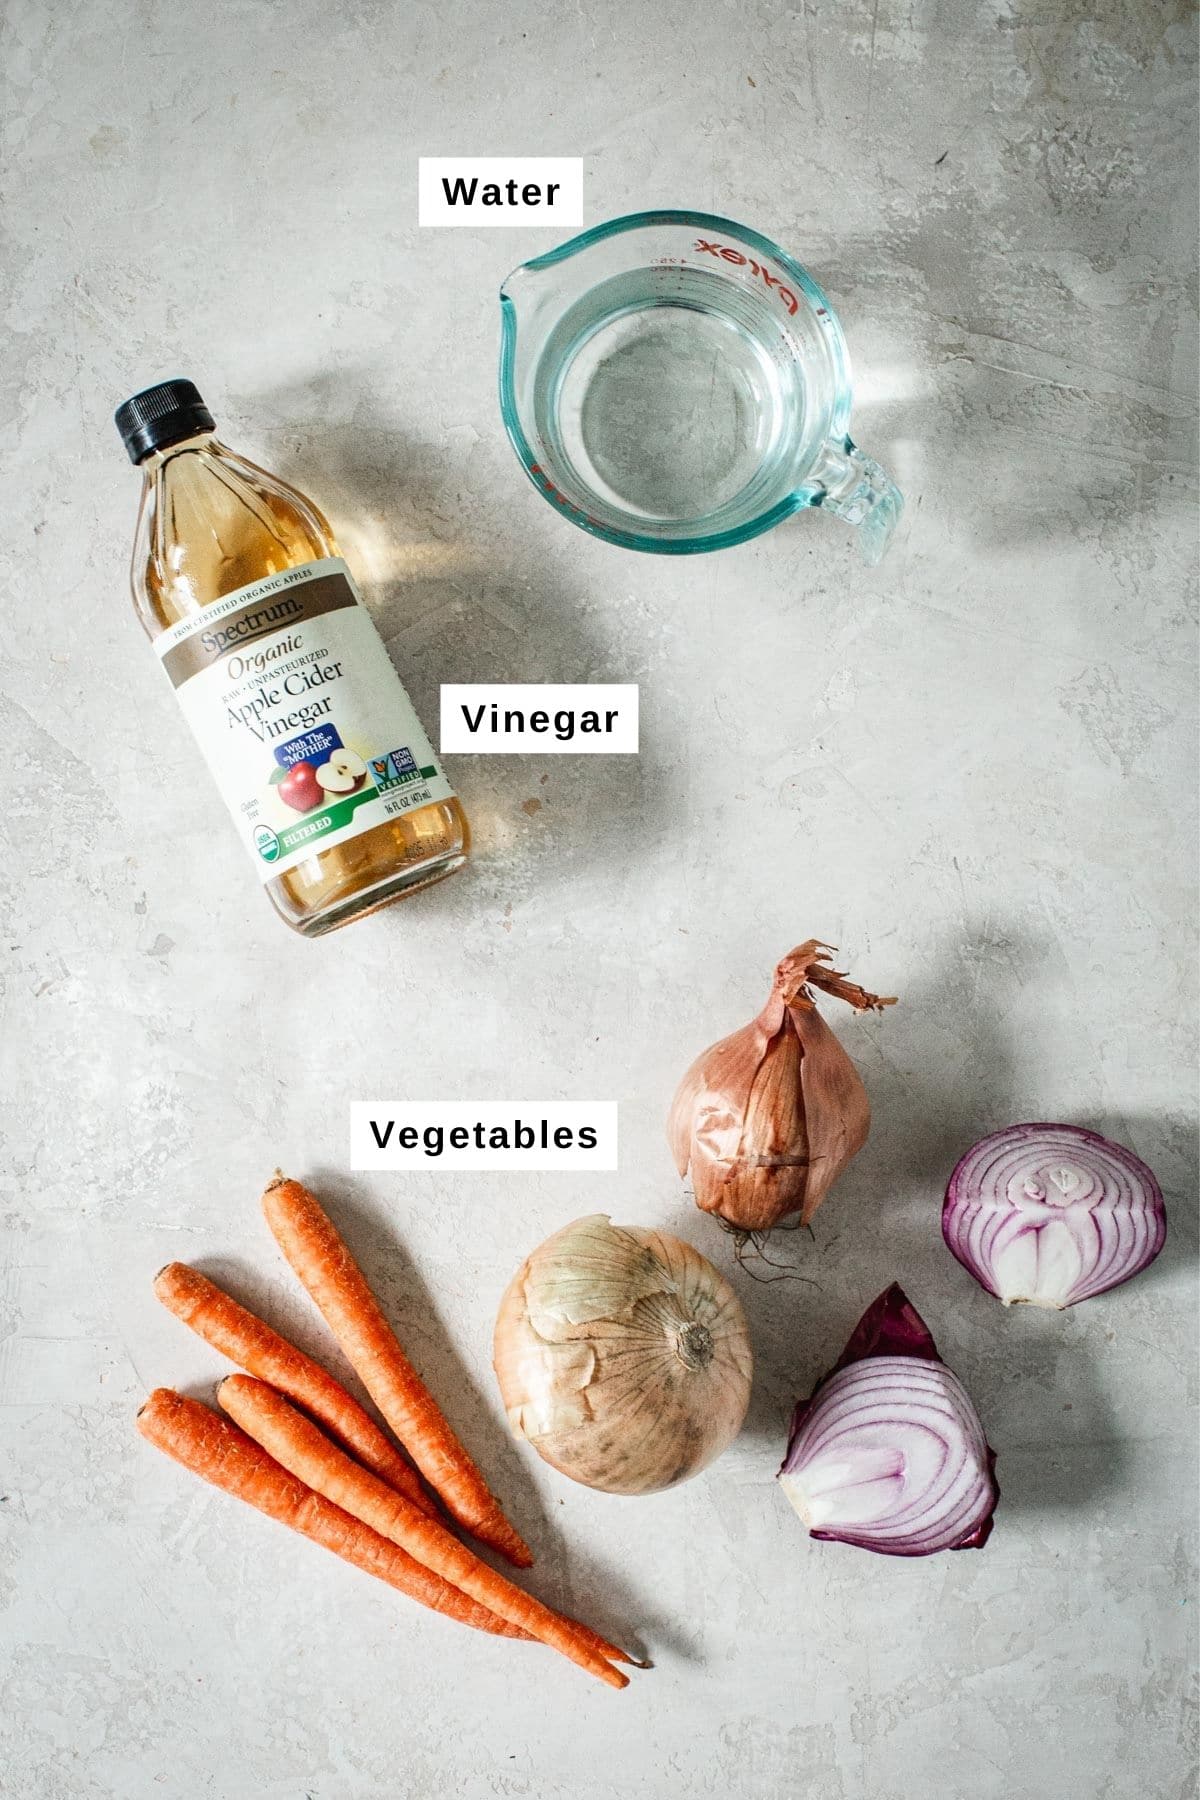
Ingredients You’ll Need
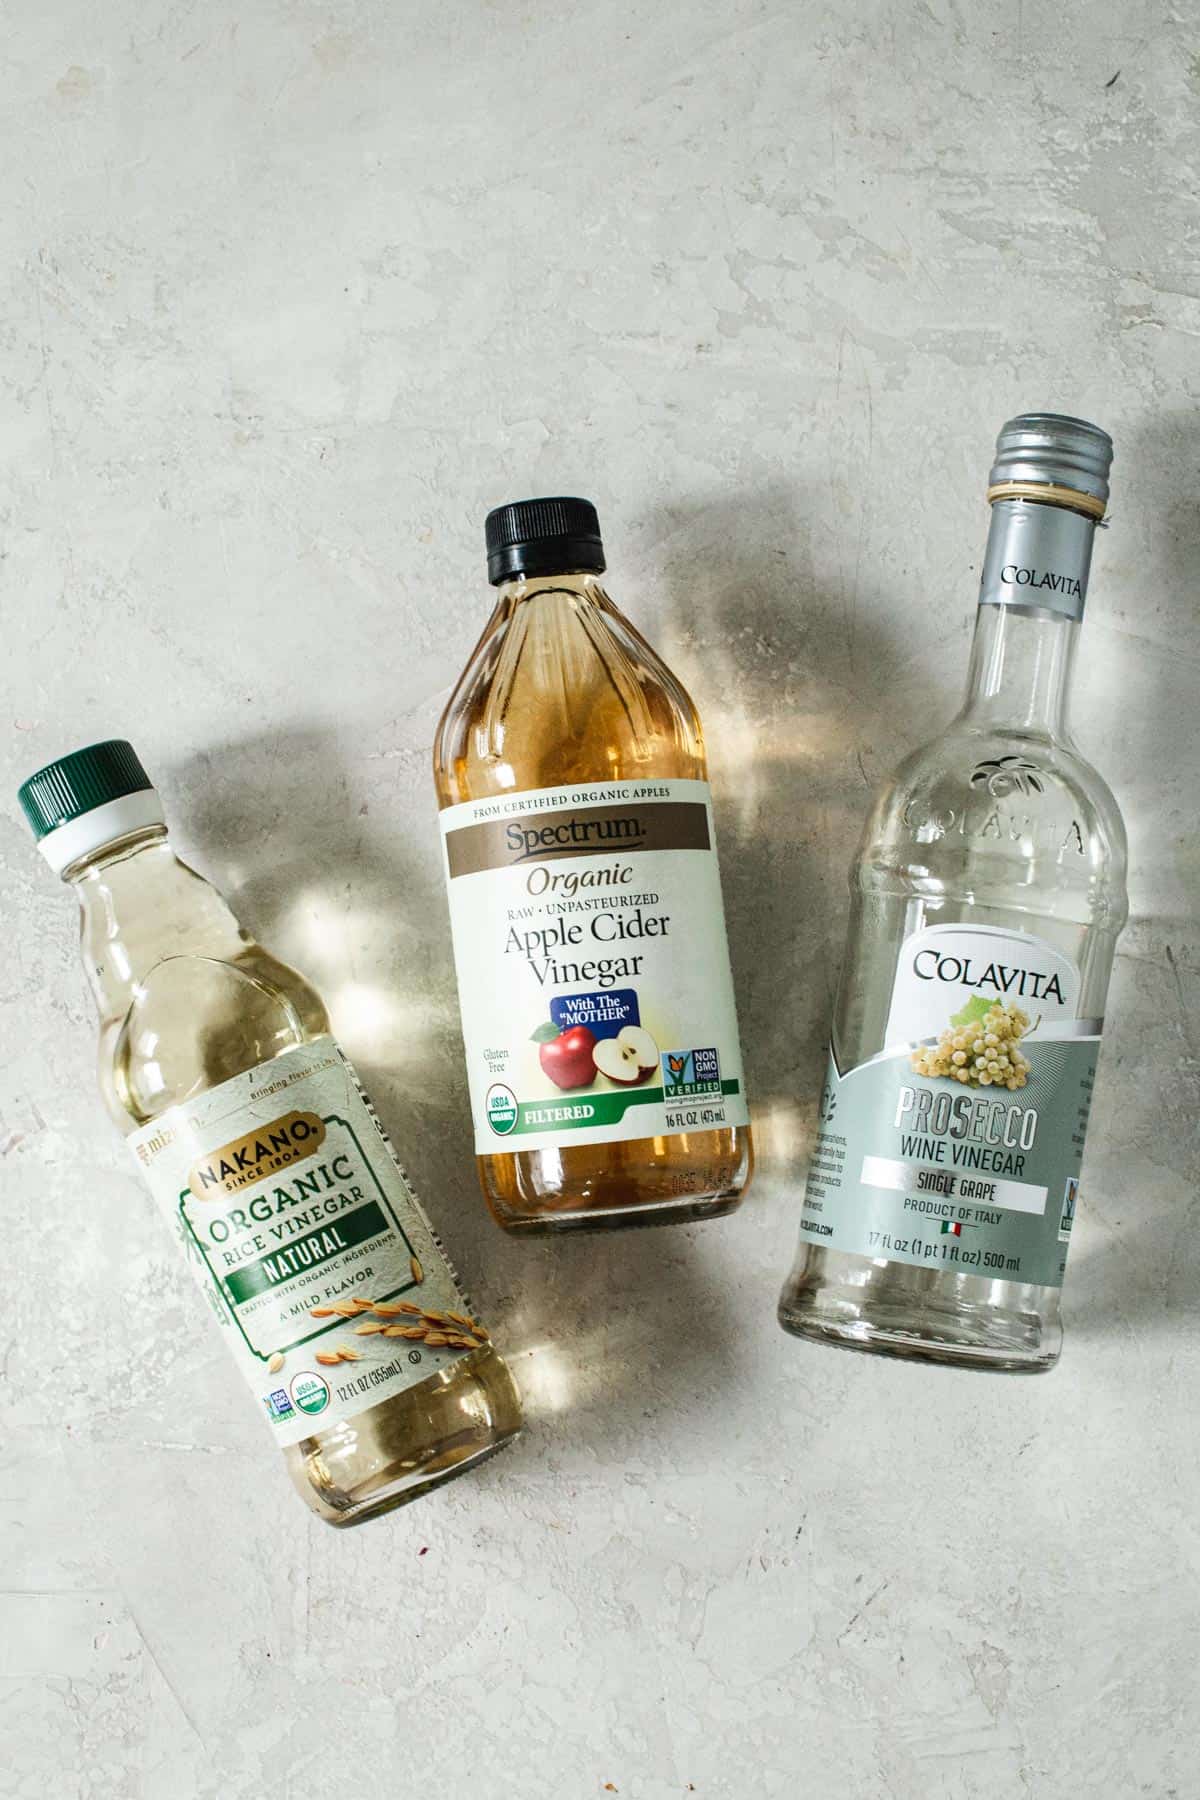
To create a basic brine for pickling you’ll want to use equal parts vinegar and water. Depending on your flavor preferences you can play around with the ratio too. Any vinegar will work as long as it’s not a concentrated version such as balsamic or malt vinegar. My favorite to use is apple cider vinegar.
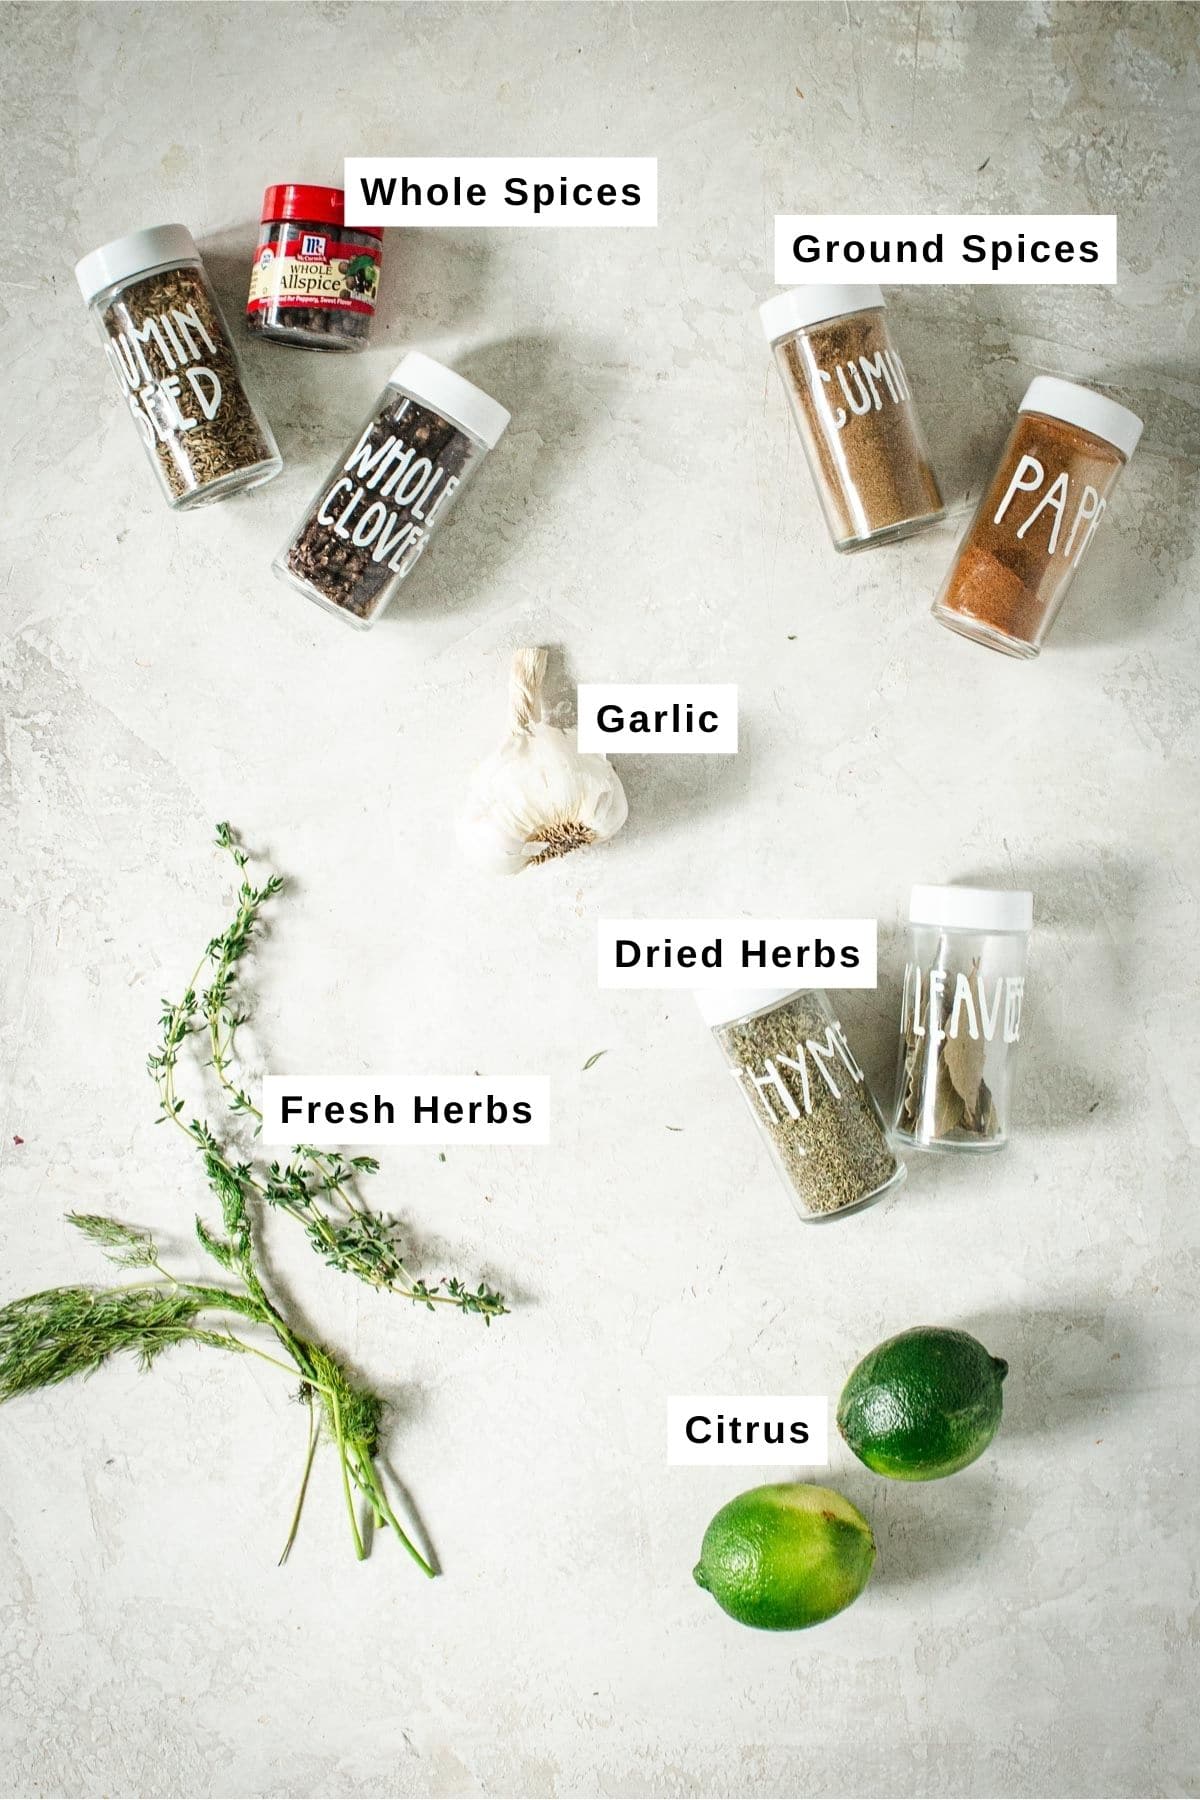
Flavoring Options
You can create your own flavor by combining any of the spices listed below or you can go with a classic pairing. Create some dilly beans by mixing garlic, red pepper flakes, mustard seeds, and dill sprigs. Pickled cherry tomatoes seasoned with black peppercorns and garlic are a flavor explosion. The combinations are endless.
- Whole Spices: coriander, celery seed, mustard seed, peppercorns, cloves, and red pepper flakes.
- Ground Spices: cumin, smoked paprika, turmeric, and salt mix well with vegetables.
- Garlic: I recommend fresh whole cloves or sliced cloves, but you can also use minced as well.
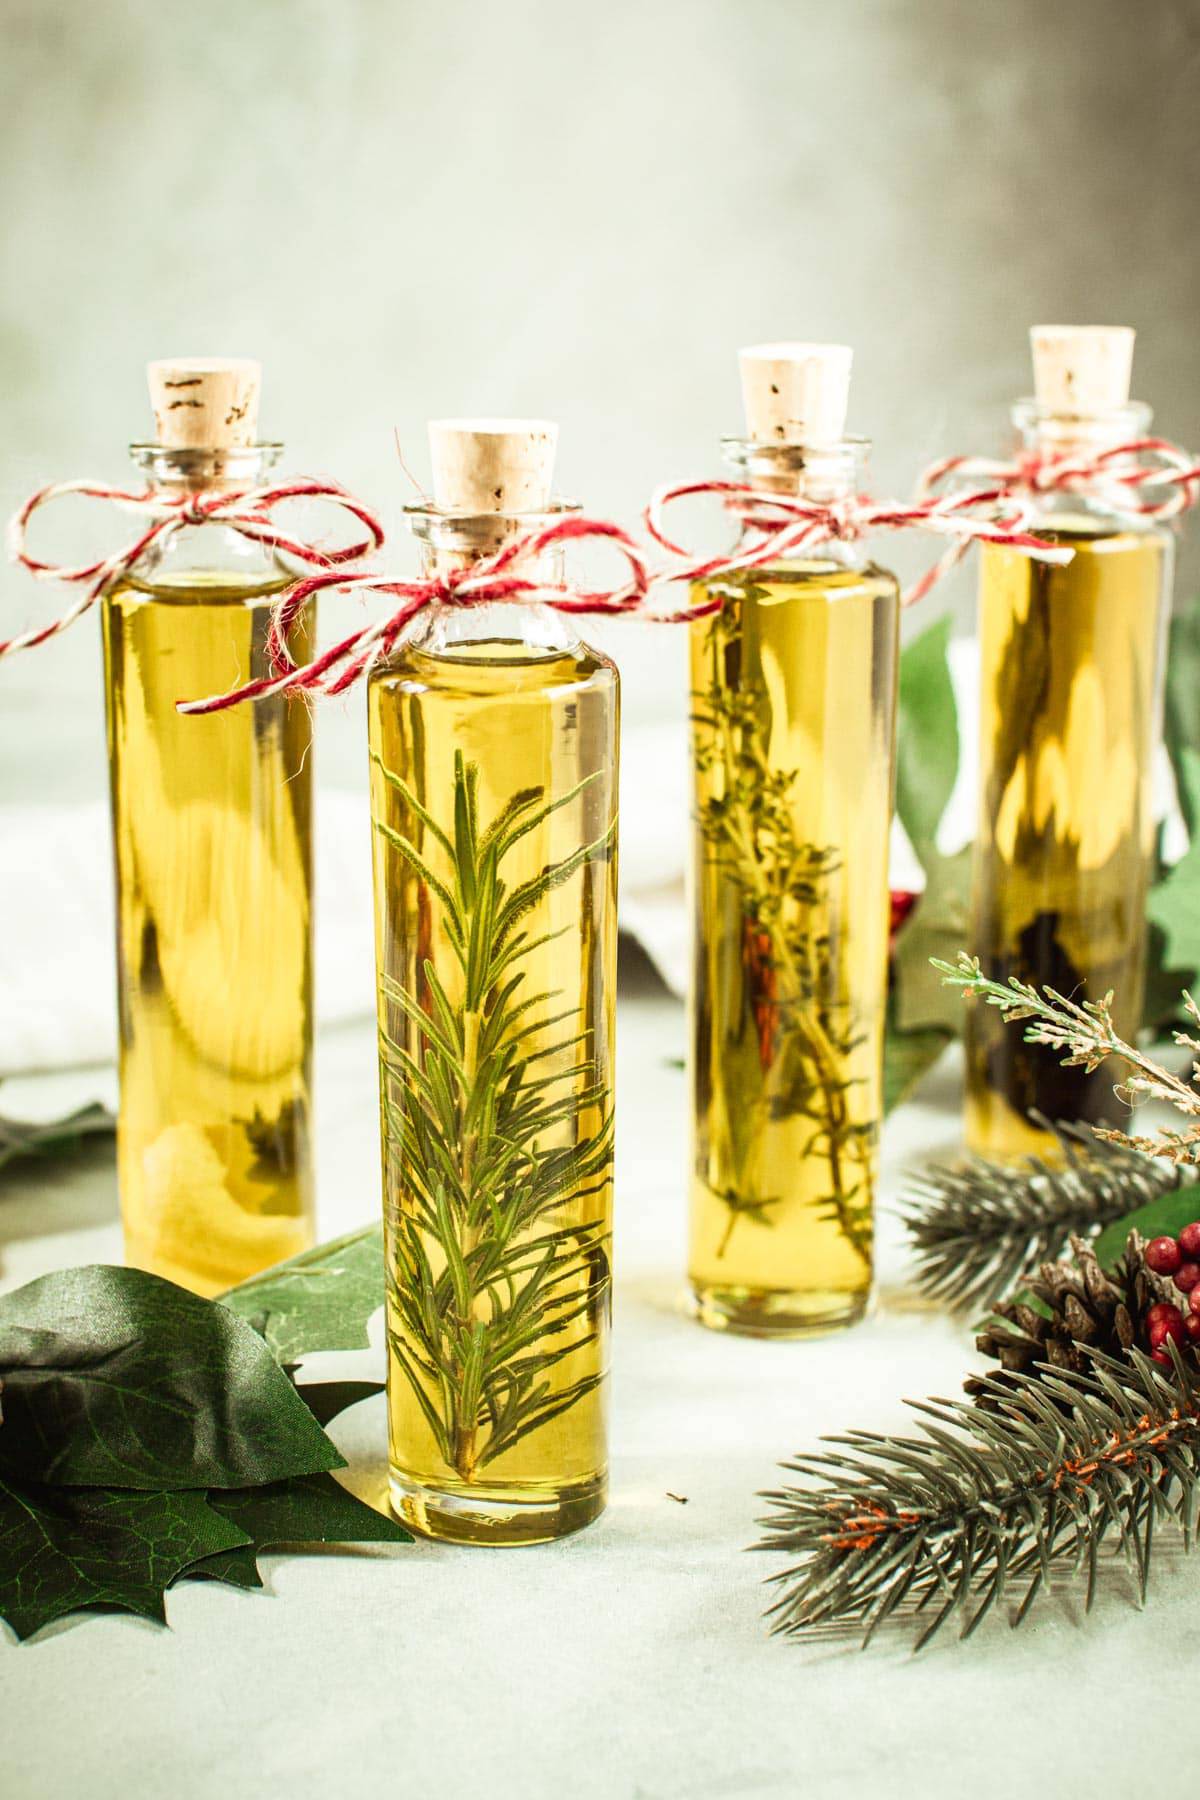
- Fresh Herbs: rosemary, dill, and thyme work best and look beautiful in the jar.
- Citrus: try adding some citrus peel to the mixture such as lemon or orange.
- Dried Herbs: dill, thyme, and majoram are the best options.
- Ginger: add some fresh peeled ginger.
Which Salt to Use
If you plan on adding salt to your pickling brine then here are a few guidelines for choosing one that will work best.
- Pickling Salt: perfect for pickling as it’s name states this finely textured salt dissolves quickly in brines and is free of additives and anti-caking agents, which can cause cloudiness in colored foods.
- Sea Salt: this natural salt is also free of additives and comes and many grain sized. Choose a smaller grain size so it dissolves easier in the brine.
- Kosher Salt: this salt version can be used, but check the label to ensure there are no additives and that it contains pure salt only.
- Table Salt: while it will work for pickling I don’t recommend using table salt since it is refined it often creates a cloudy brine and disscoloration of the vegetables.
Best Vinegar for Pickling Vegetables
You can use white vinegar, apple cider vinegar, white wine, and even rice vinegar to make quick pickled vegetables. They can also be combined. Avoid using aged or malt vinegar, and concentrated vinegar such as balsamic vinegar.
Step-by-Step Instructions
This quick guide to pickling is easy and has only 4 steps from start to finish. It’s not entirely necessary to chill the jars for 48 hours, but to get the best flavor it’s highly recommended.
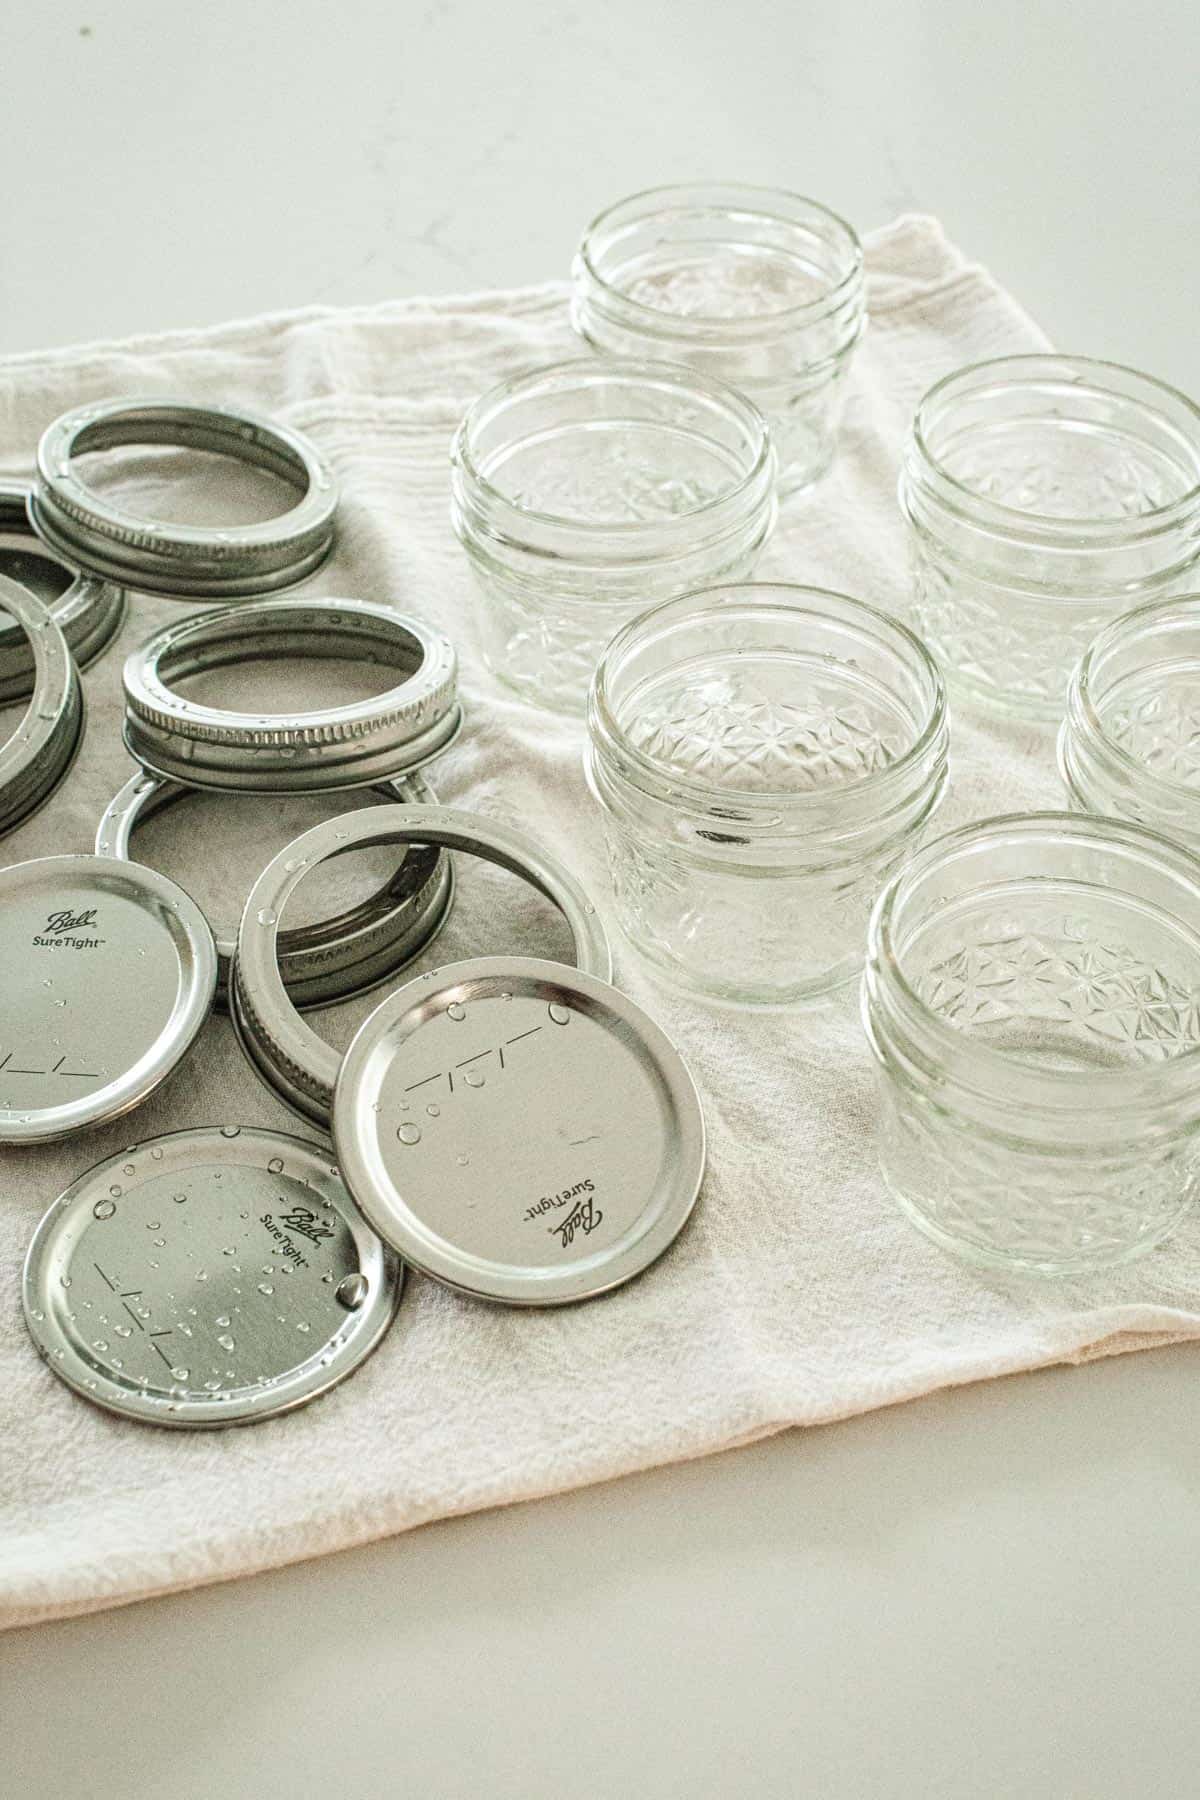
Step 1: Wash the Jars
Wash each jar, lid, and band in warm soapy water, making sure to rinse them thoroughly before placing the mixture in them.
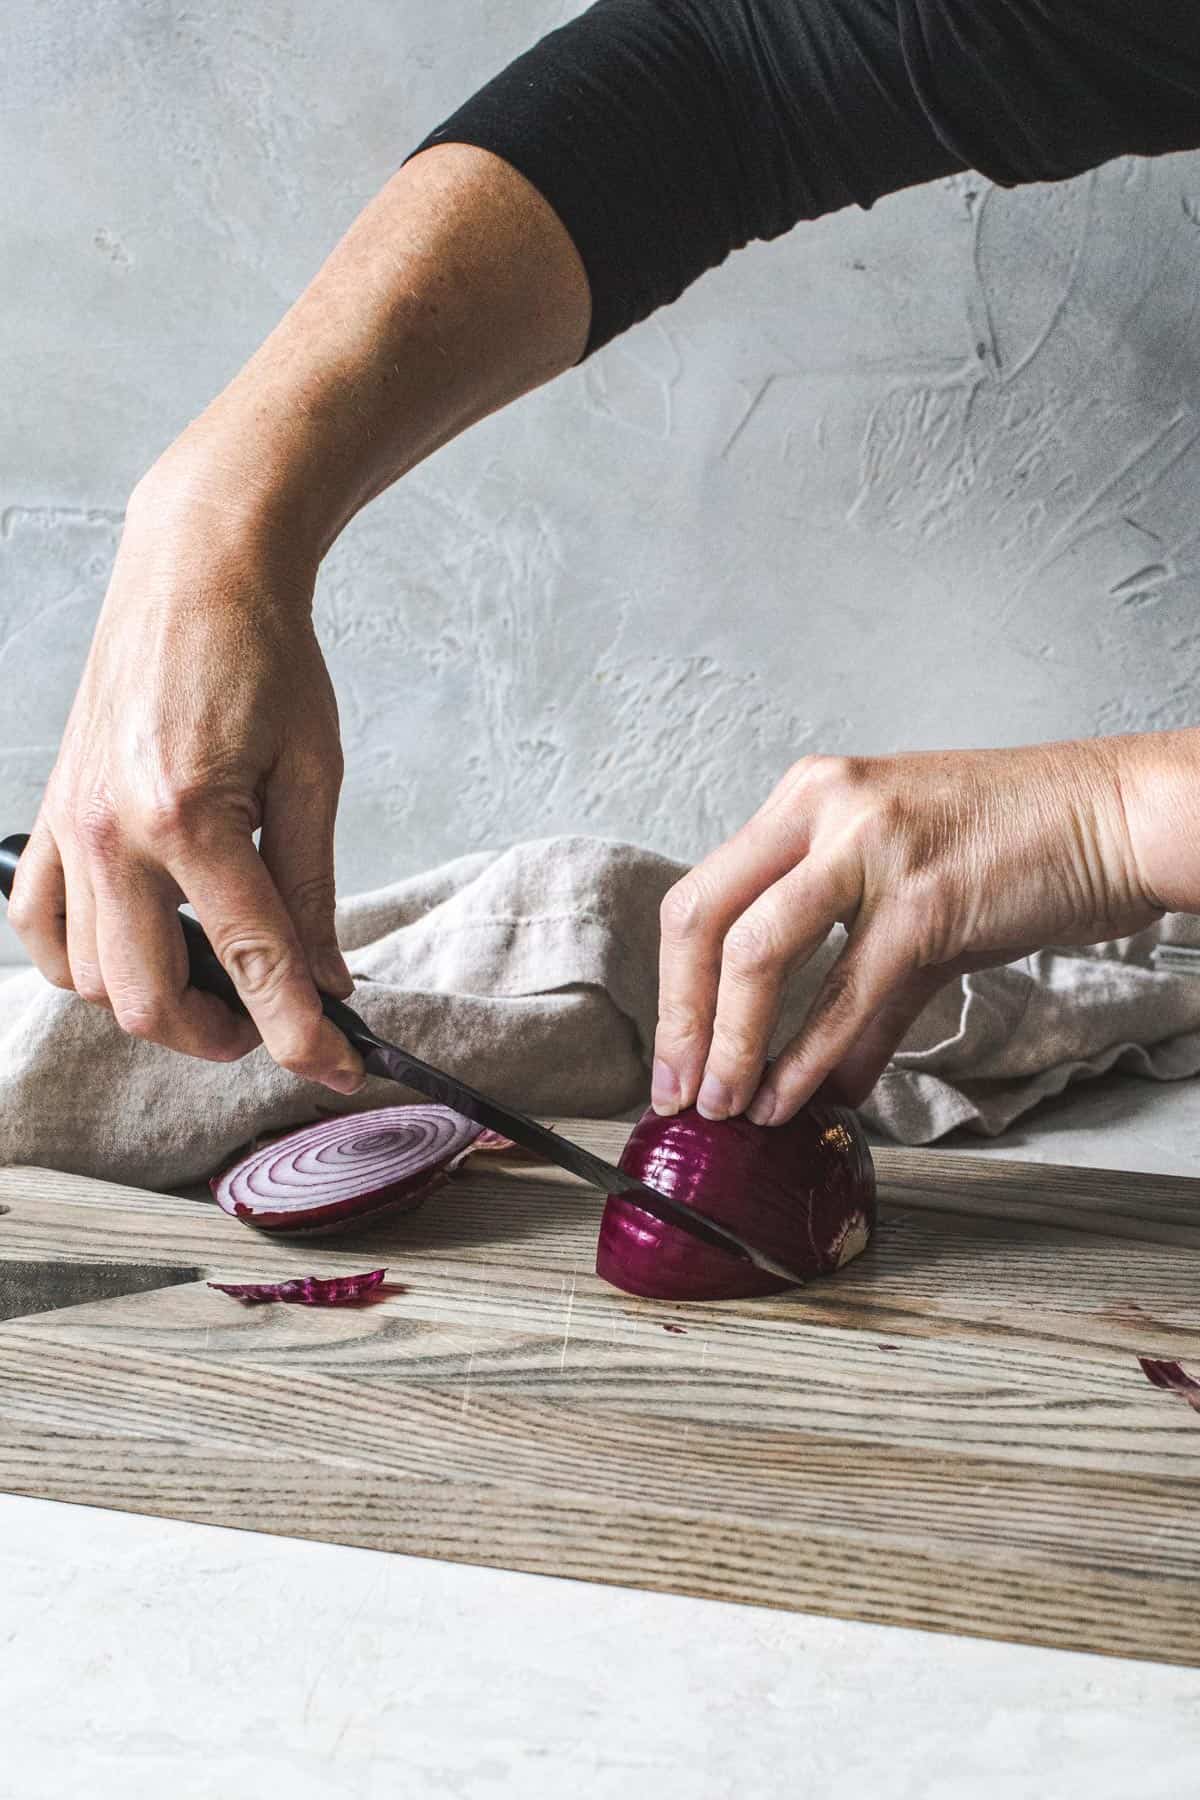
Step 2: Prep the Vegetables
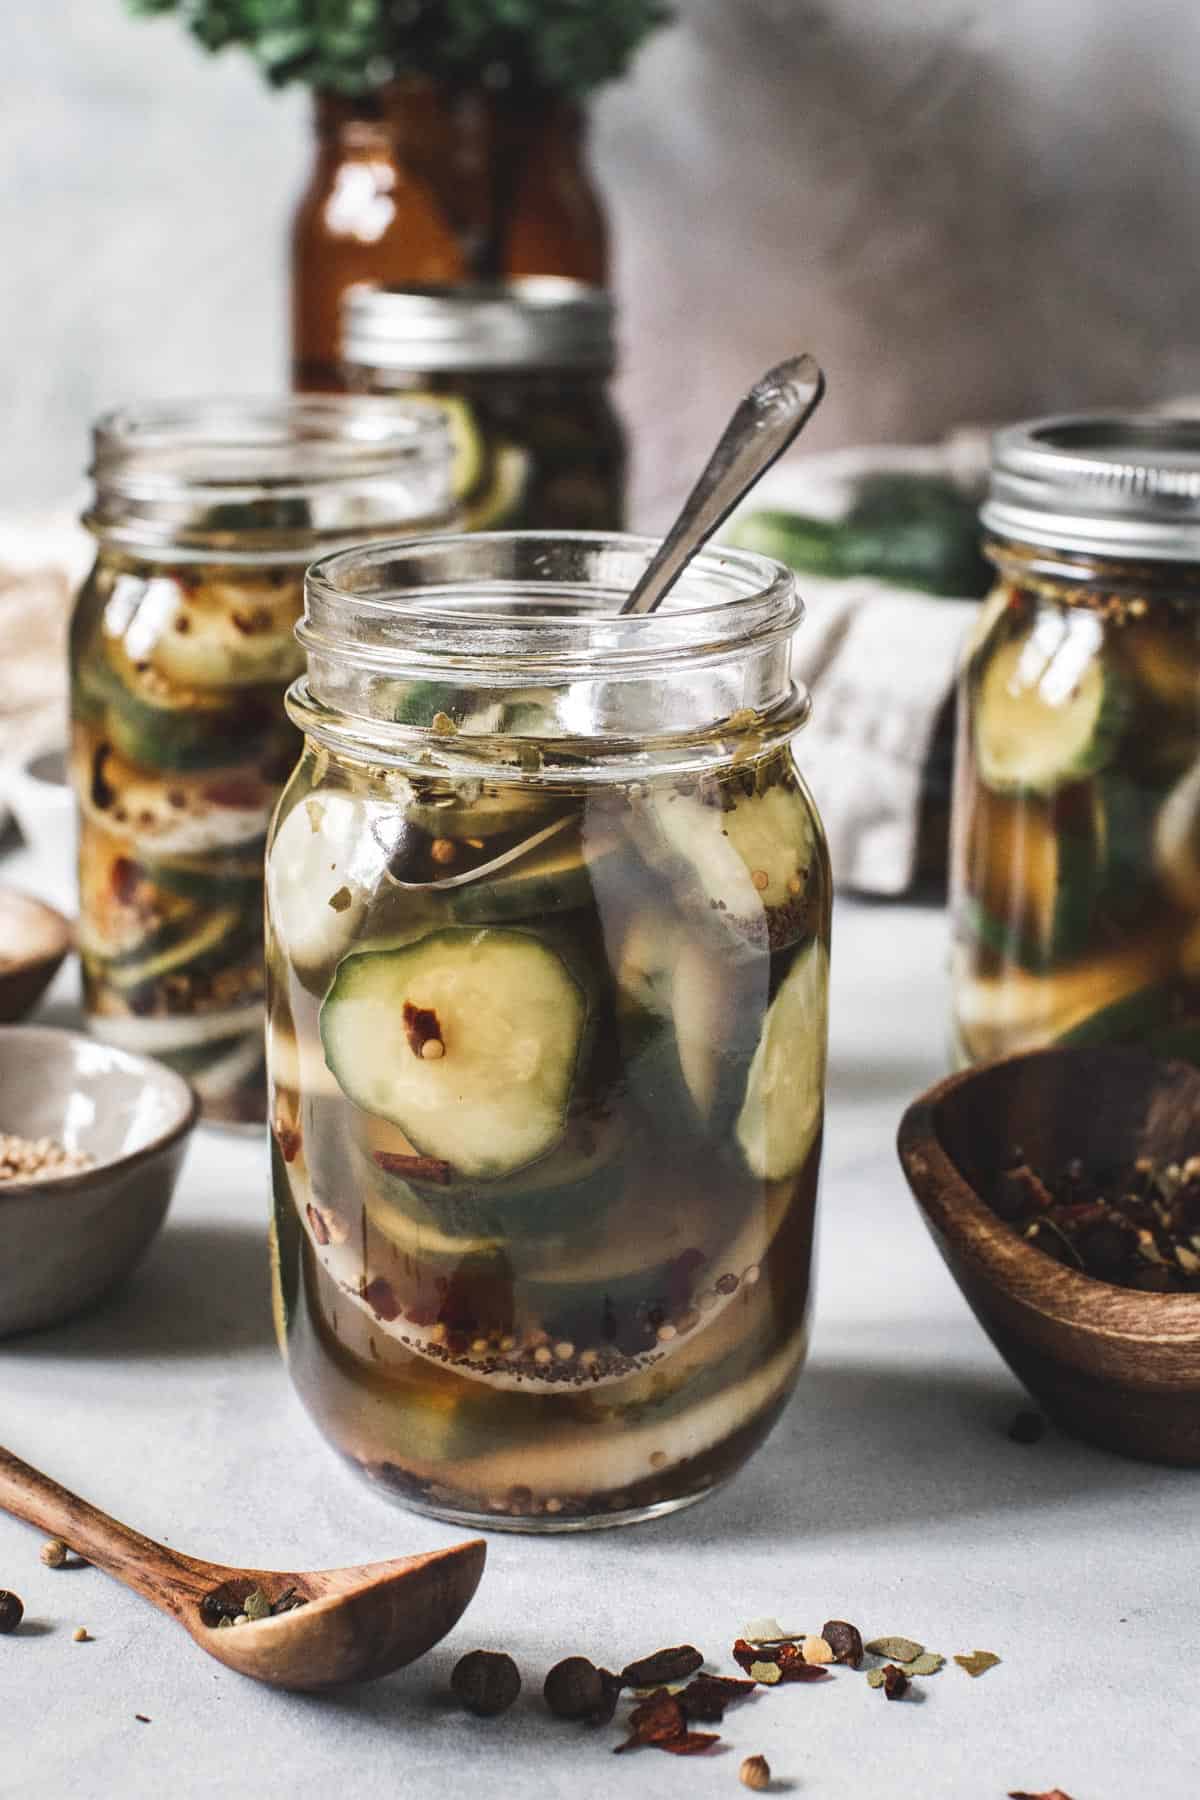
Check your jars to confirm the vegetables will fit and then you can prep them however you like. To ensure the vegetables absorb the most brine, and thus the most flavor, cutting them into pieces often works best.
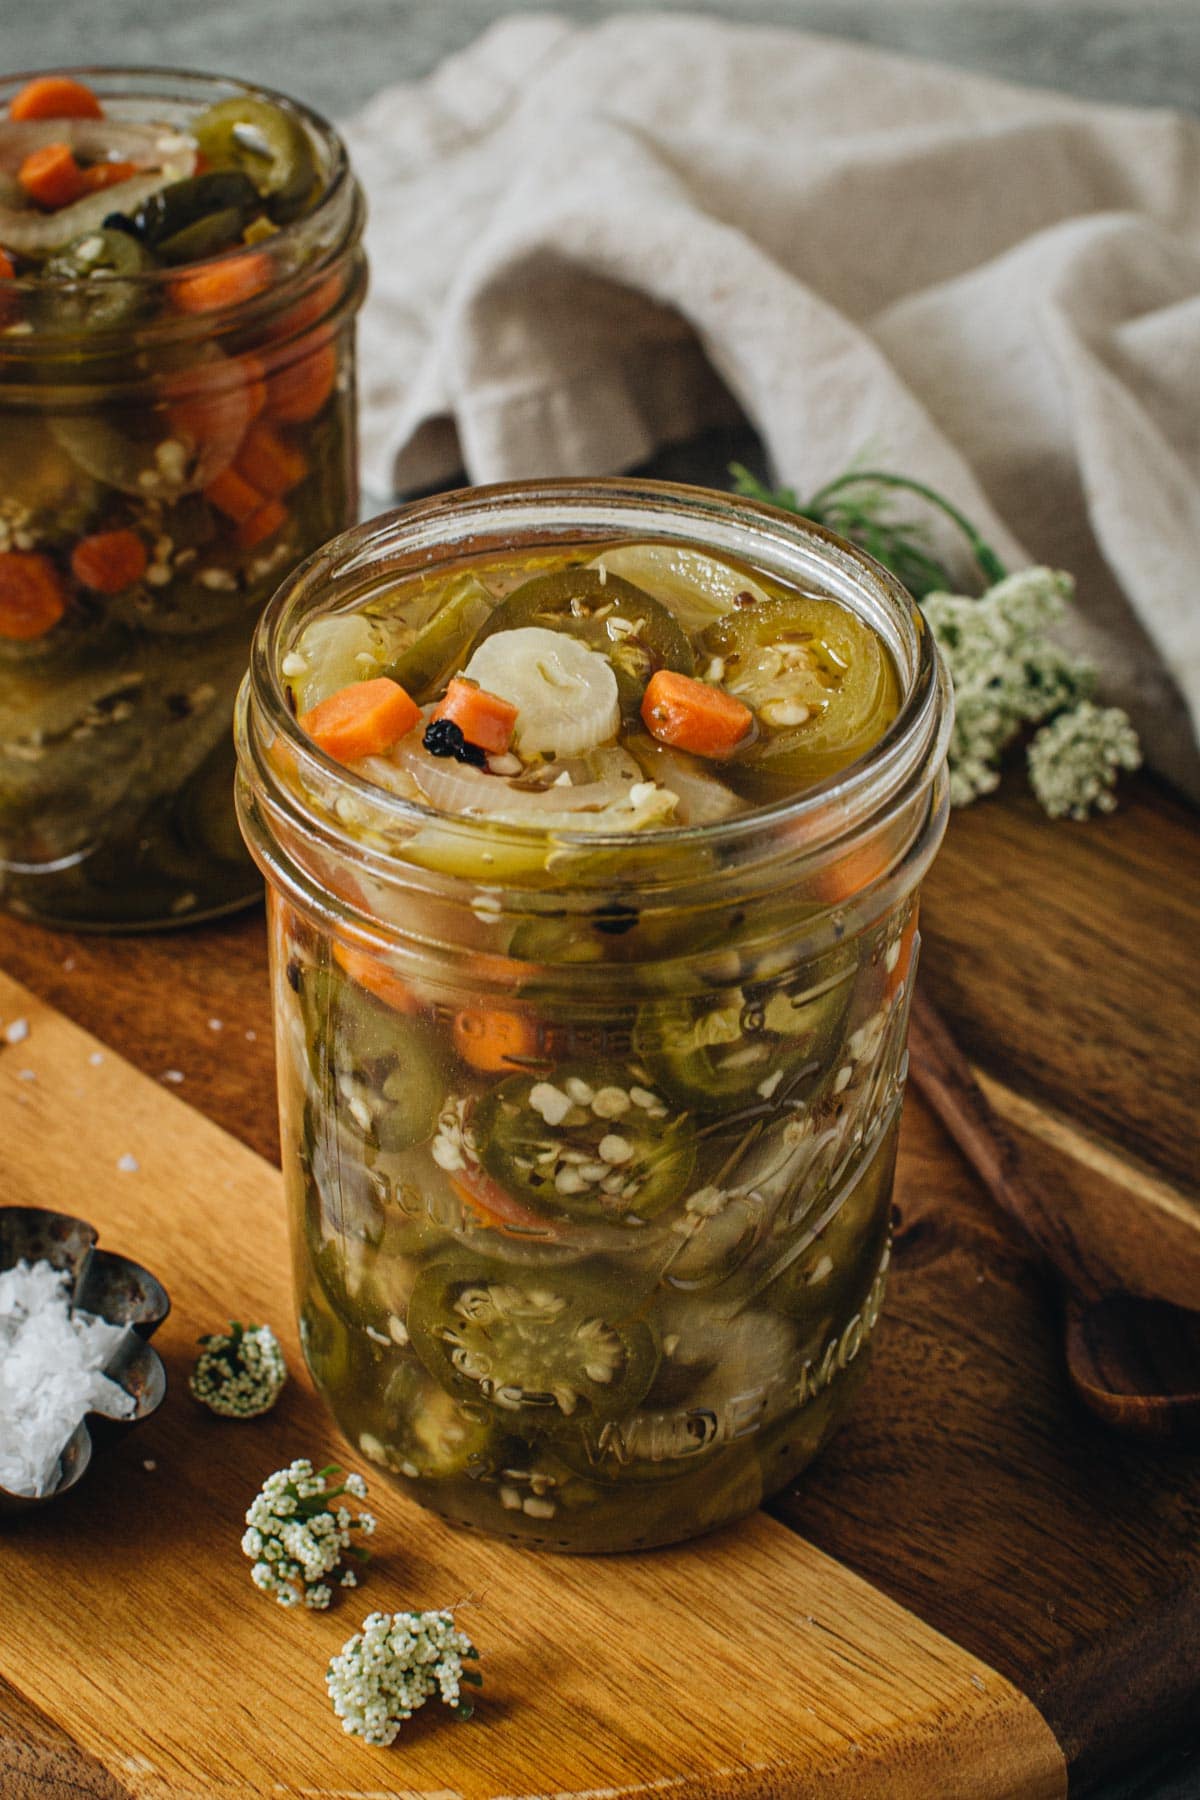
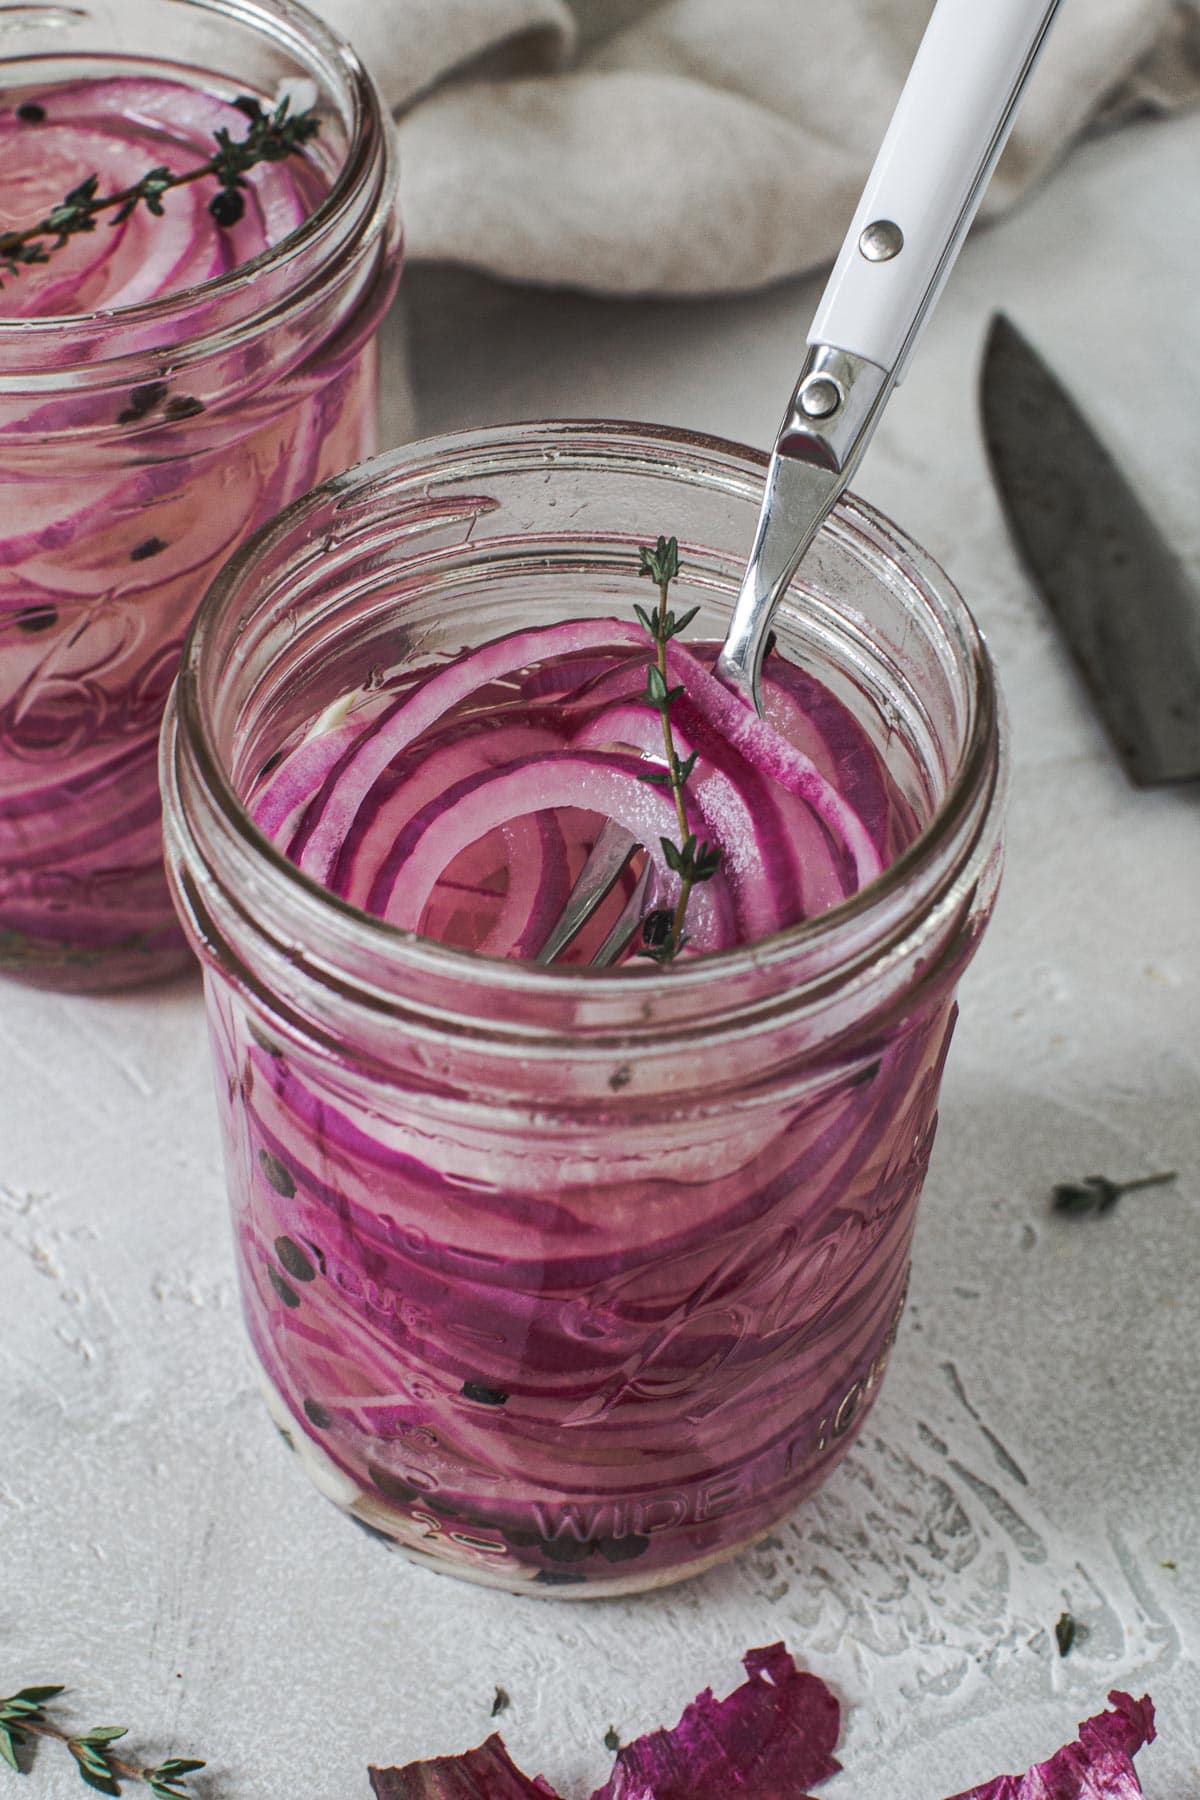
Onions are always best sliced into crescent shape or half-moon shape, carrots can be sliced or cut into matchsticks, green beans and cukes need the edges trimmed. Cukes are also best if quartered. Cauliflower should be crumbled into smaller florets. Cherry tomatoes though can be left whole.
Consider how you plan on using the vegetable. Is it going to be a topping or slaw for sandwiches or a side like a pickle? Then you can cut or slice it accordingly.
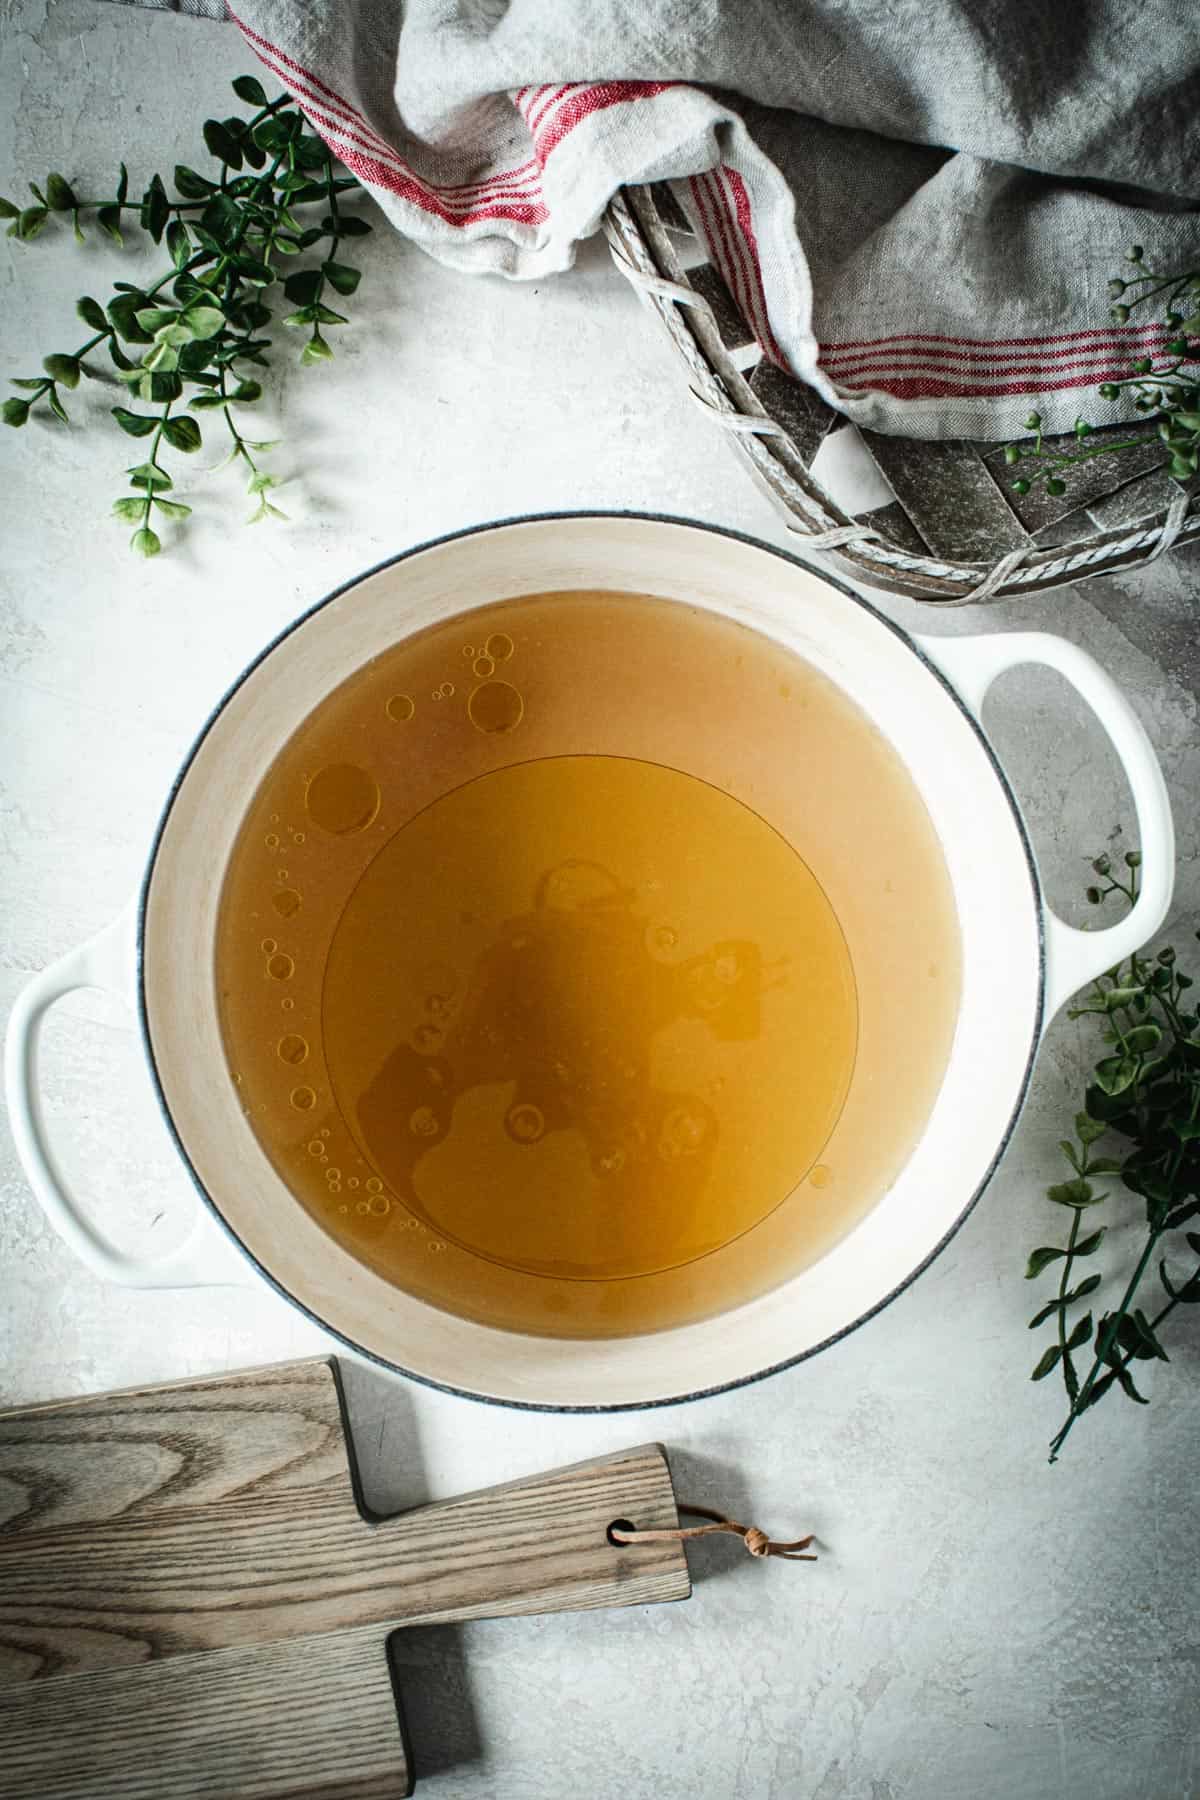
Step 3: Prepare the Brine
The most basic brine is comprised of vinegar, water, salt, spices, and sugar. Place these ingredients into a large pot and bring to a boil, stirring occasionally until the sugar and salt have dissolved.
Step 4: Arrange the Jar
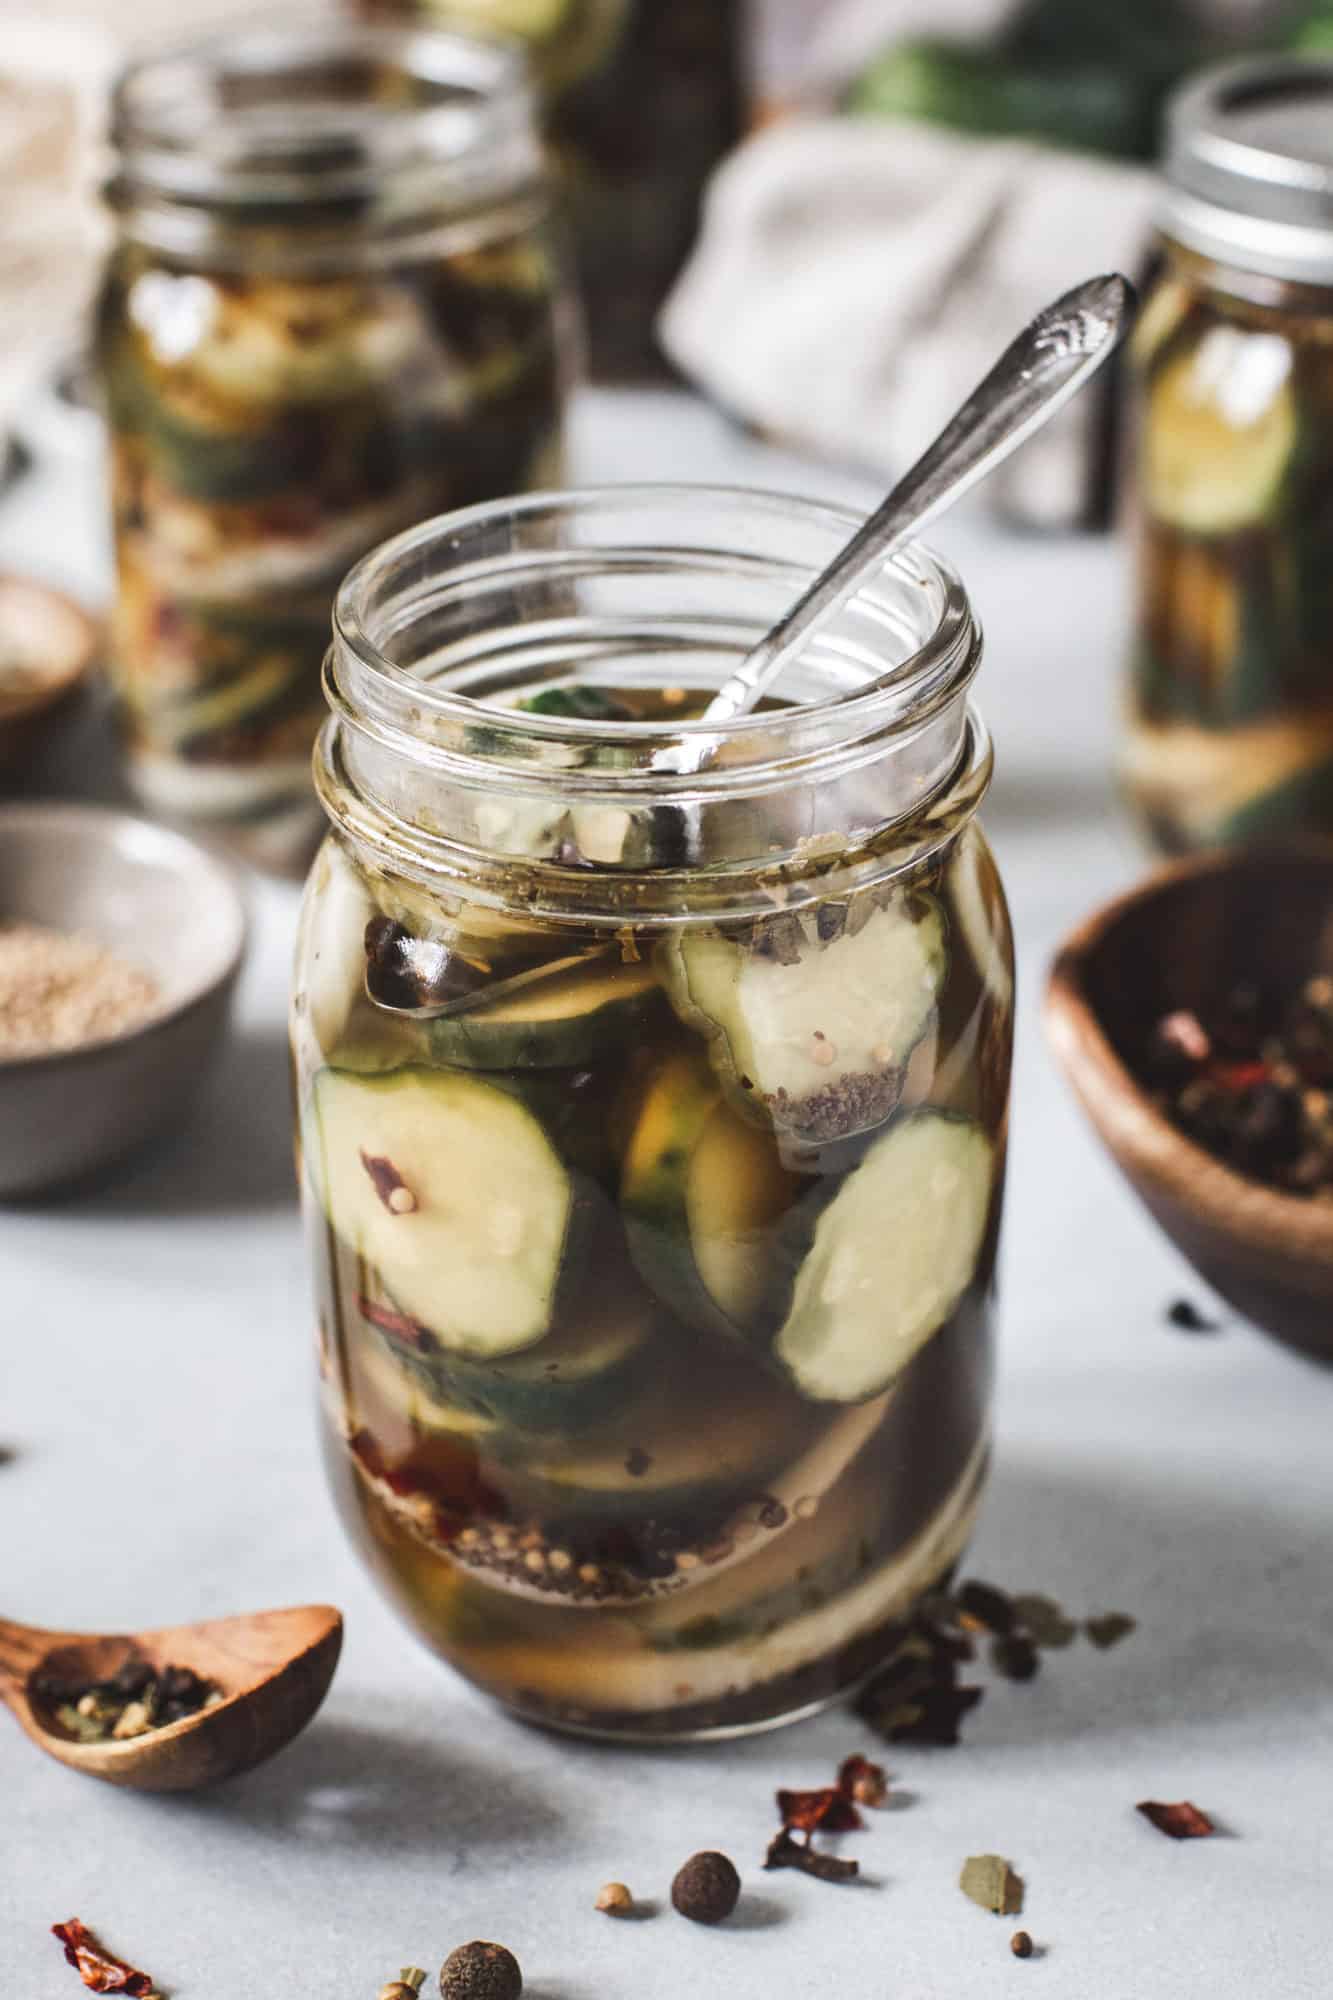
Place your prepared vegetables into the desired jars making sure to leave 1/2-inch of headspace. Put a funnel on top of the jar and ladle the hot brine into each jar again leaving 1/2-inch headspace. Sit the lid on top and screw on the band.
Step 5: Refrigerate
Let the jars cool to room temperature before placing them in the fridge to chill. Ideally, wait 48 hours before opening the jars to consume. This will ensure the best flavor.
Helpful Equipment
- Canning Jars with Lids: in order to prepare any pickling recipe you will need canning jars and lids. Most of these recipes in this post will make 2 pint jars worth of vegetables, however, you can place them in whatever size jar you prefer.
- Canning Funnel: this funnel has a wide mouth that fits all sizes of canning jars and it makes transfering the brine into the jars easy with little mess.
- Ladle: a simple ladle helps you scoop up the brine and spices easily.
- Large (Non-reactive) Heavy Pot: A non-reactive pot is heavy and made of material such as stainless-steel, enamel, or nonstick. Other types of pots, such as alluminum, may react with the acidity of the ingredients in some of the recipes, which can produce and off-flavor in the completed recipe. A heavy pot is also one that feels heavy when holding it and has a thicker bottom. This type of pot will help prevent buring the ingredients too. For making the brine I like to use a large Dutch oven from Le Crueset.
Recipes to Try
To make each of these recipes place the vegetable or fruit in your desired cleaned jars and then prepare the brine by heating the liquids along with the spices in a pot. Once the brine boils use a ladle and funnel to pour the mixture into the jars. Seal with a lid and band and store in the fridge. Each of the recipes below makes about 2 pints.
- Green Beans: Also known as “dilly beans” are a popular quick pickling recipe. You will need 1 lb green beans, trimmed, 2 garlic cloves, a 1/2 teaspoon of red pepper flakes, 1/2 teaspoon of yellow mustard seeds, 2 fresh dill sprigs, 1 cup distilled white vinegar, 1 cup hot water, 2 teaspoons pickling salt (or 1 tablespoon kosher salt).
- Beets: To make pickled beets you will need 1 cup hot water, 2 teaspoons pickling salt (or non-iodized salt), 1 cup apple cider vinegar, 2 beets diced or quartered, 1 teaspoon of sugar, 1 sprig of rosemary, and 2 crushed glaric cloves.
- Cabbage: To make pickled cabbage, which is a great sandwich topper, you will need 1/4 a head of red cabbage, finely shredded, 3/4 cup of shredded carrots, 1/2 a yellow onion, cut into wedges, 2 garlic cloves, sliced, 1 1/2 cups of cider vinegar, 3/4 cup of packed brown sugar, 2 teaspoons of celery seeds, 2 teaspoons of kosher salt.
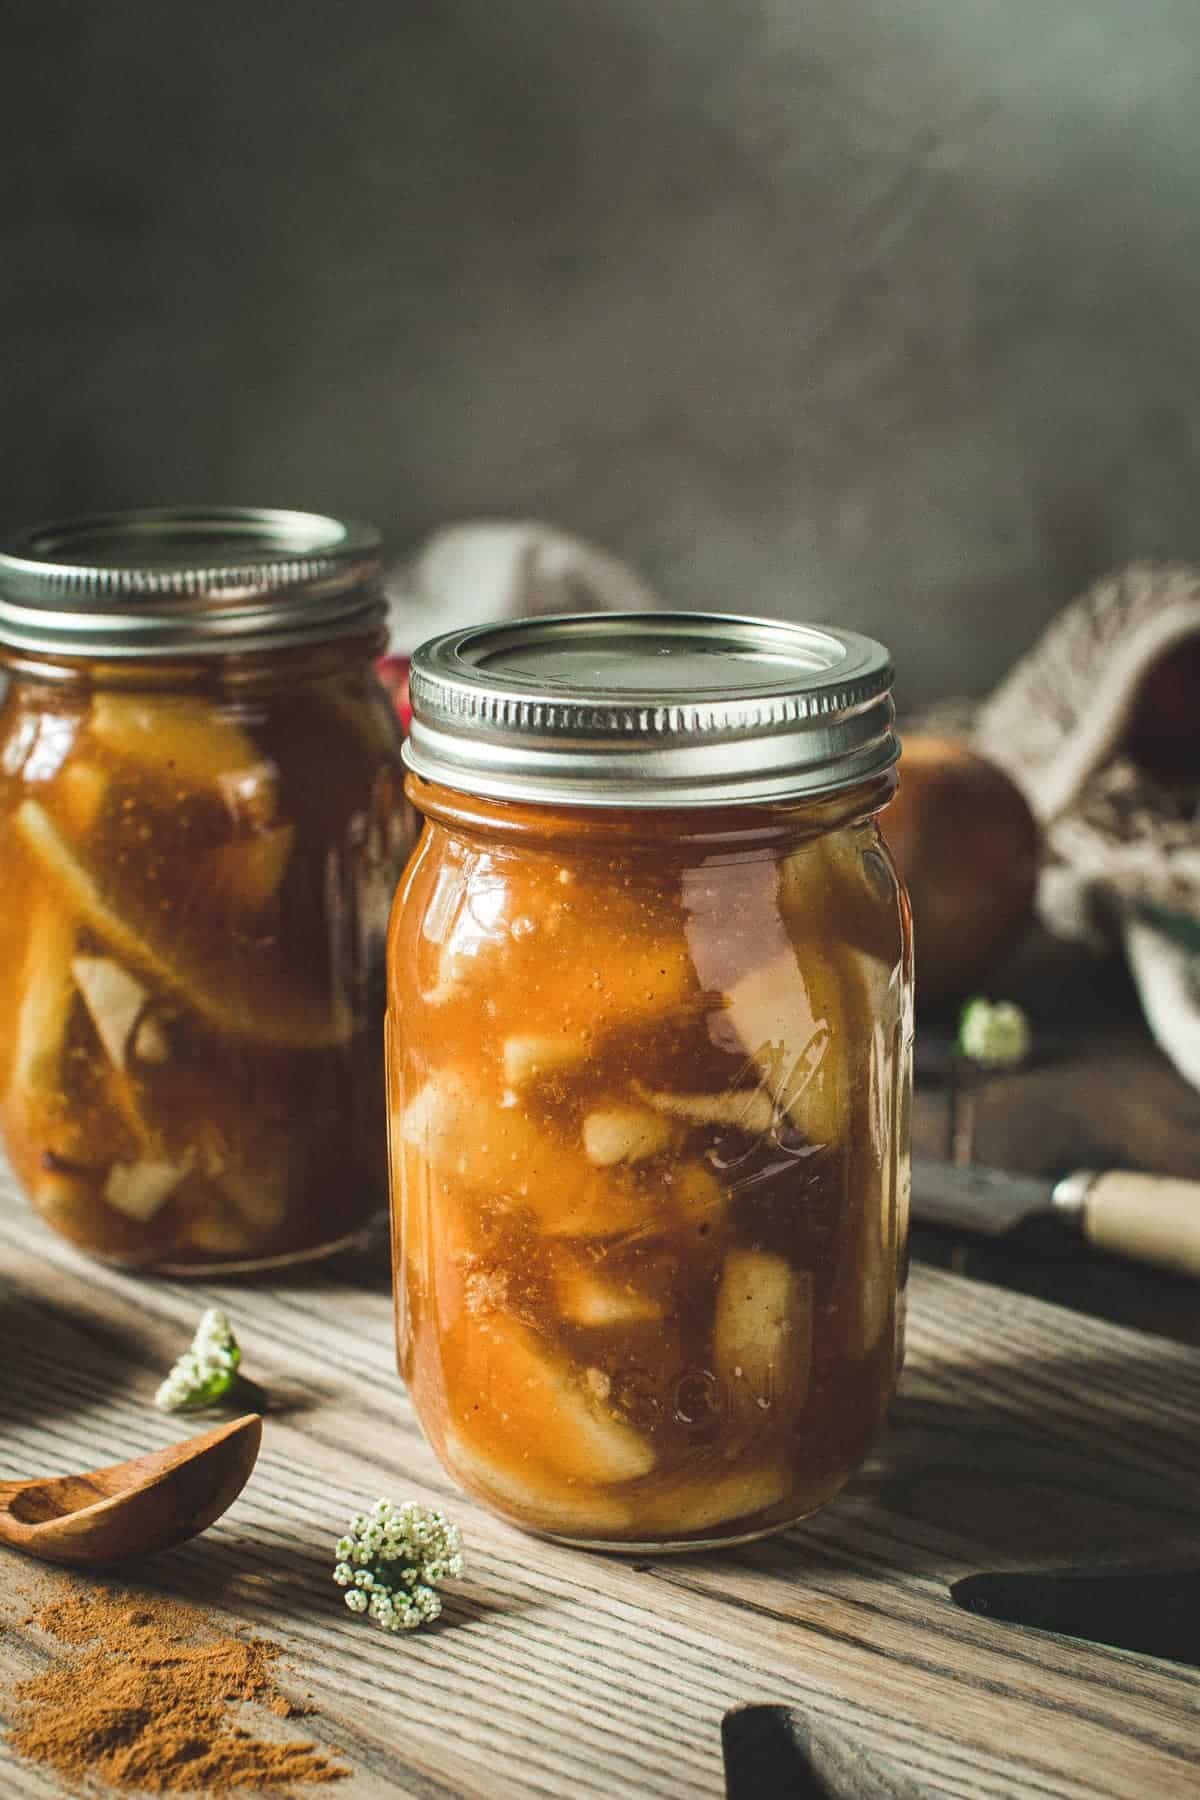
- Grapes: It may sound bizarre, but these are surprisingly delicious. You’ll need 1 cup of hot water, 1/2 a cup of sugar, 1 cup of apple cider vinegar, 2 inches of peeled ginger, sliced thin, 1 tablespoons coriander seeds, 1 teaspoon whole black peppercorns, 2 cinnamon sticks, 1 bay leaf, and 2 to 3 cups of seedless red grapes.
The most popular of all pickling recipes are Refrigerator Pickles, which are equally easy to prepare and delicious. You can also try some of my recipe combinations, which are listed out below.
- Quick Pickled Okra
- Quick Pickled Red Onions
- Pickled Jalapenos and Carrots
- Pickled Three Bean Salad (which has the option for canning)
Recipe Notes and Expert Tips
- Keep the amount of sugar low unless specified by the recipe, because the brine will end up more syrupy than salty and it won’t taste good.
- You can use any combination of spices, fresh herbs, and dried herbs. If you don’t like a particular herb or spice leave it out or replace it with something else you love.
- Quick pickling is just that, it’s quick and is stored in your fridge, but these recipes have not been tested for canning. For long-term storage and canning, I suggest following the guidelines of the USDA Guide to Home Canning.
- Even though you’re not using the canning process, canning tools such as a funnel and spatula are still helpful in preparing this recipe.
Frequently Asked Questions
You can pickle practically any vegetable or a combination of vegetables, but some of the most popular are cukes, carrots, okra, jalapenos, and onions. Also try some beets, cabbage, brussels sprouts, cherry tomatoes, radishes, cauliflower, broccoli, squash, or asparagus.
Make sure to use super fresh, firm, and smaller vegetables. Prepare the brine and jar them immediately after you’ve prepped them. Sometimes vegetables like pickles will end up being on the softer side no matter what you try.
Keep your jars stored in the fridge for up to 3 weeks. If you plan on giving away any jars place a label on them with the date they were pickled.
Don’t worry! Garlic contains an enzyme that caused it to turn shades of green or turquoise when it comes in contact with acidic ingredients. It’s completely safe to eat.
If you made any of these Quick Pickled Vegetables I want to hear all about it! Share a photo and tag me on Instagram using @AimeeMarsLiving and #AimeeMars so I can see your beautiful work. Enjoy!
Quick Pickled Vegetables
Equipment
- Canning Pint Jars with Lids
- Ladle
- Canning Funnel
- Large Pot
Ingredients
- 1 lb Fresh Vegetables such as cucumbers, carrots, green beans, etc.
- 2 tablespoons Spices such as black peppercorns, coriander seeds, or celery seeds
- 2 sprigs Fresh Herbs such as thyme or rosemary
- 2 teaspoons Dried Herbs or Spices
- 1 cup Vinegar
- 1 cup Water
- 1 tablespoon Kosher Salt
- 1 tablespoon Sugar
Instructions
Wash the Jars
- Wash each jar, lid, and band in warm soapy water, making sure to rinse them thoroughly before placing the mixture in them.
Prep the Vegetables
- Check your jars to confirm the vegetables will fit and then you can prep them however you like. To ensure the vegetables absorb the most brine, and thus the most flavor, cutting them into pieces often works best.
Prepare the Brine
- Place the vinegar, water, and any spices and flavorings into a large pot and bring to a boil, stirring occasionally for about 2 to 4 minutes.
Arrange the Jars
- Place your prepared vegetables into the desired jars making sure to leave 1/2-inch of headspace. Place a funnel on top of the jar and ladle the hot brine into each jar again leaving 1/2-inch headspace. Place the lid on top and screw on the band.
Refrigerate
- Let the jars cool to room temperature before placing them in the fridge to chill. Ideally, wait 48 hours before opening the jars to consume.
Notes
- Keep the amount of sugar low unless specified by the recipe, because the brine will end up more syrupy than salty and it won’t taste good.
- You can use any combination of spices, fresh herbs, and dried herbs. If you don’t like a particular herb or spice leave it out or replace it with something else you love.
- Quick pickling is just that, it’s quick and is stored in your fridge, but these recipes have not been tested for canning. For long-term storage and canning, I suggest following the guidelines of the USDA Guide to Home Canning.
- Even though you’re not using the canning process, canning tools such as a funnel and spatula are still helpful in preparing this recipe.